
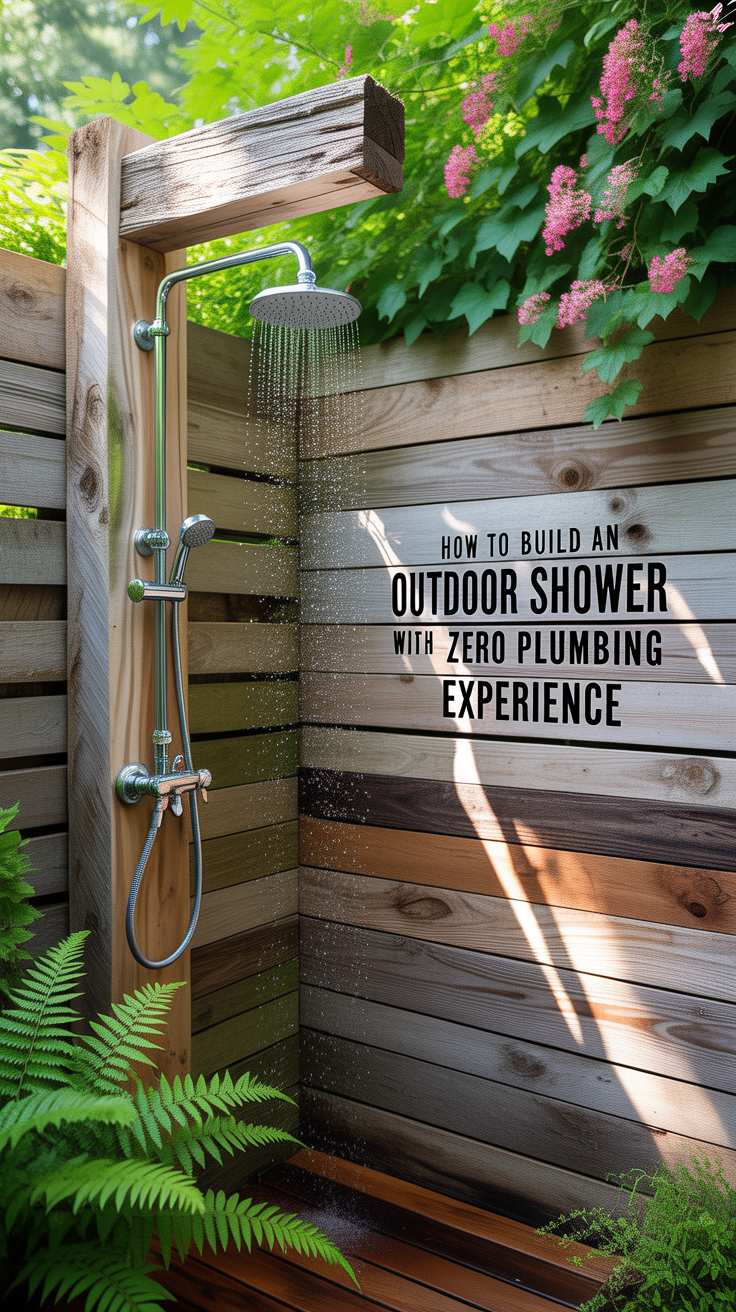
How to Build an Outdoor Shower With Zero Plumbing Experience
An outdoor shower is one of those upgrades that feels “luxury,” but it’s surprisingly achievable even if you’ve never cut a pipe or installed a valve in your life. The key is choosing a design that keeps the plumbing simple: gravity-fed, garden-hose-fed, or a self-contained solar shower—then building a sturdy, private enclosure and a safe drainage setup.
This guide walks you through how to build an outdoor shower with zero plumbing experience, including beginner-friendly options, a complete materials list, step-by-step build instructions, drainage solutions, privacy ideas, and practical tips to keep it comfortable and code-friendly. You’ll end up with a shower that’s functional, easy to maintain, and ready for everything from sandy feet to post-garden rinse-offs.
Outdoor shower design choices that require almost no plumbing
Before buying materials, decide on your simplest water source. This single choice determines how “plumber-free” the entire project stays.
Garden hose-fed shower (beginner favorite)
This is the easiest route for most homeowners:
- Water source: standard outdoor spigot
- Connection: garden hose + a simple shower fixture made for hose hookup
- Complexity: low
- Best for: seasonal showering, rinsing off after the pool, beach, gardening
You’ll build the structure (platform + frame + privacy), then attach a shower head/fixture that connects to the hose. Many professionals rely on ready-to-connect water solutions to streamline basic off-grid washing without cutting into household lines—and that’s exactly what this method does.
Gravity-fed tank shower (no pressure, no problem)
A gravity-fed system uses an elevated water container. The higher the tank, the better the pressure.
- Water source: filled by hose, rain catchment, or carried water
- Connection: short tubing run to shower head
- Complexity: low-moderate (mostly mounting the tank safely)
- Best for: off-grid cabins, campsites, emergency backup hygiene
If you’re planning more self-sufficient water storage alongside your shower, 💡 Recommended Solution: SmartWaterBox
Best for: organizing stored water for off-grid use or emergencies
Why it works:
- Helps you plan water storage more intentionally
- Supports household readiness when tap water isn’t available
- Fits a self-sufficiency approach without requiring plumbing skills
Solar shower bag or solar column (fastest build)
This is “almost no build” if you want it that way: hang a solar shower bag from a beam/tree or mount a solar shower column.
- Water source: bag/tank
- Heating: solar-warmed
- Complexity: very low
- Best for: cabins, tiny homes, minimal builds, warm climates
If you want the “real shower” feel but still avoid household plumbing, many DIYers look at purpose-built outdoor shower systems. As a practical alternative to piecing together parts, Water Freedom System is often considered by people who want a more complete solution without learning plumbing from scratch.
Site planning basics that prevent expensive redo work
Where you place the shower matters more than most first-timers expect. Good siting prevents muddy puddles, slippery walkways, privacy problems, and freeze damage.
Pick a location that’s convenient and discreet
Aim for:
- Close enough to your spigot (hose-fed builds are easiest under 25–50 ft)
- A naturally private area (fence line, behind garage, near a shed)
- A spot with sun exposure if you want warmer water or solar heating
- A firm base area that won’t become a swamp
Avoid placing it right next to your house foundation unless you have truly solid drainage. Splash and runoff can cause long-term moisture issues.
Confirm drainage strategy early
You have three beginner-friendly drainage options:
- Infiltration (French drain / gravel pit): drains into the ground
- Directed runoff: slopes away to a safe area (works best for rinse-only)
- Greywater-friendly landscape: drains to plants only if you use biodegradable soap and local rules allow it
If you’ll use soap, default to a gravel-based dry well rather than letting water run wherever it wants.
Think about seasonal factors
- Freezing climates: plan for easy winterization (disconnect hose, drain lines, removable shower head)
- Wind exposure: a windy shower is miserable—use walls and a partial roof slat panel for windbreak
- Lighting: consider a solar path light nearby so it’s usable at dusk
Check local code and common-sense safety
Even simple builds can trigger rules regarding:
- setback from property lines
- drainage/greywater handling
- height limitations or structures on decks
You don’t need to overcomplicate this, but if you’re unsure, call your local building office and describe it as a “seasonal rinse-off station with hose connection.”
Materials and tools for a no-plumbing outdoor shower build
You can build a sturdy, attractive shower with basic carpentry tools and zero pipe-fitting. Below is a flexible list—choose what matches your design.
Materials (typical)
Structure & privacy
- Pressure-treated 4×4 posts (or 2×4 framing for a lighter build)
- Exterior screws (deck screws)
- Fence pickets, cedar boards, or corrugated panels for walls
- Concrete mix (if setting posts in ground) or post bases (if building on a deck/pad)
Floor
- Deck boards for a slatted base, or outdoor pavers
- Gravel for underlayment
- Landscape fabric (helps stop weeds and keeps gravel from sinking)
Water delivery (no plumbing version)
- Garden hose (appropriate length)
- Hose splitter (optional, if you want to keep using the spigot)
- Outdoor shower fixture designed for hose connection or a hose-to-shower adapter + shower head
- Hose quick-connect fittings (optional but very convenient)
Drainage
- ¾” gravel (lots of it)
- Optional perforated drain pipe + fabric (for a simple dry well/French drain)
- Optional edging stones to keep gravel contained
Tools (typical)
- Tape measure, level, pencil
- Post hole digger or auger (if setting posts)
- Drill/driver + bits
- Circular saw or miter saw
- Shovel and rake
- Safety gear (gloves, eye protection)
While standard power tools are enough, the “hidden tool” for outdoor comfort is reliable off-grid power if your site is away from outlets (for drills, lights, or a small pump). 💡 Recommended Solution: Ultimate OFF-GRID Generator
Best for: powering tools and small essentials in remote yard areas
Why it works:
- Helps you work where extension cords don’t reach
- Supports preparedness and self-reliant projects
- Useful beyond this single build
Building the base and drainage so it stays dry and solid
A great outdoor shower feels clean underfoot and never turns into a muddy mess. Focus on the base first; then build walls.
Step 1: Mark the footprint
A comfortable interior space is usually:
- 3′ x 3′ minimum
- 4′ x 4′ if you want elbow room and hooks/shelf space
Mark corners with stakes and string.
Step 2: Excavate and lay a stable foundation
For a simple, durable base:
- Remove sod/topsoil 4–6 inches deep
- Compact the soil (hand tamper helps)
- Add landscape fabric
- Add 3–4 inches of gravel and level it
From here, choose your walking surface:
- Slatted wood platform: comfortable and classic; lifts feet above splash
- Pavers: easy to clean; stable; less carpentry
- Gravel-only: cheapest; less comfortable; can be slippery with soap
Step 3: Add a beginner-friendly drainage solution
If you’ll be using soap, build a basic dry well:
- Dig a pit roughly 2′ x 2′ and 2–3′ deep (adjust based on soil)
- Line with landscape fabric
- Fill mostly with gravel
- Direct shower area runoff into this pit (sloping gravel bed or a short run of perforated pipe)
If your soil is clay-heavy and drains poorly, increase pit size or run a short French drain line to a better draining area.
Step 4: Prevent slip hazards
- Keep the floor level and stable
- Use textured decking boards or add anti-slip strips
- Avoid smooth tile outdoors unless it’s specifically slip-resistant
“As many site-prep contractors note, stability and drainage are what make outdoor wash stations last; a well-planned base prevents 90% of maintenance headaches later.” That principle matters more than fancy fixtures.
Framing and privacy walls that look great and block wind
Once the ground is right, the rest is straightforward carpentry. Your goal: sturdy posts, solid attachment points, and enough privacy to actually use the shower.
Step 1: Set posts or build a freestanding frame
Two beginner options:
Option A: Set four posts in the ground (most stable)
- Dig post holes below frost line if applicable
- Use gravel at the bottom for drainage
- Set posts plumb and pour concrete
Option B: Build a skid base (no digging)
- Create a heavy rectangular base from pressure-treated lumber
- Anchor posts to the base using metal brackets
- Works best on compact gravel or pavers
Step 2: Add wall framing and cladding
For privacy, you can use:
- cedar fence pickets (light, attractive)
- horizontal slats (modern look)
- corrugated metal (rustic/industrial)
- outdoor fabric curtains (fastest and cheapest, but less durable)
Helpful privacy tip: leave a ½” to 1″ gap between slats for airflow and faster drying, reducing mildew.
Step 3: Include a door or entry gap
A full hinged door is optional. Many outdoor showers use:
- a 18″–24″ entry gap (simple)
- a curtain rod + outdoor curtain
- saloon-style half doors
Step 4: Add the comfort extras now
These take minutes and dramatically improve usability:
- towel hook(s)
- a small shelf for soap/shampoo
- a bench or foot rinse bar
- a mirror (optional, but nice)
If your broader goal is a more resilient, homestead-style yard setup (not just a single shower), The Self-Sufficient Backyard can be a useful planning resource to connect projects like outdoor washing, water handling, and backyard systems into one coherent setup—without needing technical experience.
Installing water delivery with no plumbing: three foolproof methods
Now the fun part: getting water to the shower head without cutting pipes or adding valves inside your house.
Method 1: Hose-to-shower fixture (lowest learning curve)
This is the most “plug-and-play” approach:
- Mount a shower fixture (or a simple riser pipe setup designed for hoses) to a post/wall
- Run the garden hose to the fixture inlet
- Add a shutoff valve at the shower if your fixture supports it (nice to have)
- Attach shower head and test for leaks at connections
Use washers in hose fittings and snug connections—don’t overtighten.
Problem-solution bridge: Struggling with messy hose connections and inconsistent outdoor water planning? SmartWaterBox focuses on water readiness so your outdoor hygiene setup isn’t dependent on last-minute scrambling.
Method 2: Gravity-fed tank (simple, but mount safely)
- Mount a sturdy shelf/platform above head height
- Secure a water container designed for storage (safety first)
- Add tubing from outlet to shower head with a simple on/off valve
- Fill tank and test flow
Safety note: water is heavy. A 30-gallon tank weighs roughly 250 pounds when full. Overbuild the support and use strong brackets.
Method 3: Solar shower bag (fastest possible)
- Install a robust overhead beam or hook
- Hang the bag
- Place it where it’ll get sun for several hours
- Use as directed and bring it in when not in use
This is ideal for seasonal use, camps, and quick builds.
Temperature and comfort tips (no hot line required)
- Use a black hose coiled in the sun to warm water passively
- Shower mid-afternoon when the line has warmed
- Add a simple mixing strategy: start with warmest water first; finish with rinse
While traditional hot/cold plumbing is popular, a simplified outdoor system can be a more affordable alternative for beginners—especially if your goal is functionality, not a spa.
Making it durable: weatherproofing, upkeep, winterizing, and safety
A beginner outdoor shower fails for predictable reasons: rot, rust, mildew, unstable footing, or freeze damage. Address these upfront and maintenance becomes easy.
Weatherproofing and materials choices
- Prefer cedar or pressure-treated lumber for wet zones
- Use exterior-rated screws (coated or stainless)
- Seal cut ends of pressure-treated lumber if recommended by local supply
- Avoid interior hardware that will rust quickly outdoors
If you paint or stain, choose a product designed for decks/fences. Let everything cure before heavy water exposure.
Keep it clean and odor-free
- Ensure airflow (slat gaps, open top, or partial roof)
- Use a removable floor grate/platform you can lift and rinse
- Occasionally flush the drainage gravel with a bucket of clean water
If you plan on using soap often, stick to biodegradable options and keep runoff in the gravel pit/dry well.
Winterizing (important in freezing climates)
For hose-fed builds:
- Turn off spigot
- Disconnect and drain hose
- Store shower head/fixture components if possible
- Leave valves open so trapped water can escape
For gravity systems:
- Drain tank completely
- Store removable parts indoors
Basic safety checklist
- No exposed sharp fasteners inside the shower
- Stable platform with slip resistance
- Curtain/door that won’t tangle or trap
- Pathway lighting to prevent falls at night
“As outdoor maintenance pros often remind homeowners, water + wood + shade equals rot unless you design for drainage and drying.” Build for airflow and access.
If you’re building with preparedness in mind—hygiene, sanitation, and resilience—pairing an outdoor shower with broader self-reliance knowledge is smart. Many people exploring off-grid habits also look into resources like URBAN Survival Code to help structure practical readiness skills around everyday home life.
Tools, resources, and simple upgrades that make your shower feel “finished”
A bare-bones outdoor shower works, but a few thoughtful additions make it feel like a real outdoor room—without adding plumbing complexity.
Comfort upgrades that don’t add plumbing
- Foot rinse spout (hose splitter + short hose)
- Changing hook area outside the splash zone
- Small roof slats for shade while still allowing ventilation
- Privacy planting (bamboo in planters, tall grasses)
- Outdoor mat at entrance to reduce tracked mud
Water readiness and off-grid support (resource list)
If your shower is part of a bigger self-sufficient setup, these tools/resources are often considered together:
- SmartWaterBox — water storage planning and readiness support
- Water Freedom System — an option people explore for a more complete outdoor water setup approach
- Ultimate OFF-GRID Generator — off-grid power concept for tools/yard projects
Example: a simple “weekend build” timeline
Day 1 (3–6 hours)
- Choose location, mark footprint
- Excavate, gravel base, start drainage pit
Day 2 (4–8 hours)
- Set posts/build frame
- Add walls and hooks/shelf
- Mount fixture and run hose
- Test drainage and adjust slope/gravel
A common beginner mistake is rushing the base. If you spend extra time getting the floor stable and the drainage right, the build feels easy afterward.
Conclusion
Learning how to build an outdoor shower with zero plumbing experience comes down to choosing a low-plumbing water source (hose, gravity tank, or solar bag), building a stable base with smart drainage, and framing a private enclosure that dries quickly. You don’t need to open walls, sweat pipes, or install complicated valves. With basic carpentry tools and a weekend of effort, you can create a reliable rinse-off space that keeps dirt outside, saves cleanup time indoors, and adds real everyday comfort to your yard.
If you treat drainage and durability as the “main project” and the shower fixture as the easy finishing touch, your outdoor shower will stay solid for seasons to come.
FAQ
Can I build an outdoor shower with zero plumbing experience using only a garden hose?
Yes. A hose-fed outdoor shower is the most beginner-friendly method: connect to an existing spigot, mount a simple shower fixture or adapter to a post, and focus your effort on the base, privacy walls, and drainage.
What is the easiest drainage option for a DIY outdoor shower?
A gravel dry well (small pit filled with gravel and lined with landscape fabric) is one of the easiest and most reliable options for beginners, especially if you plan to use soap. It keeps water from pooling and reduces mud.
How do I warm the water without installing hot plumbing lines?
You can warm water by using a solar shower bag, placing your hose in the sun before showering, or using a dark hose coiled in sunlight to raise water temperature naturally. These methods avoid any indoor plumbing modifications.
Do I need a permit to build an outdoor shower?
It depends on your local rules. Many areas treat a simple hose-fed seasonal rinse station as minor, but drainage, structures, or greywater handling can change requirements. When in doubt, call your local building office and describe the project plainly.
How do I winterize an outdoor shower in freezing weather?
Disconnect and drain hoses, remove and store the shower head/fixture if possible, drain any tanks completely, and leave valves open so trapped water doesn’t freeze and crack components.
RANK MATH SEO BLOCK
SEO Title (≤60 chars): Build an Outdoor Shower With Zero Plumbing Experience
Meta Description (≤160 chars): Learn how to build an outdoor shower with zero plumbing experience: simple hose setups, drainage, privacy walls, and winterizing tips.
URL Slug: build-outdoor-shower-zero-plumbing-experience
Focus Keyword: How to Build an Outdoor Shower With Zero Plumbing Experience
Suggested Schema Type: HowTo / FAQ