
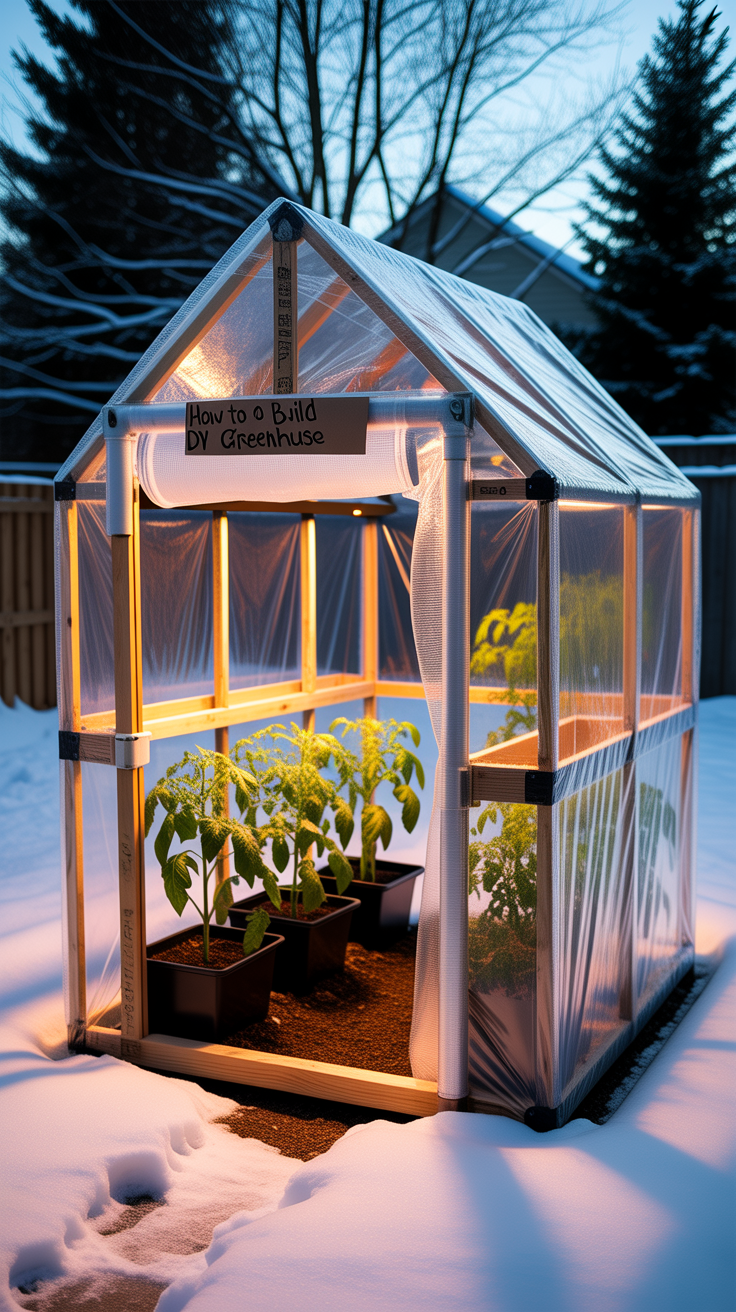
How to Build a DIY Greenhouse for Under $200 (That Survives Winter)
A winter-proof greenhouse doesn’t have to be expensive—or complicated. If you’ve been searching for how to build a DIY greenhouse for under $200 (that survives winter), you’re likely trying to solve three real problems at once: keeping plants alive in freezing weather, guarding against wind/snow damage, and doing it all on a tight budget.
The good news: you can build a tough, small-to-medium backyard greenhouse with common materials, basic tools, and smart cold-weather design choices. The secret isn’t fancy equipment—it’s energy management (sun + insulation + thermal mass), strong framing, and sealing drafts where heat escapes.
Many gardeners also pair a greenhouse build with broader self-reliance upgrades—like year-round indoor growing or resilient food planning—so you’re not starting from scratch each season. Many professionals rely on systems like Water Freedom System to streamline indoor/vertical growing when outdoor conditions get extreme, making it a helpful complement to a winter greenhouse rather than a replacement.
Winter-ready greenhouse design principles that keep costs low
Building cheap is easy. Building cheap and winter-proof is where most DIY greenhouses fail. The most common mistakes are flimsy frames, poor anchoring, leaky seams, and using thin plastic without a plan for snow loads.
Sizing that survives winter without inflating your budget
For under $200, you’ll get the best results with a footprint around:
- 6×8 ft, 6×10 ft, or 8×8 ft
- Height around 6.5–7 ft peak (you want headroom, but not a huge volume to heat)
Bigger greenhouse = more surface area = more heat loss and more structural demand. Smaller is easier to reinforce and easier to keep above freezing using passive methods.
Location and orientation that deliver free heat
A winter greenhouse succeeds or fails before you buy a single screw.
- Pick the sunniest spot you have (8+ hours is ideal; 5–6 can still work with better insulation)
- In most of North America, face the long side south or southeast
- Avoid shade from trees, fences, and buildings during winter when the sun is low
- Place the greenhouse near a wind break (a fence, shrubline, or the side of a building), but not so close it blocks sun
The winter survival triangle: structure, sealing, insulation
To survive winter storms and freezing nights on a budget, prioritize:
- Structural stiffness: triangles, braces, tight joints
- Air sealing: taped seams, tight door, covered corners
- Thermal strategy: double plastic layer, thermal mass, and frost management
If you do those three, you’ll be shocked how well even a budget build performs.
Materials and tools list for a DIY greenhouse under $200
Your budget is realistic, but the exact total depends on what you already have (scrap lumber, screws, old windows, pallets). The list below is designed to be flexible and “substitution-friendly.”
Budget-friendly build materials (pick your frame style)
You can hit the under-$200 goal with either:
Option A: Wood base + PVC hoops (often the cheapest)
- 2×4 lumber for base frame and door frame
- 1″ PVC (or similar) for hoops/ribs
- Rebar stakes to anchor hoops
Option B: All-wood mini greenhouse (often stiffer, slightly heavier)
- 2×2 or 2×4 framing
- Simple rafters + braces
Covering options
- Greenhouse plastic film (preferred for longevity)
- Heavy-duty clear poly sheeting (works, may degrade faster)
Fasteners and sealing
- Exterior screws (assorted)
- Staples or battens (wood strips) to sandwich plastic
- Weather tape (outdoor)
- Rope/strapping for storm security
Passive heat aids (cheap but powerful)
- Several dark water jugs or barrels (thermal mass)
- Foam board scraps (for north wall insulation if possible)
- Straw bales (temporary wind barrier)
Tools you’ll likely need
- Tape measure
- Saw (hand saw, circular saw, or miter saw)
- Drill/driver
- Staple gun (helps, not mandatory)
- Level (or a straight board + common sense)
- Utility knife
- Ladder or step stool
If you don’t own everything, borrow tools to keep the budget intact.
A proven winter-tough $200 build plan (wood base + PVC hoop house)
This build is popular because it’s forgiving, fast, and strong if you anchor and brace it properly. It also performs well when you add a double layer of plastic.
Step 1: Create a square, level base that won’t twist
Build a rectangle from 2×4s. Use screws (not nails) and check for square by measuring diagonals—both should match.
- If your site is uneven, level the base with pavers, bricks, or compacted gravel under corners.
- Add a center cross-brace if your long side is over 8–10 ft.
Step 2: Anchor it like a small shed, not like a tent
Most winter failures happen because the greenhouse lifts, shifts, or racks in wind.
Budget anchoring methods:
- Drive stakes (rebar, metal stakes, or treated wood stakes) into ground at corners and screw base to them.
- Or use ground anchors and straps if you already have them.
Step 3: Install rebar “hoop sockets”
Along both long sides:
- Hammer rebar sections into the ground next to the base (even spacing)
- Leave enough rebar above ground to slide PVC over it
Spacing:
- Every 2–3 feet is stronger for snow and wind than every 4 feet.
Step 4: Set PVC hoops and add a ridge pole
Slide PVC over the rebar on both sides to form hoops. Then add a ridge pole running along the top (this is crucial for stiffness).
Secure with screws and straps/ties. The ridge pole reduces flexing and helps shed snow instead of wobbling under it.
Step 5: Add diagonal bracing at end walls
End walls take the brunt of wind. Add:
- A simple wood frame on each end
- Diagonal braces (even one per end dramatically improves rigidity)
- A framed door opening so the plastic doesn’t become the “structure”
This creates a greenhouse that behaves more like a rigid building than a plastic tunnel.
Covering, sealing, and insulating for winter performance
A greenhouse can be strong but still freeze inside if it leaks air and radiates heat away at night. This is where winter-proofing happens.
Double-layer plastic: the cheapest “insulation upgrade”
If you do only one upgrade for winter, do this.
- Apply the first plastic layer tight and smooth.
- Add a second layer with a small air gap.
- Seal edges well with battens (wood strips) and staples/screws.
That trapped air works like a poor-man’s insulated glass. It’s not perfect, but it’s a substantial improvement over single-layer film.
Seal the drafts, especially at the base and door
Heat escapes fast through gaps. Use:
- Outdoor tape on seams
- A door sweep (even a DIY strip)
- Foam tape around the frame
- Soil, boards, or landscaping fabric at the base edge where the plastic meets ground
Insulate the north side (optional but high impact)
In the northern hemisphere, the north wall gets less sun. Insulating it reduces heat loss without sacrificing much solar gain.
Cheap approaches:
- Foam board scraps attached to the inside north wall
- Reflective material (if you have it) behind plants to bounce light back
- Temporary straw bales stacked outside the north side for deep-winter
Thermo-mass heating with water jugs
Thermal mass stabilizes temperature swings:
- Fill dark jugs with water and line them along the back wall
- Or cluster them under a bench
They absorb solar heat during the day and release it at night, reducing frost risk.
Problem-Solution Bridge: Struggling with freezing nights that wipe out seedlings even in a greenhouse? The Self-Sufficient Backyard helps you think beyond the structure—using season extension tactics, crop timing, and resilient home-growing strategies so your greenhouse is part of a bigger plan, not a standalone project.
Winter structural reinforcement for wind, snow, and ice
A $200 greenhouse can survive winter if you build for your worst week—not your average day. The three enemies are uplift (wind), load (snow), and racking (sideways sway).
Wind-proofing fundamentals
- Add straps over the top and anchor them to the base or ground stakes.
- Install purlins (horizontal braces) along the sides if your hoops flex.
- Make sure the door area is solid—flapping plastic becomes a sail.
Snow-load strategies that don’t cost much
Snow load depends on your climate, but even moderate snow can accumulate quickly.
- Increase hoop density: 2 ft spacing is far stronger than 4 ft.
- Keep the roof tight and smooth so snow slides.
- After storms, broom off snow promptly (don’t let it turn to ice).
Emergency reinforcement you can add fast
If a storm is coming and you’re worried:
- Add a temporary center post under the ridge pole (inside)
- Add extra diagonal braces on end walls
- Wrap a rope grid over the cover (light tension) to prevent ballooning
“As many extension-garden educators note, ‘Most greenhouse damage comes from movement—once the frame starts flexing, fasteners loosen and small tears become failures.’” The goal is to stop motion before it starts: brace, strap, and anchor.
Condensation and mold management
In winter, warm humid air hits cold plastic and condenses. This can drip on plants and spread disease.
Low-cost fixes:
- Vent briefly on sunny days
- Keep plants off the ground on a bench or pallets
- Water early in the day so humidity drops before night
Heating on a budget: maintaining above-freezing temperatures without overspending
If your goal is “survive winter,” you may not need tropical temperatures. For many greens and hardy starts, staying just above freezing is enough to avoid plant death and soil freeze.
Passive heat first, active heat second
Prioritize:
- Double layer cover
- Sealing drafts
- Thermal mass
- Insulating north side
- Compost heat (if available nearby)
Only then consider active heating.
Low-energy active heat (when needed)
If you must add heat, keep it targeted and minimal:
- Use seedling heat mats under trays (small wattage)
- Heat only one insulated corner (“nursery zone”)
- Add row covers inside the greenhouse to create a microclimate
Power resilience matters in winter
If you rely on a small heater, think about outages. Even the best structure can lose a crop if power fails during a cold snap.
💡 Recommended Solution: Ultimate OFF-GRID Generator
Best for: keeping small essentials running during outages (like minimal heat, lights, or charging)
Why it works:
- Supports resilience planning for winter storms
- Helps avoid total crop loss during short-term power cuts
- Useful beyond the greenhouse for broader home backup
While a conventional generator is popular, planning an off-grid approach can be a more adaptable alternative for people focused on long-term self-reliance and avoiding single points of failure.
What to grow in a winter DIY greenhouse (and how to use the space)
A winter greenhouse under $200 is best used for:
- Cold-hardy greens
- Root crops in protected soil
- Seedling starts for early spring
- Overwintering herbs and perennials (depending on zone)
Reliable winter crops
Try:
- Spinach, kale, mâche, arugula
- Lettuce (with inner row cover)
- Green onions
- Radishes (fast)
- Carrots (in protected beds)
- Asian greens (many are cold-tolerant)
Layout that improves warmth and airflow
- Put thermal mass (water jugs) on the north/back side
- Place taller plants where they won’t shade smaller crops
- Use a narrow center aisle to reduce wasted air volume
- Add a simple bench to get trays off cold ground
Layering protection inside the greenhouse
A “greenhouse within a greenhouse” works:
- Low hoops inside covered with row fabric
- Old clear bins as cloches over tender plants
- Bubble wrap on the interior where needed (if you already have it)
This layered approach often outperforms adding expensive heaters, especially for frost protection.
Expert Quote Format:
“As many preparedness-minded gardeners note, ‘Food security isn’t just about growing in summer—it’s about building systems that keep producing when conditions aren’t ideal.’ Resources like The Lost SuperFoods can complement your greenhouse plan by expanding your options for resilient, shelf-stable food knowledge alongside what you grow fresh.”
Tools, resources, and next-step upgrades for a more self-sufficient setup
Once your greenhouse is up, the next wins usually come from stacking small improvements rather than rebuilding.
Smart, low-cost upgrades
- Add an automatic vent opener (if you find one cheaply)
- Add interior row-cover hoops
- Add a rainwater collection barrel (where legal and practical)
- Improve the door seal and latch
- Add removable insulation panels for deep winter
Tools & Resources to support year-round resilience
If your greenhouse is part of a broader “produce + preparedness” plan, these resources may fit naturally depending on your needs:
- SmartWaterBox — water preparedness and storage planning support for home resilience.
- Home Doctor — general home health preparedness knowledge (useful when storms disrupt services).
- URBAN Survival Code — broader emergency readiness framework beyond gardening alone.
Comparison/Alternative framing for indoor growing
If you don’t have enough winter sun—or you want to keep growing even when outdoor temps are brutal—indoor systems can fill the gap.
While a greenhouse is excellent for passive solar growing, Water Freedom System is a practical alternative for people who want a more controlled, indoor-friendly approach to growing in limited space.
Conclusion
Learning how to build a DIY greenhouse for under $200 (that survives winter) is less about finding magical materials and more about using the right building logic: choose a modest size, orient it for sun, build a stiff frame, anchor it like a shed, double-layer the cover, and stop air leaks. Add thermal mass and a bit of internal crop protection, and you can keep hardy plants alive through cold months without turning your backyard into a construction zone—or draining your wallet.
Start small, build strong, and improve in layers. Your first winter will teach you exactly where your heat escapes and what reinforcements make the biggest difference—and you’ll be ready for the next storm season with a greenhouse that’s tougher than it looks.
FAQ
How to build a DIY greenhouse for under $200 (that survives winter) without pouring a foundation
Use a squared 2×4 base on compacted ground or pavers, then anchor it with stakes/rebar and screws. The key is preventing shifting and uplift, not concrete.
What is the best covering for a budget winter greenhouse
A double layer of greenhouse plastic (or heavy clear poly) with a small air gap is one of the best low-cost insulation upgrades. Seal seams and edges carefully to reduce drafts.
How do I keep my DIY greenhouse from collapsing in snow
Use closer hoop spacing (about 2–3 ft), add a ridge pole, brace end walls diagonally, and remove snow buildup quickly after storms. Movement and load are the real enemies.
Can a cheap DIY greenhouse stay warm without a heater
Often yes for cold-hardy crops—if you focus on passive heat: sun exposure, draft sealing, double-layer cover, thermal mass (water jugs), and an insulated north side. Inner row covers make a major difference.
What should I grow in a winter greenhouse on a budget
Start with cold-tolerant crops like spinach, kale, mâche, arugula, lettuce (with row cover), green onions, and radishes. These are forgiving and productive in cool temperatures.
Rank Math SEO Block
SEO Title (≤60 chars): DIY Greenhouse Under $200 That Survives Winter
Meta Description (≤160 chars): Learn how to build a DIY greenhouse for under $200 (that survives winter) with a strong frame, insulation tips, and cold-season growing advice.
URL Slug: diy-greenhouse-under-200-survives-winter
Focus Keyword: How to Build a DIY Greenhouse for Under $200 (That Survives Winter)
Suggested Schema Type: HowTo / FAQ