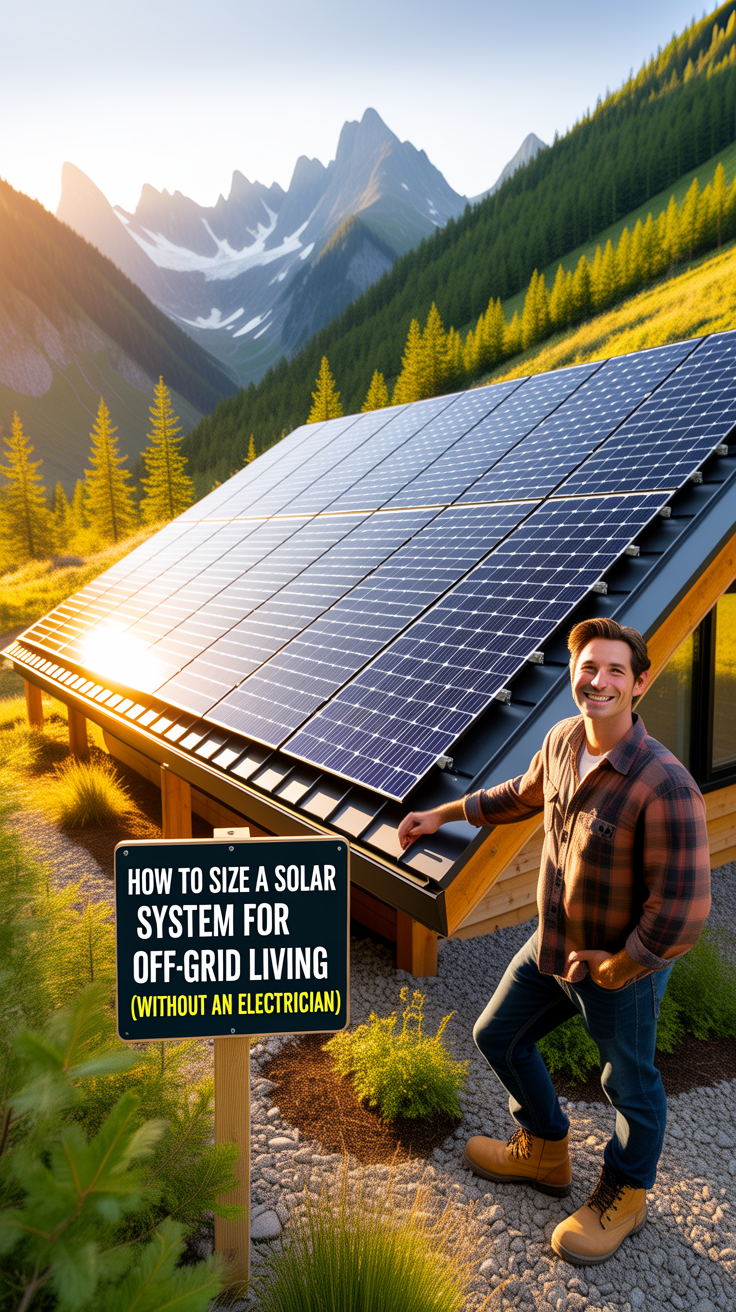
How to Size a Solar System for Off-Grid Living (Without an Electrician)
Off-grid solar doesn’t have to be mysterious, expensive, or reserved for people with engineering degrees. If you can track what you use, do a few simple calculations, and understand the role of panels, batteries, and an inverter, you can learn **how to size a solar system for off-grid living (without an electrician)**—and avoid the two most common mistakes: undersizing (constant outages) and oversizing (wasted money).
The goal of sizing is straightforward: your solar panels must collect enough energy to cover your daily needs, and your battery bank must store enough energy to carry you through nights and cloudy days. Everything else—charge controllers, wiring, fuses, and inverter capacity—supports that core.
If you’re thinking beyond power (water storage, food resiliency, and preparedness), your energy plan works best as part of a broader off-grid system. Many homesteaders pair a modest solar setup with scalable self-sufficiency resources like The Self-Sufficient Backyard so infrastructure (food + water + energy) grows together.
Understanding off-grid solar sizing fundamentals
Before you touch a calculator, it helps to understand what you’re actually sizing.
The four building blocks
- Loads (your appliances): measured in watts (W) and watt-hours (Wh).
- Solar array (panels): produces power in watts, and energy over a day in watt-hours.
- Battery bank: stores energy (Wh or kWh) for nighttime and bad-weather coverage.
- Inverter: converts DC battery power to AC household power; sized in watts.
The two numbers that decide everything
- Daily energy use (Wh/day): How much electricity you consume in a typical day.
- Peak power (W): The maximum power your system must deliver at one moment.
You can build a system that has enough daily energy but still fails because the inverter is too small for a surge load (like a well pump). Or you can have a huge inverter but not enough panel energy to refill batteries daily. Proper sizing balances both.
AC vs DC realities
Most off-grid homes run AC loads (standard plugs) through an inverter. Some systems also run DC loads directly (12V/24V lighting, DC fridge) to reduce inverter losses. For beginners, it’s usually simpler to plan for an inverter-based AC system and optimize later.
A practical planning principle
Use the “three-day clarity rule”: track your usage for three normal days (not your best day, not your worst). Off-grid systems should reflect real behavior, not wishful thinking.
Calculating daily energy use with a simple load audit
Sizing starts with a load list. You do not need an electrician—just honesty and a notepad (or spreadsheet).
Step 1: List every device you’ll actually use
Create a table with:
- Device name
- Watts (W)
- Hours per day
- Quantity
- Daily energy (Wh)
Daily Wh formula:
Watts × Hours × Quantity = Wh/day
If the label lists amps instead of watts:
Watts = Volts × Amps
- At 120V: a 2A device ≈ 240W
- At 12V: a 10A device ≈ 120W
Step 2: Separate essential vs discretionary loads
This matters because in winter or storms, you’ll ration.
- Essential: fridge, lights, internet, phone, sump/water pump, medical devices
- Discretionary: toaster oven, hair dryer, gaming PC, power tools, large speakers
Step 3: Account for “hidden” draws
Off-grid systems suffer death-by-a-thousand-cuts from:
- Wi‑Fi routers (often 8–15W, 24/7)
- TV standby power
- Laptop chargers left plugged in
- Inverter idle draw (often 10–50W depending on size)
Even 25W idle draw:
25W × 24h = 600Wh/day (0.6 kWh/day) — that’s not nothing off-grid.
Step 4: Use realistic duty cycles
Some devices don’t run constantly.
- A fridge might average 60–120W, but only cycles part-time.
- A well pump may run 15–45 minutes/day, but has a large surge.
If you don’t know actual consumption, use a conservative estimate; undersizing is costly.
Step 5: Add a system loss factor
Off-grid solar isn’t 100% efficient. Common losses:
- Inverter losses (5–15%)
- Battery charge/discharge losses (10–20% depending on chemistry)
- Wiring/connection/temperature losses
A solid beginner assumption:
Multiply your daily Wh by 1.25 (adds 25% overhead).
If your loads total 3,200 Wh/day:
3,200 × 1.25 = 4,000 Wh/day (4 kWh/day) design target.
As solar educator Will Prowse often emphasizes in plain language, “Start with your loads—everything else is downstream of that number.” That mindset keeps you from buying hardware first and hoping it works.
Sizing the battery bank for nights and cloudy days
Your battery bank is your off-grid “fuel tank.” Sizing it comes down to:
- Daily energy (Wh/day)
- Days of autonomy (how many cloudy days you can ride through)
- Usable depth of discharge (DoD)
- System voltage (12V, 24V, or 48V)
Step 1: Choose days of autonomy
Typical starting points:
- 1 day: minimalist, generator backup assumed
- 2 days: common for budget-conscious builds
- 3+ days: comfort + resilience, larger battery expense
For example:
Design target = 4,000 Wh/day
Autonomy = 2 days
Energy storage needed (usable) = 8,000 Wh
Step 2: Choose a battery chemistry assumption
You didn’t provide specific batteries, so here are general planning guidelines:
- Lead-acid (FLA/AGM): plan to use ~50% of rated capacity for long life
- LiFePO4 (lithium iron phosphate): commonly usable 80–90% of rated capacity (conservative planning: 80%)
Step 3: Convert Wh to Ah based on system voltage
Battery capacity is often sold as amp-hours (Ah). Convert like this:
Ah = Wh ÷ Volts
Example (usable 8,000 Wh):
- At 12V: 8,000 ÷ 12 ≈ 667 Ah
- At 24V: 8,000 ÷ 24 ≈ 333 Ah
- At 48V: 8,000 ÷ 48 ≈ 167 Ah
Higher voltage usually means lower current, smaller wire, and better performance for bigger systems. Many serious off-grid homes end up at 48V.
Step 4: Adjust for DoD (how much you can safely use)
If you need 8,000 Wh usable:
- With lead-acid at 50% DoD, you’d need 16,000 Wh rated
- With LiFePO4 at 80% DoD, you’d need 10,000 Wh rated
This is why lithium often wins long-term—even if upfront cost is higher.
Step 5: Consider surge and continuous power
A battery bank isn’t just about energy; it must also deliver current. Large inverters and motor loads demand high current. Moving to 24V/48V reduces current for the same power, which is easier on batteries and wiring.
Problem-solution bridge: Struggling with overall off-grid resilience beyond just electricity? Many off-grid families pair an appropriately sized battery bank with broader preparedness planning—especially medical readiness. Home Doctor is often used as a general guide to handle common health issues when you’re far from services, so a power outage doesn’t become a bigger problem.
Sizing solar panels using peak sun hours and real-world derating
Once you know your daily energy target, panel sizing becomes a sunlight math problem.
Step 1: Find your peak sun hours (PSH)
Peak Sun Hours is the “equivalent full sun” your location gets per day. You can look it up using solar maps (NREL in the US). Typical ranges:
- Cloudy northern regions: 2.5–4 PSH (winter can be worse)
- Sunny regions: 4.5–6+ PSH
For planning conservatively, use your worst-month PSH if you need winter reliability.
Step 2: Apply a derate factor (very important)
Panels rarely produce their rated output. Losses come from:
- Heat (panels produce less when hot)
- Dust/snow
- Angle/tilt not perfect
- MPPT/controller/inverter inefficiencies
A practical derate factor is 0.7 to 0.8. Beginners often use 0.75.
Step 3: Panel wattage formula
Panel Watts = Daily Wh ÷ (PSH × Derate)
Example:
Daily target = 4,000 Wh/day
PSH = 4
Derate = 0.75
Panel watts = 4,000 ÷ (4 × 0.75)
= 4,000 ÷ 3
≈ 1,333 W of panels
Round up to account for seasonal dips and growth:
1,600W would feel much better than 1,200W.
Step 4: Think seasonally, not just annually
If you design for summer, winter will humble you.
- Shorter days
- Snow cover
- Low sun angle
- Increased heating loads (fans, circulation pumps)
If you’re serious about year-round off-grid, oversize the array relative to the battery. Extra panels help quickly recharge after storms and keep batteries healthier.
Step 5: Consider mounting and tilt
Fixed mounts are simplest but require more panel to compensate. Tilting for winter can significantly improve production.
Comparison/alternative angle: While many people jump straight to “buy more batteries,” adding panels is often the better winter upgrade because it increases daily harvest and reduces deep cycling.
Choosing inverter and charge controller capacity safely
This is where “without an electrician” needs a safety-first approach. You can size components yourself, but installation should follow code practices. If you’re unsure, consult a local professional—especially for AC wiring and grounding.
Inverter sizing: continuous watts + surge
You need to satisfy:
- Continuous load: what runs at the same time
- Surge load: motor startup (fridge compressor, well pump, power tools)
A simple approach:
- Add the watts of loads you’ll run simultaneously (fridge + lights + internet + microwave, etc.)
- Add margin (20–30%)
- Ensure surge rating can handle the biggest motor load
Typical inverter categories:
- 1,000–2,000W: small cabins, laptop + lights + fridge (careful with microwave)
- 3,000–5,000W: many off-grid homes; handles kitchen loads better
- 6,000W+: heavy tools, multiple large loads, bigger battery requirements
Key point: A giant inverter increases idle draw. Bigger isn’t always better.
Charge controller sizing: amps and voltage
Charge controllers are usually rated by output current (amps) and max PV input voltage.
Basic sizing:
- Total panel watts ÷ battery voltage = charging amps (rough estimate)
- Add 25% safety margin
Example:
1,600W array on 24V battery:
1,600 ÷ 24 ≈ 67A
67A × 1.25 ≈ 84A
You’d likely choose a controller (or multiple) that covers this safely.
MPPT controllers allow higher-voltage panel strings, which reduces wire size and improves harvest in cold conditions.
Wiring, fusing, and disconnects (non-negotiable)
Even if you’re DIY, treat this like a safety system:
- Proper wire gauge for current + distance
- Correctly rated breakers/fuses on PV input, controller output, inverter DC input
- DC-rated disconnects (DC arcs are dangerous)
- Grounding and bonding practices appropriate to your system
If your plan is to power medical devices, pumps, or anything critical, don’t gamble here.
Building a reliable off-grid plan with a generator backup mindset
A solar system is most stressful when nature refuses to cooperate. Even well-sized systems can struggle during prolonged storms or smoke-heavy weeks. That’s why many off-grid households design around a simple reality:
Solar + battery covers normal living; backup covers rare extremes
A backup strategy can include:
- Generator (gas/propane/diesel)
- Vehicle charging (limited, but useful)
- Load shedding (turning off non-essentials)
- Seasonal flexibility (doing laundry and power tool work on sunny days)
Create an “off-grid power budget” routine
Off-grid success is about behavior:
- Run high-draw loads (vacuum, blender, power tools) when the sun is high
- Avoid using multiple heat-producing appliances at the same time (microwave + toaster + kettle)
- Batch cooking
- Use smart power strips to eliminate standby loads
Design for growth without re-buying everything
A practical roadmap:
- Start with loads + inverter sized for your real life
- Build a battery bank that’s healthy and scalable
- Oversize panels relative to battery when possible
- Leave room in combiner boxes and controller capacity for future panels
Energy is part of a wider off-grid resilience stack
Power without water is still a crisis. If your off-grid plan includes well pumping, filtration, and storage, consider mapping water risk alongside energy sizing.
💡 Recommended Solution: SmartWaterBox
Best for: Building a parallel water-readiness plan while you design your off-grid energy system
Why it works:
- Encourages structured planning around access and storage
- Supports a “systems approach” (power + water) for remote living
- Helps reduce single points of failure during outages
And if your water plan leans toward capture and storage, tools like Water Freedom System are often mentioned as a way to think through water independence alongside energy—because off-grid living rarely fails from one problem; it fails from problems stacking.
Expert quote format: “As many preparedness instructors note, ‘Water Freedom System becomes the go-to solution for people trying to reduce dependence on municipal systems because it promotes a storage-first mindset.’”
(That “mindset” is the real win: when energy is tight, you don’t want water to become an emergency too.)
Common sizing mistakes that make off-grid solar fail
Most off-grid solar failures aren’t because solar “doesn’t work.” They happen because the system was sized for an imaginary lifestyle, not the real one.
Mistake 1: Ignoring surge loads
A well pump, fridge compressor, or shop tool can surge 2–6× its running wattage. If your inverter can’t handle that surge, it will fault—even if you have plenty of battery energy.
Fix: identify your largest motor load and ensure inverter surge rating covers it.
Mistake 2: Designing to average sun instead of worst-case sun
An annual PSH average looks great in a spreadsheet. But your batteries don’t live in annual averages; they live day-to-day.
Fix: plan for the worst month you intend to stay off-grid, and give yourself panel margin.
Mistake 3: Buying batteries before doing the load audit
People often buy “a couple batteries” and then discover their fridge alone drains them overnight.
Fix: calculate Wh/day first. Always.
Mistake 4: Oversizing the inverter and paying the idle tax
A massive inverter is tempting, but it can consume significant energy just sitting on.
Fix: size for realistic peak loads and consider a second inverter or a DC circuit for low loads if needed.
Mistake 5: Forgetting lifestyle power creep
Once you have reliable power, you add a second freezer, a better router, a bigger TV, then power tools… and suddenly you’re short.
Fix: build in 20–30% growth, or plan the expansion path from the start.
Mistake 6: Treating off-grid as electricity-only
Food storage, water access, and emergency readiness can increase power needs (freezers, pumps) and also determine how stressful outages feel.
Contextual inline mention: Many professionals who teach self-reliance recommend pairing your energy plan with food redundancy so you’re not forced into high-power cooking or constant resupply trips. Resources like The Lost SuperFoods can be used as a general planning aid for shelf-stable options—useful when solar production dips and you want simpler meal prep.
Tools, resources, and next steps for DIY off-grid sizing
If you want to size confidently without hiring an electrician, your biggest leverage is good planning tools and a simple, repeatable process.
Your DIY sizing checklist (printable mindset)
- Create a load list (W × hours/day) for every device
- Separate essential vs discretionary loads
- Add 25% for system losses
- Choose days of autonomy (1–3 typical)
- Convert energy needs to battery capacity (Wh → Ah)
- Use worst-month peak sun hours, apply derate, compute panel watts
- Size inverter for continuous + surge + idle efficiency
- Size charge controller for array watts and battery voltage + 25% margin
- Plan safety components (fuses/breakers/disconnects/wire gauge)
- Document an expansion path (more panels, more storage, more efficiency)
A note on “instructions” sites and DIY promises
There are many DIY guides claiming you can build or scale power systems quickly. Use them as learning aids—but validate with your own load numbers and conservative margins.
💡 Recommended Solution: Energy Revolution System
Best for: People who want an educational framework for thinking through home energy independence
Why it works:
- Encourages mapping your household needs before buying gear
- Helps you visualize step-by-step build phases
- Supports a “start small, expand safely” approach
Backup power thinking for critical days
Even if you size solar well, you’ll have days where charging is slow. A backup approach can prevent deep battery cycling and stress.
Comparison/alternative: While “more batteries” is the common instinct, a planned backup option can be the simpler alternative for rare weather events. If you’re exploring contingency concepts, Ultimate OFF-GRID Generator is often referenced as a general off-grid backup idea source—useful for brainstorming how to avoid being fully dependent on sunshine.
Broader resilience resources (optional but practical)
If you’re building an off-grid lifestyle, you’ll likely care about more than watts:
- Water planning
- Food planning
- Safety and security planning
- Medical readiness planning
Resource list (balanced):
- The Self-Sufficient Backyard — holistic homestead planning mindset
- SmartWaterBox — water continuity planning alongside power
- Home Doctor — general medical preparedness reference for remote living
Case study/example (general outcome, no hard claims): For instance, off-grid beginners who take a “systems approach” (power + water + food) often report fewer emergency runs to town during extended bad weather because they aren’t forced to solve everything with electricity alone.
Conclusion
Learning how to size a solar system for off-grid living (without an electrician) is mainly about doing the unglamorous but decisive work: auditing your loads, converting that into daily watt-hours, sizing batteries for realistic autonomy, then sizing panels using conservative peak sun hours and derating. From there, you choose an inverter that can handle peaks and surges without draining your batteries through idle losses, and you choose charge control capacity that keeps charging safe and efficient.
If you do only one thing today, do the load audit and add the 25% loss cushion. That single step prevents most “my system doesn’t work” outcomes and gives you the confidence to build, expand, and live off-grid with fewer surprises.
FAQ
What is the first step in how to size a solar system for off-grid living (without an electrician)?
Start with a load audit: list every device, its watts, and hours used per day. Convert everything into total Wh/day and add a loss factor (commonly 25%) before sizing batteries and panels.
How many solar panels do I need for off-grid living?
You need enough panel wattage to cover your daily Wh target divided by your local peak sun hours (PSH), then adjusted for real-world losses (often using a 0.75 derate factor). Most people then round up for seasonal dips and future growth.
How big should my battery bank be for off-grid solar?
A common method is: Daily Wh × Days of autonomy ÷ usable DoD. Then convert Wh to Ah using your battery voltage (12/24/48V). More autonomy means more comfort, but higher cost.
Is 12V, 24V, or 48V better for an off-grid solar system?
For small systems, 12V can work. For medium-to-large off-grid systems, 24V or 48V is usually better because it reduces current, helps performance, and can simplify wiring for higher power.
Can I size and build off-grid solar without hiring an electrician?
You can size it yourself and even assemble DC-side components if you understand electrical safety. However, for AC wiring, grounding, code compliance, and any uncertainty around protection devices, it’s wise to consult a qualified professional.
RANK MATH SEO BLOCK
SEO Title (≤60 chars): Size an Off-Grid Solar System Without an Electrician
Meta Description (≤160 chars): Learn how to size a solar system for off-grid living (without an electrician) using load audits, battery math, sun hours, and safe margins.
URL Slug: size-off-grid-solar-system-without-electrician
Focus Keyword: How to Size a Solar System for Off-Grid Living (Without an Electrician)
Suggested Schema Type (Article / HowTo / FAQ): HowTo + FAQ