
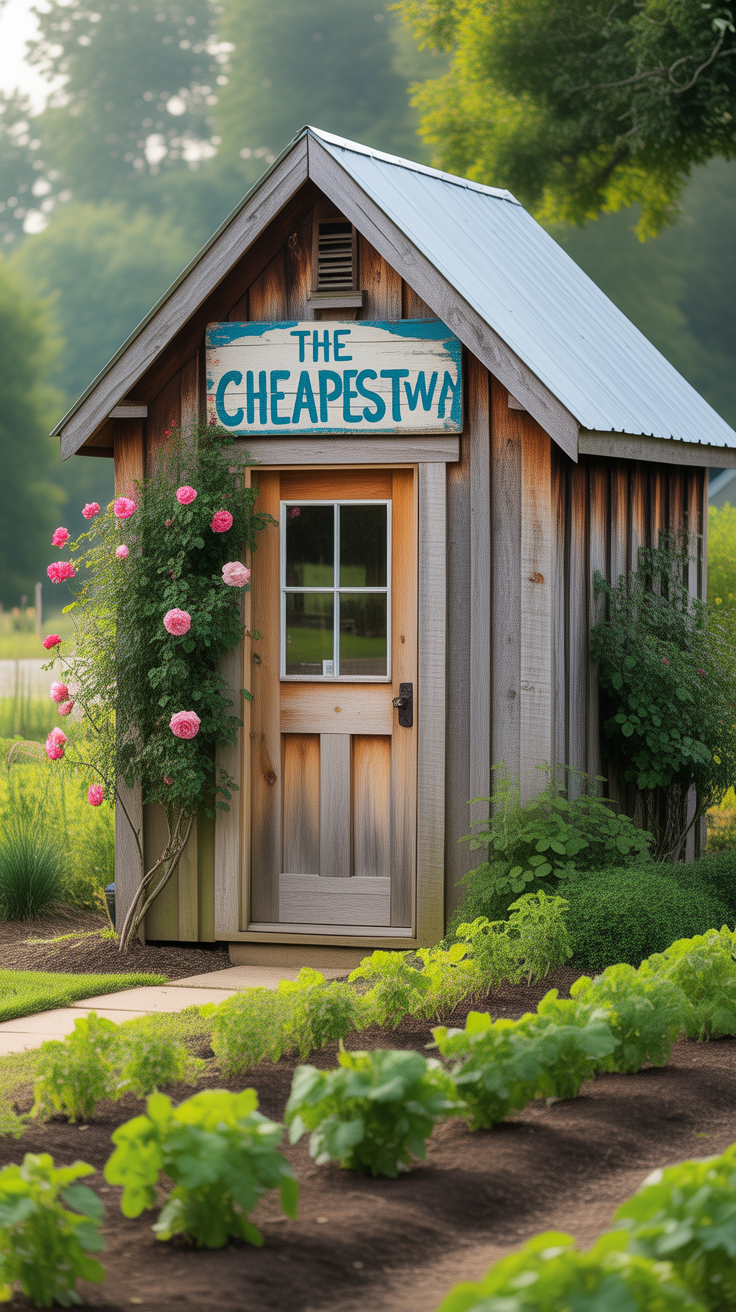
The Cheapest Way to Add a Room to Your Homestead Without a Permit Nightmare
Adding a room to your homestead can feel like choosing between two bad options: spend a fortune on a “real” addition, or step into a permit maze that drags on for months. The good news is that the cheapest way to add a room to your homestead without a permit nightmare usually isn’t a traditional addition at all—it’s a permit-light, reversible, code-aware space that expands your living area without triggering the same level of structural inspection, foundation requirements, or zoning scrutiny.
In most rural and semi-rural areas, the affordability sweet spot comes from using “accessory,” “temporary,” “mobile,” or “non-permanent” room solutions—then setting them up in a way that respects setbacks, septic limits, and safety basics. The result: you gain a practical extra room (guest space, office, schoolroom, pantry overflow, mudroom, or care space) while keeping your timeline and budget under control.
“The fastest projects are the ones that don’t change the building’s structure,” as many permit technicians routinely stress at the counter. The less you alter load-bearing walls, rooflines, and foundations, the less likely you are to trigger full-plan review.
Below is a real-world approach you can adapt to your land, climate, and priorities—without gambling on a DIY loophole that could come back to bite you.
Understanding what actually triggers permit headaches
A “permit nightmare” is rarely about one form. It’s usually about scope creep. The moment a project looks like a permanent, habitable structural expansion, many jurisdictions shift you into deeper requirements: engineered drawings, energy code compliance, septic review, inspections, and occasionally zoning hearings.
Here are the most common triggers that turn a simple idea into a drawn-out process:
Permanent structural changes to the main dwelling
If you’re cutting openings in load-bearing walls, extending rooflines, or pouring a new foundation tied into the house, you’re signaling permanent expansion. That typically requires full building permits and inspections.
New plumbing and septic load
Adding a bathroom or kitchen is where costs and approvals jump. Even if the room is small, plumbing can trigger:
- septic capacity checks,
- well flow testing,
- trenching/easements review,
- and additional inspections.
Classified as a new dwelling unit
If your “extra room” starts looking like an ADU (accessory dwelling unit)—with cooking facilities, sleeping space, and a dedicated entrance—some counties treat it as a second residence. That can mean zoning review, impact fees, and a stricter code path.
Electrical done the “wrong way”
Hardwiring improperly, DIYing a subpanel without permits, or skipping GFCI/AFCI protections can create risk. Even permit-light builds should prioritize safe electrical choices.
Zoning setbacks and lot coverage
Even when building permits are minimal, zoning can block location, size, or use. Setbacks (distance from property lines, roads, wells, and septic fields) are the silent killers of “cheap room” plans.
Practical takeaway: The cheapest way forward is usually to choose a room method that’s non-invasive to the main house, minimizes permanent foundations and plumbing, and stays under common size thresholds—while still being comfortable and safe.
Choosing the cheapest permit-light room approach for homesteads
There isn’t one universal answer because rules vary. But across many homestead-friendly counties, a handful of room types consistently show up as the best mix of low cost, speed, and low permitting friction.
Detached “backyard room” structure (shed-to-room, studio, or cabin shell)
In many places, small detached structures under a certain size can be built with limited permits or simplified rules—especially if they’re not classified as a dwelling.
Pros:
- keeps the main home untouched,
- reduces structural engineering needs,
- can be placed to avoid septic fields and setbacks,
- scalable: start simple, upgrade later.
Cons:
- may still require a permit depending on size/use,
- heating and insulation matter in cold climates,
- classification (“habitable”) can change the rules.
Finished outbuilding space you already have
If you have a barn corner, enclosed porch, garage bay, or large mudroom area, the cheapest “addition” is often a conversion inside an existing envelope.
Pros:
- no new footprint or roof,
- can be cheaper than any new build,
- may qualify as interior remodel rules.
Cons:
- egress and fire separation can apply,
- moisture and rodents must be handled,
- electrical may need upgrades.
Mobile, reversible room options (the permit-light champions)
These include:
- small travel trailers,
- tiny homes on wheels (where legal),
- prebuilt modular “office pods” (depending on jurisdiction),
- canvas wall tents or yurt-style shelters (often seasonal/temporary rules).
Pros:
- often treated as temporary or movable,
- avoids foundations and roofline tie-ins,
- fast to set up.
Cons:
- zoning or HOA rules may restrict,
- utilities require thoughtful, safe planning,
- winter performance varies.
The true budget winner in many areas: a detached, non-plumbed backyard room
If you want the cheapest way to add a room to your homestead without a permit nightmare, a common winning formula is:
- Detached
- No plumbing
- Minimal or no permanent foundation
- Under common “accessory structure” thresholds
- Used as office, hobby, storage-plus, or flex space
You can still make it comfortable—insulation, ventilation, heat source, and safe power—without turning it into a second house on paper.
💡 Recommended Solution: The Self-Sufficient Backyard
Best for: homesteaders planning a practical, low-cost expansion of usable space
Why it works:
- Helps you think in systems (space, water, food, energy) instead of one-off projects
- Encourages staged upgrades so your “extra room” supports the whole homestead
- Supports a simpler, resilient lifestyle without overbuilding
A step-by-step blueprint for a low-permit, low-cost homestead room
The biggest money-saver is planning a build that stays “simple” in the eyes of inspectors and zoning staff—without cutting safety corners.
Start with the constraints that matter most
Before you buy materials or a prebuilt shell, map these out:
- Property lines and likely setbacks (front/side/rear)
- Septic tank and drain field location (protect it)
- Well location (separation distances)
- Overhead lines, easements, and access paths
- Flood zone or seasonal drainage issues
A cheap room becomes expensive when you have to move it later.
Choose a “foundation” that doesn’t scream “permanent addition”
Depending on climate and local practice, low-drama options often include:
- compacted gravel pad with pavers,
- skids and blocks,
- pier blocks (where allowed),
- adjustable deck-style supports.
Even if you choose something permit-light, aim for level, stable, dry. A room that shifts or takes on water is never cheap long-term.
Keep the build non-plumbed at first
If you can avoid running water and drainage, you eliminate a major approval path and a major cost center. Use:
- the main house bathroom,
- an outhouse/composting toilet setup where legal and appropriate,
- a wash station outside (seasonal),
- a simple handwashing setup with a gray-water approach (only where permitted).
Use safe, simple electrical
If you need power, the safest “permit-light” approach in many cases is:
- a dedicated outdoor-rated circuit installed properly,
- GFCI protection,
- weatherproof disconnects,
- or a compliant power inlet and distribution approach.
If you can’t or don’t want to trench power, you can build a room that runs off efficient devices and independent power—but do it intentionally.
Problem-solution bridge: Struggling with powering an extra room without expensive trenching and panel upgrades? Many homesteaders look for off-grid-friendly options that reduce reliance on long cable runs and complex tie-ins.
💡 Recommended Solution: Ultimate OFF-GRID Generator
Best for: powering a backyard room, workshop corner, or emergency backup loads
Why it works:
- Supports a more independent power plan when grid work is costly
- Useful for staged building where you add systems over time
- Helps reduce downtime during outages (especially when the new room is essential)
Design for comfort without “dwelling unit” signals
To stay out of second-dwelling classification, many people avoid built-in cooking and full-time sleeping claims. Instead, frame it as:
- office / homeschool room,
- craft room / studio,
- gear room / pantry overflow,
- caregiver daytime space,
- seasonal guest room (check your local rules).
Your primary goal is real utility with fewer regulatory triggers.
The “permit nightmare” avoidance checklist homesteaders actually use
Permits aren’t inherently bad. The nightmare part is when you unknowingly trigger a higher tier of regulation. Use this checklist to keep things predictable and cheap.
Keep it small, simple, and detached when possible
Detached structures often live in a different rule category than additions. They also:
- avoid structural tie-in to the house,
- reduce engineering and inspection scope,
- can be relocated if you later need a permit.
Avoid plumbing until you’re ready
Plumbing is the fastest way to:
- increase inspections,
- increase cost,
- delay timelines.
If your future plan includes plumbing, consider building the room now and adding wet utilities later with a formal permit.
Mind egress, smoke alarms, and fire safety
Even if you think you’re building “just a room,” safety matters:
- at least one clear egress path,
- smoke and CO alarms if any combustion heating is used,
- safe clearances around heaters,
- proper ventilation and moisture control.
Cheap builds often fail because they become damp, moldy, or unsafe.
Don’t play games with occupancy claims
Calling something “storage” while fully furnishing it like a residence can create conflict later, especially if neighbors complain. A smarter approach is:
- build a legit flex space,
- use it accordingly,
- keep documentation and receipts,
- and follow the spirit of your local rules.
Document your build and placement
Take photos:
- site before and after,
- pad/base layers,
- framing and insulation,
- electrical routing (if done),
- ventilation and moisture barriers.
If you ever need to legitimize the room later, documentation saves time and money.
“The cheapest compliance is the kind you plan for,” as contractors often say—meaning: don’t build yourself into a corner you can’t permit later.
Budget breakdown and where people overspend
If your goal is the cheapest way to add a room to your homestead without a permit nightmare, you need to avoid the classic cost traps.
Cost centers that balloon fast
- Concrete foundations: expensive, permanent, inspection-heavy.
- Plumbing: trenching, venting, septic tie-ins, fixtures, inspections.
- Custom windows/doors: pricey and often slow to source.
- Complex rooflines: more labor, more materials, more leak risk.
Where to spend (so you don’t pay twice)
- Moisture control: flashing, roof underlayment, ground vapor barrier.
- Insulation and air sealing: comfort is what makes a room usable.
- Ventilation: especially for small rooms with people or stored goods.
- Pest-proofing: rodents turn cheap rooms into recurring repairs.
The “staged build” strategy that keeps it affordable
Homesteaders often win with a phased approach:
- Base + shell (dry, level, weather-tight)
- Insulation + basic interior finish
- Power strategy (grid tie or off-grid)
- Heating/cooling
- Optional upgrades later (built-ins, extra windows, nicer siding)
You get a usable room sooner, and you spread costs across seasons—ideal for homestead cash flow.
Expert quote format:
“As many off-grid educators note, ‘Energy independence is usually cheaper in stages than in one big install,’ and resources like Energy Revolution System can help you think through how to scale power as your space expands.”
(General benefit description only: it’s aimed at helping you plan energy resilience so your new room doesn’t force rushed, expensive electrical work.)
Making the room useful year-round with simple systems
A “cheap room” that sits unused eight months of the year isn’t actually cheap. The goal is livable comfort without turning the project into a full permitted dwelling.
Heating without overcomplicating the build
Depending on your climate and safety requirements, common approaches include:
- efficient electric space heating (with safe wiring and clearances),
- insulated curtains or thermal partitions,
- passive solar gain (window placement, dark thermal mass),
- mini wood heat only if you can meet safe clearances, venting, and local rules.
If you rely on any combustion heat, prioritize CO safety and ventilation.
Cooling and ventilation
Small rooms overheat quickly. Use:
- a vent fan or passive vents,
- shaded awnings,
- reflective roof coating (where appropriate),
- cross ventilation windows.
Water planning for an extra room
Even if the room is not plumbed, it often increases water needs (more time outside, more gardening, more people). Storing and treating water is one of the easiest resilience upgrades that supports any expansion.
💡 Recommended Solution: Water Freedom System
Best for: boosting emergency and day-to-day water readiness as your homestead grows
Why it works:
- Encourages practical water storage habits
- Supports contingency planning for outages and drought
- Pairs well with a new workspace/guest space where more water is used
Comparison/alternative: While some people default to scattered jugs and random barrels, an option like SmartWaterBox can be a more organized alternative for those who want a cleaner “system” approach to storage and access.
Food storage and pantry overflow
Extra rooms often become:
- canning staging space,
- dry goods overflow,
- seed storage,
- dehydration/fermentation corner (with ventilation).
If that’s your plan, temperature stability and pest-proofing are more important than fancy finishes.
Case study/example (general outcome):
For instance, homesteaders who tighten up their pantry workflow after adding a dedicated storage room often report less food waste and fewer “emergency runs” within a season—especially when paired with shelf-stable planning resources like The Lost SuperFoods.
Avoiding zoning and neighbor issues without living in fear
Even on acreage, the biggest “permit nightmare” is sometimes social: a complaint triggers scrutiny. You can reduce that risk with a few common-sense moves.
Place the room where it looks intentional
A tidy, well-sited structure reads as a normal homestead building, not a questionable dwelling. Use:
- clean skirting (if applicable),
- neat pathways,
- simple landscaping,
- proper drainage.
Keep sanitation and waste handling unimpeachable
Nothing invites conflict like odors or runoff. If you use alternative sanitation, keep it:
- legal where you live,
- properly sited away from wells/waterways,
- maintained with absolute consistency.
Don’t overload access roads or create hazards
Delivery trucks, frequent visitors, and parking can raise eyebrows in rural neighborhoods. If the room is for family use, keep traffic low and safe.
Know when to pull a permit on purpose
Sometimes the cheapest long-term decision is to permit properly—especially if:
- you’re increasing home value and want it appraised,
- you’re adding plumbing,
- you want insurance clarity,
- you’re in a stricter county.
Permits can be frustrating, but “unpermitted and discovered later” is often worse.
Expert quote format:
“As many preparedness instructors note, ‘Resilience is about decreasing points of failure,’ and guides like URBAN Survival Code are often used to help families think through risk reduction—so your homestead expansion doesn’t introduce new weak links.”
(General benefit framing: it’s positioned for planning and readiness, not as a construction manual.)
Tools and resources that support a cheap, low-drama homestead expansion
A room addition affects more than square footage. It changes your emergency planning, daily systems, and how you handle outages or supply gaps.
Practical resource list for self-sufficient homesteaders
- Water readiness: Water Freedom System or SmartWaterBox
- Food planning and shelf-stable ideas: The Lost SuperFoods
- Power resilience for staged builds: Ultimate OFF-GRID Generator or Energy Revolution System
When extra space changes medical preparedness
An extra room can become a care space during illness, injury, or bad weather. Knowing what to do when professional help is delayed is part of homestead realism.
Problem-solution bridge: Building more space is great—until you need to use it in a crisis. If you’re worried about handling common medical issues when you’re rural, a general education resource can help you feel less exposed.
💡 Recommended Solution: Home Doctor
Best for: rural households who want practical home-health preparedness knowledge
Why it works:
- Encourages readiness when help is far away
- Supports family planning for short-term care situations
- Complements the reality of expanding homestead living space
Conclusion
The cheapest way to add a room to your homestead without a permit nightmare is usually to avoid a traditional attached addition and instead build a detached, simple, non-plumbed, reversible room that stays within common accessory-structure rules—while still prioritizing safety, dryness, insulation, and responsible siting.
If you keep the main house structure untouched, minimize permanent foundations, delay plumbing, and place the room thoughtfully around septic, wells, and setbacks, you can add meaningful square footage fast—without turning your project into a months-long approval ordeal. Build it in stages, document it, and make it genuinely useful year-round so your “cheap room” stays cheap long-term.
FAQ
How can the cheapest way to add a room to your homestead avoid permits completely?
It depends on your county. Many areas allow small detached accessory structures under a certain size with minimal or no building permits, especially when they’re not plumbed and not treated as a dwelling. The safest approach is to confirm local size thresholds, setbacks, and use limits before building.
What room addition triggers the biggest permit nightmare?
Attached additions that change the home’s structure (new foundation tie-ins, roofline changes, load-bearing wall modifications) and projects that add plumbing (bathrooms/kitchens) commonly trigger the most review, inspections, and delays.
Is a shed conversion the cheapest way to add a room to a homestead?
Often, yes—especially if it’s detached, small, and kept simple (no plumbing, straightforward electrical, good insulation). The key is building it to be dry, ventilated, and safe so you don’t pay for repairs later.
How do I add power to a backyard room without making it expensive?
The lowest-cost approach is often reducing power needs first (efficient lighting, minimal loads), then choosing a safe method—either a properly installed circuit/trench solution or a staged off-grid approach. Many people explore options like Ultimate OFF-GRID Generator to support a simpler setup when trenching and panel upgrades are costly.
Can I add a bedroom to my homestead without permits?
A “bedroom” label can trigger egress, smoke alarm, and habitability requirements, and sometimes affects zoning classification. A safer permit-light path is creating a flex room (office/studio/guest space) that meets basic safety standards and complies with local rules—then formalizing later if needed.
Rank Math SEO Block
SEO Title (≤60 chars): Cheapest Way to Add a Homestead Room Without Permits
Meta Description (≤160 chars): Learn the cheapest way to add a room to your homestead without a permit nightmare using permit-light, low-cost, code-smart options.
URL Slug: cheapest-way-add-room-homestead-without-permit-nightmare
Focus Keyword: The Cheapest Way to Add a Room to Your Homestead Without a Permit Nightmare
Suggested Schema Type: FAQ