
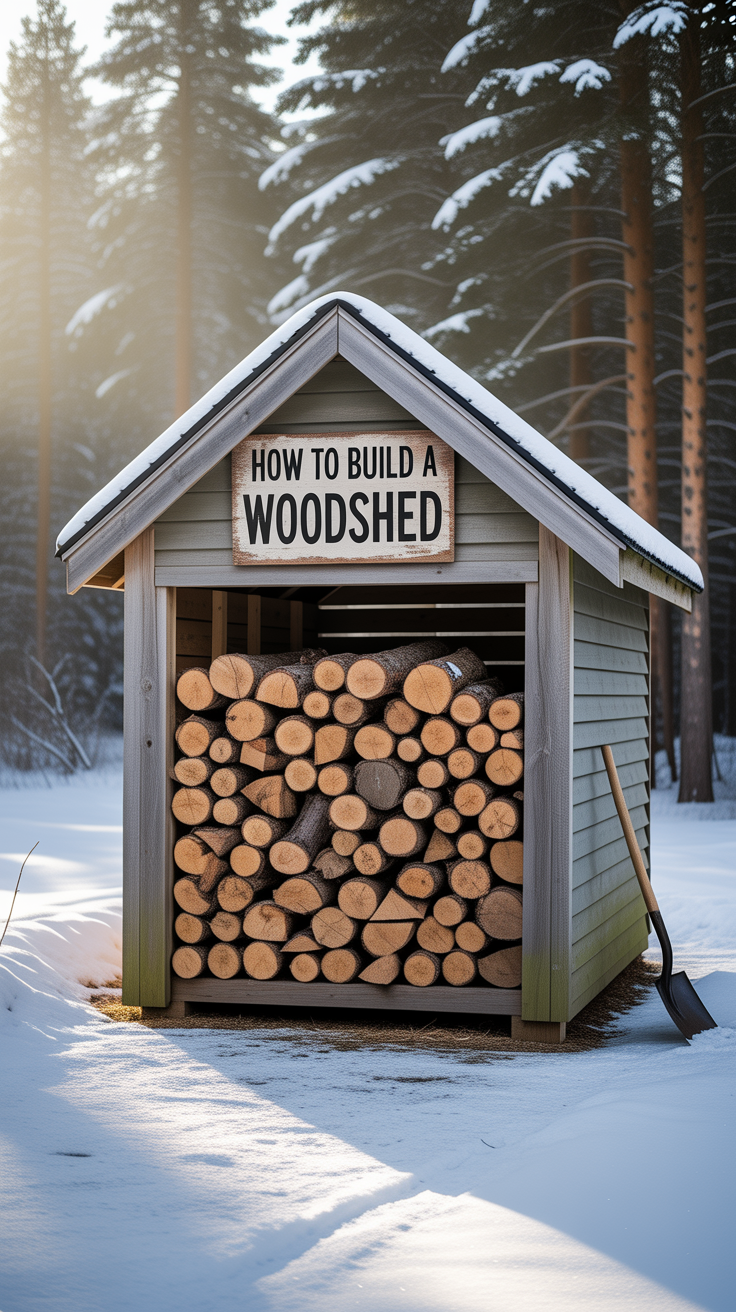
How to Build a Woodshed That Keeps Firewood Dry All Winter
Keeping firewood dry is the difference between easy, clean-burning fires and a season of smoke, creosote, and frustration. If you’ve been searching for how to build a woodshed that keeps firewood dry all winter, the real secret isn’t a complicated design—it’s getting the fundamentals right: site placement, airflow, roof overhang, ground separation, and smart stacking. Done well, a woodshed doesn’t just “store” wood; it actively helps your firewood finish seasoning and stay protected through snow, wind-driven rain, and freeze/thaw cycles.
This guide walks you through a highly practical, buildable woodshed design using common materials and straightforward carpentry. You’ll learn what to build, where to put it, what to avoid, and how to tailor the shed for your climate and the amount of wood you burn.
Introduction
A good woodshed is a weather-management system. It sheds precipitation with a roof, blocks the worst wind, and still provides enough ventilation that your stacks don’t trap moisture. Too many firewood shelters fail because they’re built like mini barns—tight walls, minimal airflow, wood stacked directly on damp ground, and a roof that doesn’t cover the face of the pile. The result is moldy, punky rounds and wood that hisses instead of ignites.
When you build with drying in mind—elevate the wood, keep the sides open, orient the opening away from prevailing storms, and extend the roofline—you create a stable dry microclimate all winter.
Many homesteaders pair a well-built woodshed with a broader resilience plan. For example, having independent water options is as important as dry heat in winter—tools like Water Freedom System and SmartWaterBox are often used as part of a “heat + water” preparedness baseline while you improve your property’s infrastructure.
Site Selection and Layout That Keeps Wood Dry
A woodshed can be perfectly built and still fail if it’s placed in the wrong spot. Moisture comes from above (precipitation), from the sides (wind-driven rain and drifting snow), and from below (ground evaporation and runoff). The right location reduces all three.
Choose high, well-drained ground
Pick a spot that doesn’t puddle, doesn’t sit in a swale, and doesn’t collect snowmelt. If you can’t avoid lower ground, plan to build up a base with gravel and elevate the wood higher than you think you need.
Tip: Walk your property during heavy rain or spring thaw. The “obvious” flat spot is often the wettest.
Use wind and sun to your advantage
- Sun exposure: South or southeast exposure helps melt snow and reduces surface moisture.
- Prevailing winds: Wind is good for drying but bad when it carries rain/snow into the shed. Orient the open face away from prevailing storm winds, while keeping enough cross-ventilation on the sides.
A common layout is open front, partially backed (or fully backed), and open sides with slats or gaps. If your storms come from the west, face the shed east or southeast.
Keep access practical in winter
Don’t tuck the shed so far away that you dread walking to it in ice and snow. You want a straight path from driveway/house to shed, with room to wheel a cart or bring in a wheelbarrow. Also ensure roof dripline won’t dump water into a walkway that will later freeze.
Size based on how much you burn
Firewood volume is usually measured in cords:
- 1 cord = 128 cubic feet (4′ x 4′ x 8′)
- Many households burn 2–6 cords per season depending on climate and stove efficiency.
A practical “starter” woodshed size is 8′ long x 4′ deep, which holds about one cord when stacked 4′ high (depending on stacking style and void space). If you burn more, scale length in 4′ or 8′ increments.
Rule of thumb: It’s better to build longer than deeper. Deeper sheds reduce airflow through the pile, especially if you stack two rows.
Design Principles That Prevent Moisture Buildup
If you want firewood dry all winter, design the shed so it doesn’t trap humidity. The goal is protection plus ventilation—not sealing.
Roof geometry matters more than walls
A roof with good slope and generous overhang prevents the most common problem: wet front faces. Include:
- Minimum 3:12 pitch, preferably 4:12+ where snow loads are common
- Front overhang 12–24 inches (more is often better)
- Side overhang 6–12 inches
Metal roofing is excellent for shedding snow and rain quickly, but shingles work if installed correctly. Add drip edge so water doesn’t run back onto fascia and down the posts.
Elevate the firewood off the ground
Ground moisture is relentless. Even in freezing temps, the ground “breathes” moisture up into your stack. Use:
- Pressure-treated runners
- Concrete blocks + timbers
- Gravel pad + pallets (better than nothing, but pallets can rot)
Aim for at least 6 inches of clearance, 12 inches if your winters are wet or you get drifting snow.
Build for airflow first
Airflow is what keeps condensation from lingering:
- Leave side walls open or use spaced boards (1–2″ gaps)
- Consider a back wall to block storms, but avoid sealing tight
- Leave the top of stacks below the roofline to prevent trapping moisture
As a general principle: if you can smell “musty wood,” you don’t have enough ventilation.
Add a vapor break under the base
If you’re doing a gravel pad, consider landscape fabric beneath the gravel to separate soil and keep the pad draining over time. This isn’t about waterproofing; it’s about keeping the base stable and reducing muddy conditions that splash onto the bottom row of splits.
Materials, Tools, and a Simple Build Plan
This guide assumes a straightforward post-and-beam woodshed that’s easy to scale. You can build it as a lean-to (against a barn/garage) or freestanding. Freestanding is best for airflow and pest management.
Common materials (adjust to your size)
- 4×4 or 6×6 posts (pressure-treated for ground contact)
- 2×6 or 2×8 for beams/rafters
- 2×4 for bracing and slats
- Roofing (metal panels or shingles + sheathing)
- Gravel (for pad)
- Concrete (for footings) or precast deck blocks (light duty)
- Exterior screws/structural fasteners
Tools
- Post hole digger or auger
- Level, tape measure, framing square
- Circular saw or miter saw
- Drill/driver and impact driver
- Ladder and roofing tools
Foundation options (ranked)
- Concrete footings below frost line (best for snow/wind and long-term squareness)
- Concrete piers/deck blocks on compacted gravel (good for small sheds, easier)
- Skids on gravel pad (fastest, but can shift; best for temporary or movable sheds)
If you live in a high-wind area, don’t skip anchoring. A woodshed loaded with several cords is heavy, but the roof can still catch wind.
Step-by-Step Build That Works in Real Winter Weather
A woodshed that keeps firewood dry all winter is built in layers: drainage first, structure second, roof third, airflow and finishing last.
Prepare the base
- Mark your footprint (e.g., 8′ x 4′ or 12′ x 4′).
- Remove sod/topsoil and level the area.
- Lay landscape fabric (optional but helpful).
- Add 3–6 inches of compacted gravel.
- Plan your wood elevation:
- Set concrete blocks and 4×4 runners, or
- Build a simple joist base deck, leaving gaps for airflow.
Set posts and frame the structure
- Place posts at corners; add mid-span posts if you’re building longer than 10–12 feet.
- The front posts should be taller than the back for roof slope.
- Install beams across the tops of posts and add diagonal bracing.
Dryness detail: A rigid frame keeps your roof straight. A sagging roof reduces overhang effectiveness, especially where snow slides and dumps near the opening.
Build the roof with generous overhang
- Install rafters and purlins (for metal roof) or sheathing (for shingles).
- Add underlayment where needed.
- Install roofing with attention to drip edges and fastening patterns.
In snow country, a metal roof sheds snow fast—great for keeping wood dry, but be mindful of snow “avalanches” near entrances and pathways.
Add partial walls or slats (optional but strategic)
- Back wall: Good for blocking prevailing storm direction.
- Side slats: Great for stopping drifting snow while still ventilating.
- Keep gaps: 1–2 inches is typical for spaced siding.
Avoid fully enclosed walls unless you add vents and can keep the interior from becoming a moisture trap.
Build a front lip or splash guard (optional)
A simple 2×6 placed as a low front rail can keep the stack stable and reduce splashback. Don’t make it a solid wall—air must enter at the bottom too.
Stacking, Seasoning, and Winter Use Tips
Even the best woodshed can’t compensate for green wood. A shed’s main job is keeping already-seasoned wood dry and helping “almost ready” wood finish drying with airflow.
Seasoning basics
- Most species need 6–18 months to season depending on climate and split size.
- Split wood dries faster than rounds.
- Top-covering stacks outdoors can work, but winter wind-driven precipitation often soaks sides. A woodshed offers far more consistent protection.
Best stacking practices inside the shed
- Stack bark-side down or mixed; the bigger factor is airflow.
- Leave a small gap between the stack and any back wall (2–4 inches).
- Don’t stack to the roof—leave headspace to prevent stagnant pockets.
- Rotate: burn the oldest/driest wood first.
Keep snow and rain out without sealing airflow
If you frequently get drifting snow into the open face:
- Add a removable tarp or curtain only during storms, and open it afterward.
- Add side slats or a partial “wind wing” on the storm side.
- Increase roof overhang and consider a slightly deeper footprint (but don’t go too deep).
Pest and safety considerations
- Keep the woodshed a reasonable distance from the house to limit insects and rodents migrating indoors.
- Avoid storing kindling and cardboard directly on the ground.
- Keep stacks stable—toppling wood is a real injury risk.
As many off-grid builders emphasize: “Dry heat is reliable heat.” A woodshed is a small project with big winter payoff, especially when paired with broader preparedness habits like food storage and backup utilities.
Tools and Resources for a More Self-Sufficient Winter
Building a woodshed solves the immediate firewood problem, but winter resilience is usually a bundle of systems: heat, water, food, and contingency planning.
💡 Recommended Solution: The Self-Sufficient Backyard
Best for: planning homestead-style systems around your home
Why it works:
- Helps prioritize projects that support daily resilience
- Encourages practical, step-by-step upgrades (like storage, growing, and seasonal planning)
- Pairs well with learning-based DIY builds such as sheds and shelters
Many professionals rely on tools like Home Doctor to streamline household readiness when conditions are harsh and services are delayed—especially in winter, when minor issues can snowball quickly.
While a woodshed protects fuel, water is the other winter essential. If freezing weather or outages are a concern, SmartWaterBox is often considered by homeowners who want a more organized way to think about water storage and availability when infrastructure is strained.
“As preparedness educators often note, ‘Water Freedom System has become a go-to solution for households that want a clearer plan for securing water because it supports better self-reliance habits.’”
(Use these resources as educational starting points—your best setup depends on climate, space, and household needs.)
Common Mistakes That Lead to Wet Wood (and How to Fix Them)
Most “wet wood” issues aren’t mysterious. They come from a few repeatable mistakes.
Mistake: building too deep with no airflow
If you stack two rows deep in a 6–8′ deep shed, the center stays damp. Fix it by:
- Keeping depth around 4 feet for single-row stacking, or
- Leaving a central airflow gap, or
- Using spaced slats and a high roofline for ventilation.
Mistake: no overhang on the open face
Rain doesn’t need to “enter” the shed to wet wood—splash and wind-driven mist will do it. Fix:
- Increase overhang to 18–24 inches
- Add a small front header and gutter/drip edge if appropriate
Mistake: wood sitting on dirt, mud, or low pallets
That bottom row becomes a moisture sponge. Fix:
- Add gravel and elevate on runners/blocks
- Replace rotted pallets with treated skids or a simple deck base
Mistake: walls sealed like a garage
A tight shed becomes humid, especially when temperatures swing. Fix:
- Add vents high and low
- Replace solid walls with slats or leave openings under eaves
Mistake: storing unseasoned wood and expecting magic
Wet wood stays wet. Fix:
- Split smaller
- Season longer
- Keep a rotation system so you’re never forced to burn green wood in January
Conclusion
Learning how to build a woodshed that keeps firewood dry all winter comes down to designing for weather and airflow at the same time. Put the shed on high, well-drained ground, elevate your stacks, orient the opening away from storm winds, and build a roof with enough slope and overhang to protect the face of the pile. Keep the structure rigid, the sides ventilated, and your stacking disciplined, and you’ll have wood that lights easily even after weeks of snow and freezing rain.
A woodshed is one of the most satisfying DIY projects because it pays you back every single cold day—less hassle, cleaner burns, and dependable heat when you need it most.
FAQ
How big should a woodshed be to keep firewood dry all winter?
Size it for your annual burn rate. One cord is 4′ x 4′ x 8′ (128 cu ft). A common shed size is 8′ long x 4′ deep for about one cord, and you can extend length to store 2–4 cords while keeping airflow strong.
Should a woodshed have a floor to keep wood dry?
A full floor isn’t required, but elevation is. The key is keeping wood off soil and away from splashback. A gravel pad with concrete blocks and treated runners works well. If you build a wood floor, leave gaps for drainage and airflow.
What is the best roof overhang for keeping firewood dry?
For a shed with an open front, aim for 12–24 inches of front overhang. Larger overhangs reduce wind-driven rain and splash, which are the main reasons the front row gets wet.
Is it better to fully enclose a woodshed in winter?
Usually no. Fully enclosed sheds often trap humidity unless they’re carefully vented. For most climates, a roof plus partially open sides (or slats) and a storm-facing back wall is the best combination for dry wood.
Where should you place a woodshed for the driest firewood?
Place it on high, well-draining ground with sun exposure, and orient the opening away from prevailing storm winds. Also keep access practical so you can retrieve wood safely during snow and ice.
Rank Math SEO Block
SEO Title: Build a Woodshed That Keeps Firewood Dry All Winter
Meta Description: Learn how to build a woodshed that keeps firewood dry all winter with smart site choice, airflow design, roof overhangs, and stacking tips.
URL Slug: build-woodshed-keep-firewood-dry-all-winter
Focus Keyword: How to Build a Woodshed That Keeps Firewood Dry All Winter
Suggested Schema Type: HowTo + FAQ