
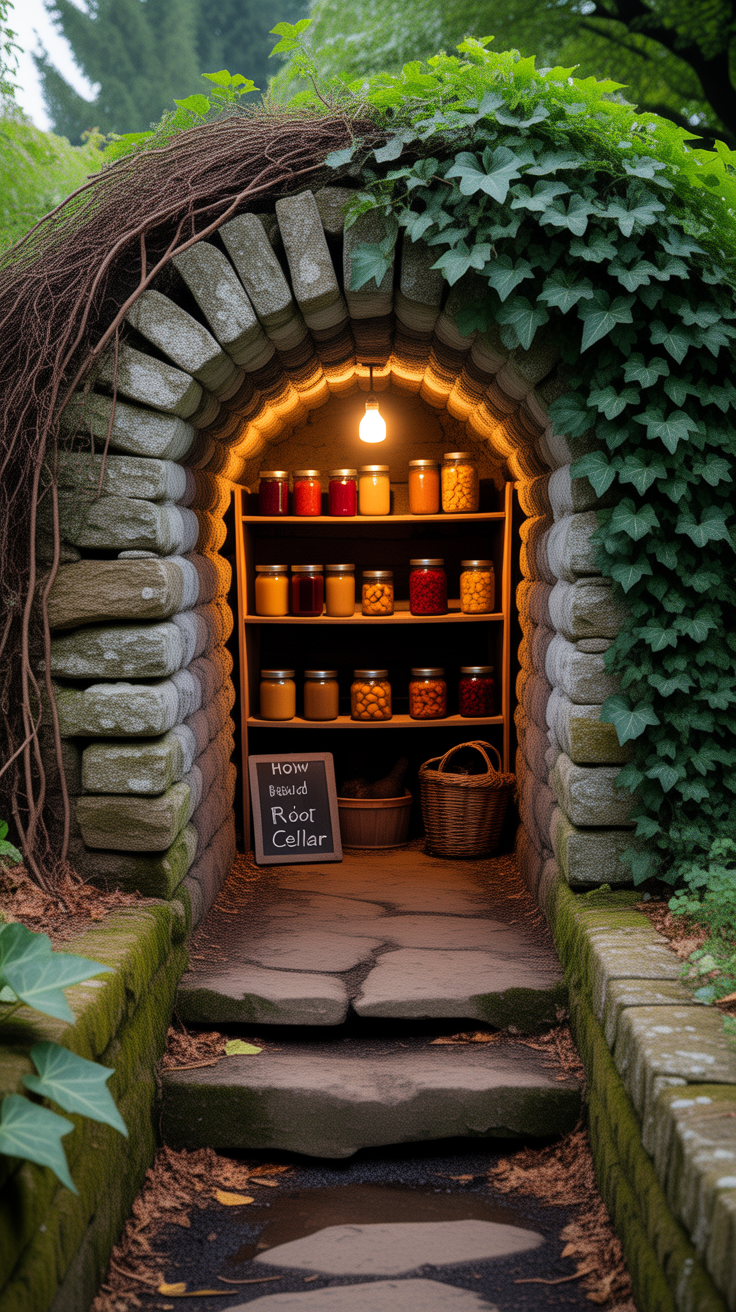
How to Build a Root Cellar in Your Backyard (Even on a Small Lot)
Learning how to build a root cellar in your backyard (even on a small lot) is one of the most practical upgrades you can make for year-round food storage without relying entirely on electricity. A well-designed root cellar stabilizes temperature and humidity naturally, helping potatoes, carrots, apples, winter squash, and home-canned goods last longer with less waste. And the good news: you don’t need acreage or a hillside to make it work—you need smart layout, careful drainage, and the right ventilation strategy.
Many people assume a cellar is only for rural properties, but small-lot versions can fit beside a shed, under a porch, tucked into a berm, or even built as a compact “capsule” partially below grade. The key is understanding what a root cellar actually does: it uses earth insulation, controlled airflow, and moisture management to create a cool, dark, stable microclimate.
“As many food preservation educators note, ‘The most reliable storage isn’t the fanciest—it’s the storage you can keep cool, dry enough, and consistent all season.’” That’s exactly what a backyard root cellar aims to deliver.
If your bigger goal is overall preparedness—food, water, and household resilience—pairing a cellar build with a broader self-sufficiency plan can help you prioritize what to store and how much. Many homesteaders also keep a reference like The Self-Sufficient Backyard to map out storage, gardens, and systems in a way that fits smaller spaces.
Root cellar fundamentals for small yards
A root cellar is essentially a passive storage room that aims for two main targets:
- Temperature: typically 32–50°F (0–10°C), depending on what you’re storing
- Relative humidity: often 80–95% for many root crops (with exceptions)
On a small lot, your constraints are different than a farmhouse property. You’re managing:
- Limited digging area (and possibly utility lines)
- Higher water risks due to runoff from roofs, driveways, and neighboring lots
- Neighbors and permits if your municipality regulates accessory structures
- Access and convenience because you’ll use it more if it’s easy to reach
What a root cellar should store (and what it shouldn’t)
Great candidates:
- Potatoes (dark, cool)
- Carrots, beets, turnips (cool, humid)
- Apples and pears (cool, more humid but separated from potatoes)
- Cabbage, onions (cooler, but onions prefer drier conditions)
- Winter squash (cooler, but not as cold; moderate humidity)
- Canned goods (cool, stable temps—avoid freezing)
Avoid:
- Anything that needs freezing
- Most fresh greens (too cold/humid; they rot easily)
- Foods you can’t isolate from strong ethylene production (apples/pears can accelerate sprouting/aging in other produce)
The two “zones” that make small cellars work best
Even in a compact design, think in zones:
- Cool + humid zone: roots like carrots, beets, potatoes
- Cool + drier zone: onions, garlic, some squash, jars
You can create zones by placing shelves and bins strategically and by controlling airflow with adjustable vents.
Choosing the best root cellar location on a small lot
Location is half the project. If you get it right, you’ll fight fewer battles with water, heat, and mold.
Ideal placement goals
- North or northeast side of your yard/house (least solar heat gain)
- Partially below grade (earth insulation is your friend)
- Away from roof runoff and low spots where water collects
- Close enough to access in winter without trekking through deep snow
Check for utilities and setbacks
Before any digging, contact your local utility locating service. On small lots, lines are often closer together than you expect. Also check:
- Property setbacks
- Easements
- Required distance from foundations (to avoid undermining footings)
Soil and water considerations
Soil type matters:
- Sandy/gravelly soil: drains well, easier to manage water
- Clay: holds water, higher hydrostatic pressure risk, needs better drainage
If you suspect high water table or seasonal saturation, you’ll likely want a shallower build or an above-grade/bermed design rather than a deep pit.
Problem-Solution Bridge: Struggling with water reliability for your home systems while you plan food storage? Many preparedness-minded homeowners also integrate rain capture or emergency storage so cellar goods aren’t your only backup. Tools like Water Freedom System are often used as a starting point for thinking through household water resilience in a space-efficient way.
Smart small-lot location options
- Bermed mini-cellar beside a shed (partially buried, soil piled around)
- Under-porch cellar (if structure and code allow)
- Hillside-style “false hill” (create a berm even if you don’t have a slope)
- Garage-adjacent bunker (only if you can keep fumes out and moisture managed)
Root cellar design options that fit tight spaces
The best small-lot root cellar is the one you can build safely, keep dry, and ventilate properly. Here are compact approaches that don’t require a massive excavation.
Underground pit cellar (compact, high performance)
Pros: excellent temperature stability, small footprint
Cons: higher water risk, more digging and structural considerations
A very small pit cellar can be as compact as a walk-in closet size, but you must plan:
- Wall strength (soil pressure)
- Waterproofing
- Drainage (perimeter drain + gravel)
Bermed or earth-sheltered cellar (best for wet areas)
Pros: less depth needed, easier drainage, still cool
Cons: needs enough yard space for a berm
This design uses soil piled around the structure to mimic a hillside. Great when water table is high.
“Hybrid” cellar: partially below grade + insulated above grade
Pros: minimal digging, flexible placement
Cons: requires excellent insulation and shading
Use rigid foam insulation (rated for below-grade use) and focus on air sealing and vent control.
Prefab-style concept (structure + soil cover)
Some homeowners use concrete culvert-style concepts or small concrete chambers. If you go this route, the biggest risks are:
- Condensation
- Venting
- Water intrusion at seams
Build for storage workflow, not just survival aesthetics
Small spaces need efficient storage:
- Narrow shelves on both sides
- A center walkway
- Stackable bins
- A spot for a thermometer/hygrometer
“As building science educators note, ‘Moisture management is design, not luck.’” For small cellars, that means you plan drainage and ventilation from day one—not after the first musty season.
Excavation, structure, and insulation basics
A backyard root cellar doesn’t need to be complicated, but it does need to be structurally sound.
Depth and frost line considerations
Being below the frost line helps stabilize temps, but small-lot builds often compromise with partial depth. Your goal is stable cool conditions, not necessarily deep subterranean construction.
If winters are extreme:
- Increase insulation on the roof/door
- Reduce venting in deep cold snaps to prevent freezing inside
Walls, roof, and floor (safe approaches)
Common wall systems:
- Poured concrete (strongest, most permanent)
- Concrete block with reinforced cores
- Pressure-treated wood is generally not ideal for long-term below-grade walls unless engineered and protected properly
Roof options:
- Reinforced concrete slab
- Heavy timber framing with waterproof membrane and soil cover (engineering matters)
Floor options:
- Compacted gravel floor (higher humidity, good for root crops)
- Concrete slab (cleaner, lower humidity unless you add moisture)
For many gardeners, a gravel floor + good ventilation strikes a practical balance for root storage.
Waterproofing and drainage: the non-negotiables
If you remember only one thing: water ruins root cellars faster than anything.
Plan:
- Slope the surrounding grade away from the cellar
- Install a gravel base
- Add perimeter drain (French drain) daylighted away from the structure where possible
- Use waterproof membrane on exterior walls
- Add gutter extensions if nearby roof runoff exists
Insulating for temperature stability
The earth does a lot of the insulating, but small builds need extra help:
- Insulate the roof/door aggressively
- Insulate exposed walls (especially above grade)
- Avoid interior vapor barriers that trap moisture incorrectly—focus on exterior waterproofing and controlled airflow
Ventilation and humidity control for long-lasting storage
Ventilation is where most DIY root cellars succeed or fail. You’re trying to balance:
- Fresh air exchange
- Temperature stability
- Humidity control
- Odor/mold prevention
The classic two-vent system (simple and effective)
Use:
- Intake vent low (brings in cooler air near floor)
- Exhaust vent high (lets warmer air rise out)
Add adjustable dampers so you can tune the airflow seasonally.
Rule of thumb: If the cellar is too warm, increase airflow at night. If it’s freezing, restrict airflow and add insulation to the door/vents.
Monitoring: what to measure
At minimum:
- Thermometer
- Hygrometer
Track patterns for a few weeks after build-out. You’ll learn when the cellar stabilizes, and you’ll catch condensation issues early.
Humidity tools (low-tech first)
For more humidity:
- Damp sand in bins
- Wet burlap over crates (avoid direct contact with produce)
- A gravel floor, occasionally misted lightly
For less humidity:
- Improve airflow
- Add a small section with drier shelving
- Store onions/garlic in mesh bags away from damp bins
Produce management that prevents spoilage
- Don’t store damaged produce
- Cure onions and squash before storing
- Keep apples separated (ethylene gas can sprout potatoes faster)
- Rotate: “first in, first out”
- Clean shelves seasonally with mild vinegar solution and let dry
Comparison/Alternative: While a refrigerator is easy, it’s also a single point of failure during outages. A root cellar offers quiet, passive stability—especially when combined with a broader plan for water, energy, and pantry strategy.
Building the entrance, door, and interior storage system
On small lots, your entrance design can make the cellar either a joy to use or an awkward chore.
Entrance placement and drainage
The entrance should be:
- Slightly elevated relative to surrounding grade
- Protected by an awning, overhang, or small “roof” to limit rain entry
- Not aimed directly at prevailing winds (helps control airflow)
If you can, include a short stairwell with drainage gravel at the bottom and a drain path out—think “mini bulkhead.”
Door design: the weak link you must strengthen
A root cellar door should be:
- Insulated
- Weather-stripped
- Tight-fitting to deter rodents and insects
- Easy to open in winter
Many DIYers use a double-door concept:
- Outer weather door
- Inner insulated door (creates an airlock effect)
Shelving and bins for compact spaces
For an 8×10 or smaller cellar, prioritize:
- 12″–16″ deep shelves (deeper wastes space and reduces airflow)
- Slatted shelves for circulation
- Labeled bins (wooden crates, plastic totes with ventilation holes, or dedicated root bins)
- A “quarantine” spot for questionable produce
Pest-proofing (quiet but essential)
- Hardware cloth on vent openings
- Tight thresholds on doors
- Keep produce off the floor except for dedicated bins
- Remove fallen scraps promptly
Resource mindset: The goal isn’t just to build a chamber—it’s to create a system you can maintain for years with minimal frustration.
For people who want to expand beyond one project and create an integrated food plan—garden yields, seasonal storage, shelf-stable recipes—resources like The Lost SuperFoods can help you think beyond “where to store it” into “what foods store best and how to use them.”
Seasonal operation, maintenance, and troubleshooting
A root cellar is not “set-and-forget.” It’s seasonal infrastructure. The good news is that the maintenance is simple once you know what to watch.
Fall setup (prime stocking season)
- Clean shelves and bins
- Check vents for obstructions
- Confirm door seals
- Pre-cool the cellar by ventilating at night
- Stock only cured, undamaged produce
Winter management
- Watch for freezing during cold snaps
- Reduce venting
- Add temporary insulation to door/vent pipes
- Check humidity weekly
- Rotate produce and remove any soft items immediately
Spring transition
As outdoor temps rise:
- Vent at night to keep the cellar cool
- Expect stored crops to change behavior (sprouting increases)
- Move remaining produce to the coolest zones
Common problems and fixes
Problem: Condensation on ceiling/walls
Fix: Increase airflow strategically, improve insulation above, reduce warm air infiltration, avoid storing warm produce.
Problem: Musty smell or mold
Fix: Remove spoiled items, clean with vinegar solution, improve ventilation, reduce overcrowding.
Problem: Cellar too warm
Fix: Night venting, add shading, increase earth cover/insulation, ensure intake/exhaust are properly placed.
Problem: Cellar too dry
Fix: Add damp sand bins, reduce airflow, store produce in perforated liners.
Case Study/Example (general): Many small-lot gardeners find that after the first season of tracking temperature and humidity weekly, they can “dial in” vent settings so the cellar stays stable with only minor adjustments during weather swings.
Tools, resources, and preparedness add-ons that pair well with a root cellar
A root cellar is strongest when it’s part of a larger home resilience setup—especially on small lots where space efficiency matters.
Tools & Resources (space-efficient planning)
💡 Recommended Solution: The Self-Sufficient Backyard
Best for: planning a small-lot homestead layout that includes storage
Why it works:
- Helps organize garden + storage goals into a realistic system
- Encourages step-by-step projects rather than overwhelm
- Useful for prioritizing what to grow for cellar storage
💡 Recommended Solution: The Lost SuperFoods
Best for: building a practical pantry around foods that store well
Why it works:
- Supports smarter long-term food choices
- Complements cellar storage with shelf-stable ideas
- Encourages variety beyond a few common crops
💡 Recommended Solution: SmartWaterBox
Best for: thinking through compact household water readiness
Why it works:
- Promotes a structured approach to water backup planning
- Helpful for small spaces where storage has to be efficient
- Pairs naturally with long-term food storage upgrades
“As emergency preparedness instructors often remind students, ‘Food storage is only as useful as your ability to cook it and hydrate safely.’” A cellar reduces food waste and extends harvest—water planning helps ensure the rest of the system holds up.
Contextual Inline Mention: Many homeowners who build a root cellar also look into broader outage planning—lighting, cooking, and keeping essentials running. If you’re mapping that out, Energy Revolution System is often referenced as a way to think through home energy resilience in a stepwise way.
Conclusion
Once you understand the fundamentals—earth insulation, drainage, ventilation, and smart storage zones—how to build a root cellar in your backyard (even on a small lot) becomes far more approachable. You don’t need a huge property to preserve more of your harvest. You need a dry site, a compact but solid structure, a two-vent airflow plan, and shelves/bins that keep food organized and breathable. Build it carefully, monitor it through one full season, and you’ll end up with a quiet, low-tech storage system that pays you back every winter.
FAQ
How deep should a backyard root cellar be on a small lot?
Deeper generally means more stable temperatures, but small-lot cellars often work well partially below grade with strong roof/door insulation and good vent control. Aim for the coolest, most shaded placement you can manage safely, and prioritize drainage.
How do I keep a root cellar from flooding?
Flood prevention comes from site selection and drainage: slope soil away, manage roof runoff, use a gravel base, waterproof exterior walls, and install a perimeter drain where feasible. Avoid low spots and clay-heavy areas unless you engineer extra drainage.
What is the best ventilation setup for a small root cellar?
A two-vent system (low intake + high exhaust) with adjustable dampers is the classic, effective approach. It lets you tune airflow for temperature and humidity as seasons change.
Can I build a root cellar above ground if my yard is too small or wet?
Yes. A bermed or earth-sheltered design can perform well by using soil piled around the structure for insulation. You’ll rely more on shading and insulation than depth, but it can still store many crops successfully.
How to build a root cellar in your backyard (even on a small lot) without it getting moldy?
Mold is usually caused by excess moisture with poor airflow. Fix it by improving ventilation, removing spoiled produce quickly, cleaning shelves seasonally, and ensuring you’re not bringing in wet, un-cured crops. Also confirm exterior waterproofing and drainage are doing their job.
RANK MATH SEO BLOCK
SEO Title: How to Build a Root Cellar in Your Backyard (Small Lot)
Meta Description: Learn how to build a root cellar in your backyard (even on a small lot) with smart design, drainage, ventilation, and storage tips.
URL Slug: build-root-cellar-backyard-small-lot
Focus Keyword: How to Build a Root Cellar in Your Backyard (Even on a Small Lot)
Suggested Schema Type: HowTo / FAQ