
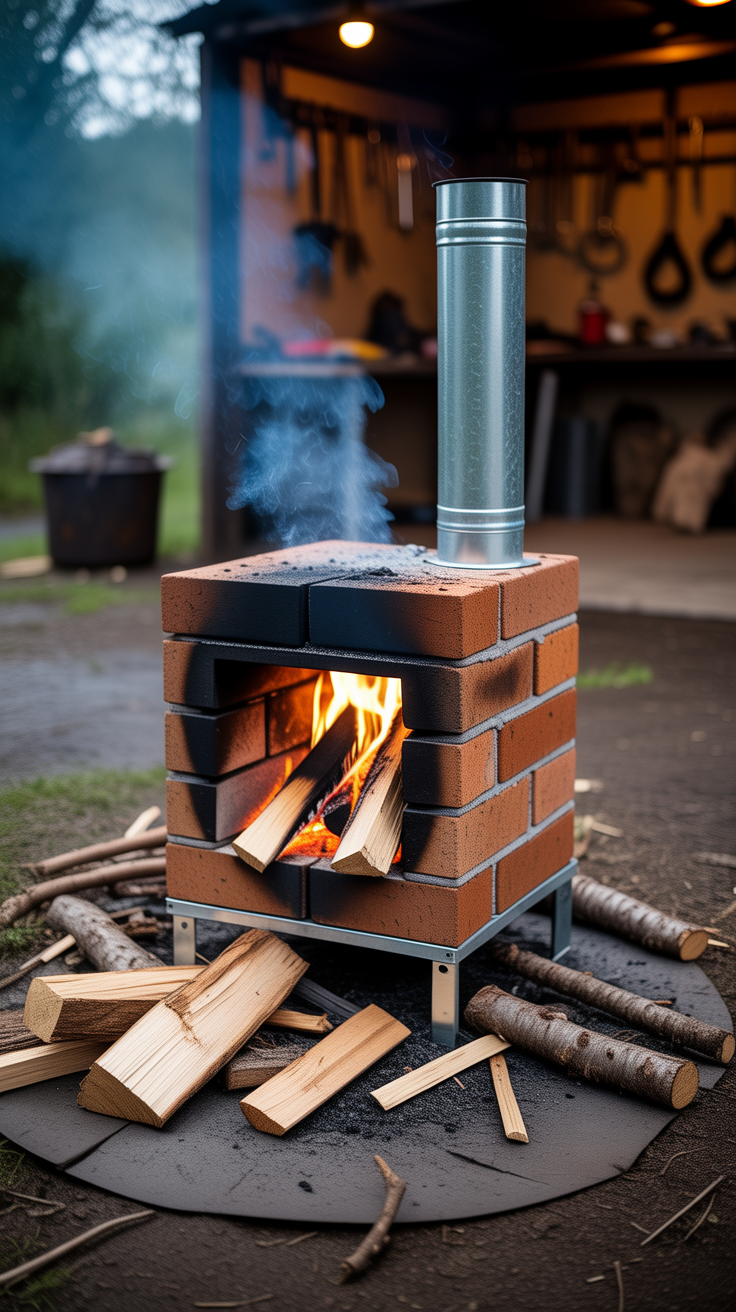
How to Build a Rocket Stove That Burns Almost Any Wood Waste
A well-built rocket stove is one of the simplest ways to turn “junk wood” into focused, high-heat cooking energy. If you’ve been searching for how to build a rocket stove that burns almost any wood waste, the goal is straightforward: create a clean-burning, insulated combustion tunnel that pulls in air, burns gases thoroughly, and directs heat exactly where you want it—without needing perfectly split hardwood.
In practical terms, a rocket stove lets you cook or boil water using twigs, offcuts, pallets (safely chosen), pine cones, small chips, and other dry scrap that would be useless in a conventional campfire. That said, “almost any wood waste” still has rules: moisture, coatings, and toxins matter. This guide walks you through a durable, proven design, the “why” behind the dimensions, safer fuel choices, and how to tune the stove so it runs hot and clean.
"In off-grid cooking and emergency preparedness circles, the rocket stove is favored because it achieves near-complete combustion with small-diameter fuel—turning inconvenient wood scraps into reliable heat."
— Common guidance echoed across field manuals and clean-burn stove design principles
Rocket stove basics and why it burns scraps so efficiently
A rocket stove isn’t magic—it’s controlled airflow and insulation. The classic design uses an L-shaped (or J-shaped) internal pathway made of a feed tube and a burn tunnel that rises into a heat riser. When hot gases rise up the riser, they create a strong draft. That draft pulls fresh air into the feed tube, feeding oxygen directly to the flame.
Key principles that make the “rocket” effect
- Insulated combustion core: Insulation keeps temperatures high, which helps burn smoke and volatile gases.
- Tight, smooth gas path: Leaks and rough transitions reduce draft and efficiency.
- Correct proportions: If the feed is too large or the riser too short, the stove smokes and stalls.
- Good pot support and gap: The hot gases need a clear path around the pot bottom—too tight and the stove chokes; too open and heat escapes.
What “almost any wood waste” really means
Rocket stoves excel at burning small, dry biomass:
- dry sticks, brush, twigs
- kiln-dried offcuts and untreated lumber scraps
- wood shavings (used carefully) and dry chips
- pine cones, dry seed pods, dry bark pieces
They do not safely burn:
- pressure-treated wood, painted wood, stained wood, MDF/particleboard/OSB
- plastics, rubber, foam, trash
- wet/green wood (it will smoke and tar up your stove)
If you use pallet wood, stick to heat-treated (HT) pallets and avoid MB (methyl bromide) markings. When in doubt, skip it.
Choosing the best rocket stove design for your needs
There are many rocket stove builds online, but most fall into two categories: quick-and-light and durable-and-insulated. Since you want a stove that reliably burns wood waste, durability and insulation usually win.
Common designs (and when to use them)
Tin-can rocket stove:
Fast and cheap, good for learning, but often short-lived and less efficient without proper insulation.
Cinder block rocket stove:
Great for backyard tests, heavy, and not very portable. Works well if you can build under a covered area and keep it dry.
Steel-body insulated rocket stove (recommended):
Best balance of performance and longevity. You build a steel shell and an insulated combustion core (often with perlite/vermiculite/clay or ceramic fiber).
Sizing: the simplest rule that keeps you out of trouble
For cooking, most people succeed with a 4-inch system (diameter equivalent). It’s large enough to draft well and small enough to be fuel-frugal.
General proportion guidance (for an L-tube style core):
- Feed tube height: ~1 to 1.5 × system diameter (often 4–6 inches above the burn tunnel entry)
- Burn tunnel length: ~2 to 3 × system diameter (often 8–12 inches)
- Heat riser height: ~4 to 6 × system diameter (often 16–24 inches)
You can scale up to 6-inch if you want more heat, but it consumes more fuel and becomes less “scrap-friendly” unless you have lots of it.
Materials, tools, and safe fuel selection
A rocket stove can be built with store-bought materials or scavenged parts, but safety matters. You’re combining fire, hot metal, and cookware—so stability and heat shielding aren’t optional.
Materials (durable build)
- Steel container for the body (e.g., a clean steel bucket, small steel drum, or welded box)
- Steel stovepipe section(s) for the burn tunnel and riser (heavy gauge lasts longer)
- Insulation: perlite or vermiculite + clay slip (common DIY), or other high-temp insulating fill
- Firebrick splits (optional but excellent for lining the burn tunnel)
- High-temp mortar or refractory cement (optional for sealing)
- Metal grate or rebar for pot stand
- Sheet metal for heat shield / skirt (optional but improves efficiency)
Tools
- Angle grinder with cutting disc (or metal snips for thinner steel)
- Drill with bits
- Measuring tape, marker, straight edge
- Gloves, eye protection, dust mask (especially with insulation materials)
Fuel rules (so your stove stays clean)
To burn “almost any wood waste” cleanly:
- prioritize dry fuel (snaps when broken, feels light)
- size it thin: pencil to thumb thickness is ideal
- avoid dusty fine sawdust piles (they smother airflow); mix small fines with sticks
- never burn chemical-treated or glued products
If you’re storing scrap fuel for emergencies, keep it dry and sorted by size, because the fastest way to make a rocket stove disappoint you is feeding it wet, chunky, inconsistent material.
Building the combustion core and feed system
The combustion core is the heart of the stove. Every performance problem—smoke, weak heat, constant relighting—usually traces back to poor core proportions, air leaks in the wrong places, or insufficient insulation.
Step 1: Set your system size
A 4-inch system is beginner-friendly. That means:
- burn tunnel cross-section roughly equivalent to a 4-inch round pipe area
- riser diameter around 4 inches
- transitions as smooth as you can make them
Step 2: Form the L-shaped path
You want:
- a vertical feed tube where you insert sticks
- a horizontal burn tunnel that leads to the riser
- a vertical heat riser where the hottest combustion happens
If you’re using stovepipe:
- cut a tee or fabricate a junction so the feed and burn tunnel meet cleanly
- keep inner corners as rounded/streamlined as possible to reduce turbulence
If you’re using firebrick:
- build a tight rectangular burn tunnel
- seal gaps with clay slip or refractory mortar
Step 3: Keep the feed tube “air-smart”
A common mistake is stuffing the feed tube full, choking airflow. You want:
- sticks to lean in, leaving gaps for air
- the burn tunnel entry unobstructed
Optional but helpful:
- a small “floor” lip or simple grate at the base so ash doesn’t pack the entry
Step 4: Seal the core where it matters
Don’t obsess over absolute airtightness everywhere—but do prevent uncontrolled air leaks in the burn tunnel/riser area. Leaks cool the flame and reduce draft. Use:
- clay slip/perlite mix as a sealant
- high-temp mortar for joints if available
Insulation, outer shell, and pot support that capture heat
Insulation is what turns a basic L-stove into a clean-burning rocket stove. The hotter the internal surfaces stay, the more completely the stove burns smoke.
Step 1: Build the outer body
Use a steel bucket/drum/box large enough to leave 1–3 inches of insulation gap around the riser and tunnel (more is usually better, within reason).
Cut openings for:
- feed tube access
- air gap/cleanout (optional)
- top exit where the riser meets the pot area
Step 2: Pack insulation correctly
A classic DIY insulation fill:
- perlite or vermiculite mixed with a clay slip (clay + water)
- aim for “damp crumbly,” not muddy; you want trapped air pockets
Pack evenly:
- around the burn tunnel
- around the riser
- avoid crushing perlite into dust (dust reduces insulating value)
Let it dry thoroughly before full-power burns. Start with small curing fires to drive off moisture.
Step 3: Build a stable pot stand
You need two things:
- pot stability
- the right “gap” for exhaust gases
A practical target gap between pot bottom and riser top is often around 1/2 inch to 1 inch (varies with stove size). Too small = choking and smoke. Too large = heat loss.
Simple options:
- three steel bolts as pot supports
- welded rebar cross
- a removable trivet
Step 4: Add a skirt (highly recommended)
A pot skirt is a metal shroud that forces hot gases to travel along the pot sides before exiting. That can significantly improve boil times and fuel efficiency.
Leave an exhaust gap at the skirt bottom so gases can exit without backpressure.
Lighting, operation, and tuning for clean burn
Once built, the stove’s behavior teaches you what it needs. Rocket stoves are responsive: tiny changes in fuel size, pot height, or air gaps can make a big difference.
Best lighting method for wood waste
Use a top-lit approach inside the burn tunnel entrance:
- place a small bundle of dry twigs
- add a little kindling at the tunnel entrance
- light so flame is pulled horizontally into the tunnel
Then feed sticks gradually through the feed tube. Avoid cramming. Let the draft do the work.
Fueling technique that keeps the “rocket” sound
- feed thin sticks continuously rather than large chunks occasionally
- keep the stick ends burning inside the tunnel, not smoking at the top of the feed
- rotate in different sizes: thin for ignition, medium for steady burn
Signs your stove is tuned correctly
- strong draft: flame pulled into the tunnel
- minimal visible smoke after warm-up
- a steady “whoosh” sound (not required, but common)
- fast boil on a covered pot
Troubleshooting quick fixes
Problem: Smoke pouring from feed tube
- fuel is wet or too thick
- pot gap too tight (choking)
- riser not insulated enough
- stove not warmed up yet
Problem: Weak heat under the pot
- pot too high above riser
- no skirt (heat escaping)
- too much excess air leaking in above the burn zone
Problem: Stove stalls when pot is placed
- increase pot gap slightly
- improve exhaust path around pot sides
- check for ash buildup blocking tunnel
Maintenance, safety, and getting the most from scrap fuel
Rocket stoves are simple, but long-term performance depends on housekeeping and safe setup.
Safe placement and heat protection
- set stove on non-combustible surface: concrete, pavers, bare soil, metal sheet
- keep clearances from walls and dry grass
- handle with gloves—outer shells get extremely hot
- never operate in enclosed spaces due to carbon monoxide risk (use outdoors or in properly ventilated setups)
Ash management
Ash is both friend and enemy:
- a thin layer can insulate
- too much blocks airflow
Empty ash from the burn tunnel area regularly, especially after burning barky twigs and chips that leave more residue.
Avoiding creosote and tar buildup
Creosote comes from low temps + wet fuel. To minimize:
- cure your stove fully (let insulation dry)
- burn hot, not smoldery
- don’t “idle” the stove for long periods with minimal flame
- store scrap wood under cover with airflow
Planning for cooking and water
A rocket stove pairs well with off-grid routines:
- boil water quickly for dishes and sanitation
- cook beans/rice with a lid to reduce fuel needs
- pre-stage bundles of twigs by meal
If your main goal is resilience—not just backyard cooking—pairing efficient heat with reliable water handling and food planning matters.
💡 Recommended Solution: SmartWaterBox
Best for: building a more complete emergency water plan alongside off-grid cooking
Why it works:
- supports more consistent water readiness (storage/organization-focused)
- complements boiling by helping you plan beyond “heat-only” solutions
- useful when fuel or time constraints limit boiling everything
Tools, resources, and off-grid upgrades that pair well with a rocket stove
A rocket stove solves one major problem: turning wood scraps into heat. In real-world preparedness, heat connects to water, food, and power. If you’re building a stove as part of a broader self-reliance setup, these resources may fit naturally—without replacing the core skill of knowing how to build a rocket stove that burns almost any wood waste.
Resource list for a broader self-sufficiency setup
- Many people rely on tools like backyard food growing guides to reduce how often they must cook from stored supplies.
- Others prioritize water readiness so cooking doesn’t consume their last clean gallons.
- Some add small-scale power options to handle lighting, charging, or refrigeration alongside solid-fuel cooking.
💡 Recommended Solution: The Self-Sufficient Backyard
Best for: pairing cooking independence with home food production skills
Why it works:
- supports planning for home-scale self-reliance
- helps connect “efficient cooking” with “reliable ingredients”
- useful if you’re building a full backyard resilience system
💡 Recommended Solution: The Lost SuperFoods
Best for: building a pantry strategy that matches low-fuel cooking methods
Why it works:
- encourages shelf-stable food planning
- complements twig-fuel cooking with simple meal options
- supports a “use what you have” mindset in shortages
💡 Recommended Solution: Ultimate OFF-GRID Generator
Best for: adding basic power resilience alongside solid-fuel cooking
Why it works:
- useful when you want redundancy beyond fire-based heat
- supports charging/lighting needs during outages
- complements a low-tech stove with optional power capability
"As many preparedness instructors emphasize, a resilient setup is layered: solid-fuel cooking, water planning, and food redundancy work better together than any single tool alone."
— Common preparedness doctrine from field training and emergency planning frameworks
Conclusion
Learning how to build a rocket stove that burns almost any wood waste comes down to getting three things right: a properly sized combustion core, strong insulation around the burn path and riser, and a pot support setup that allows hot gases to flow without choking. When you combine those with dry, safe scrap fuel—twigs, offcuts, and other small wood waste—you get a stove that starts quickly, burns cleanly once hot, and turns inconvenient debris into useful heat.
Build it carefully, cure it with small fires, and then tune it: adjust pot gap, add a skirt, and feed consistent small-diameter fuel. With a little practice, you’ll have a reliable cooking option that’s efficient, quiet, and remarkably capable—especially when conventional fuel sources are limited.
FAQ
What is the best size for a DIY rocket stove that burns wood waste well?
A 4-inch system is a strong starting point for most DIY builders. It drafts well, runs on small sticks, and is easier to tune for clean burn than very small “micro” designs.
Can a rocket stove burn sawdust and wood shavings?
It can burn small amounts, but loose sawdust tends to restrict airflow and cause smoky, inefficient combustion. Mix shavings with sticks or use them as a starter, not the primary fuel.
Why does my rocket stove smoke even with dry twigs?
Common causes include insufficient insulation, a pot gap that’s too tight (choking airflow), air leaks cooling the burn tunnel, or an ash blockage. Warm-up time also matters—many stoves smoke briefly before the riser heats.
Is it safe to burn pallet wood in a rocket stove?
Only use pallets clearly marked HT (heat-treated) and avoid pallets marked MB or anything painted/stained. When uncertain, don’t burn it—rocket stoves burn hot, and you don’t want to inhale toxic fumes.
How to build a rocket stove that burns almost any wood waste without constant tending?
Use a well-insulated core and feed uniform stick sizes so the stove maintains draft. Adding a stable feed angle and keeping airflow gaps open reduces babysitting, but most rocket stoves still benefit from periodic fueling during cooking.
RANK MATH SEO BLOCK
SEO Title (≤60 chars): Build a Rocket Stove That Burns Almost Any Wood Waste
Meta Description (≤160 chars): Learn how to build a rocket stove that burns almost any wood waste with simple materials, smart insulation, and clean-burn tuning tips.
URL Slug: build-rocket-stove-burns-wood-waste
Focus Keyword: How to Build a Rocket Stove That Burns Almost Any Wood Waste
Suggested Schema Type: HowTo / FAQ