
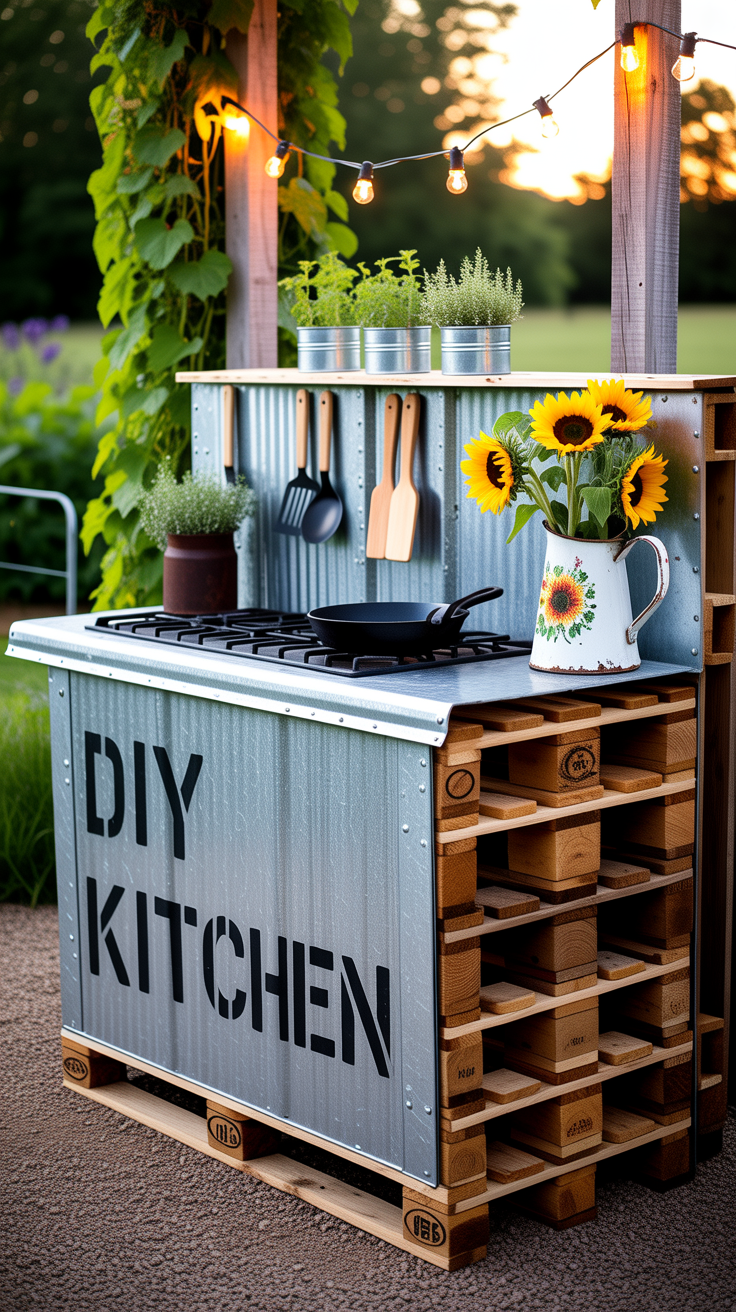
DIY Outdoor Kitchen: Build One for Under $300 With Salvaged Materials
A DIY outdoor kitchen: build one for under $300 with salvaged materials isn’t a fantasy project reserved for people with full workshops and big budgets. If you can measure, level, and screw boards together, you can create a functional cooking zone that feels permanent—using reclaimed lumber, leftover pavers, an old grill, and a little creativity. The goal isn’t perfection; it’s durability, safety, and smart layout so you can prep food, cook, and clean up without running back inside.
This guide walks you through a proven, low-cost approach: source salvage safely, plan a compact footprint, build a stable base, add a weather-tough counter, and integrate basic utilities (even if you don’t have plumbing). You’ll end with an outdoor kitchen that looks intentional, works hard, and costs less than a weekend getaway.
Setting the budget, layout, and realistic features
Before you hunt materials, decide what “outdoor kitchen” means for your yard and your $300 cap. Most successful budget builds focus on three essential zones:
- Cook zone: a grill, griddle, or small smoker on a non-combustible surface
- Prep zone: counter space for cutting and staging food
- Landing zone: a place to set hot trays, utensils, and seasonings
Choose a footprint that’s easy to build and hard to regret
A compact layout saves money because it reduces countertop area and structural supports. A great starter size is:
- 6–8 feet long and 24–30 inches deep
- Counter height 34–36 inches (standard kitchen height)
This length typically fits a salvaged grill plus 2–4 feet of counter. If you need a corner, keep it simple (L-shape only if you already have corner-friendly pieces like concrete caps or two matching base cabinets).
Keep the “under $300” promise by limiting utilities
Plumbing and permanent electrical can blow the budget fast (and may require permits). A strong budget build uses:
- A five-gallon water jug or gravity-feed handwashing station
- A bus tub for dishwashing
- A simple outdoor-rated extension setup (temporary) or solar lighting
If you want resilience beyond weekend cooking—lighting, water storage, and shelf-stable food planning—consider adding a preparedness layer that supports the outdoor kitchen lifestyle. Many off-grid builders pair projects like this with a water and food plan so the space remains useful during outages.
💡 Recommended Solution: SmartWaterBox
Best for: water readiness alongside backyard cooking
Why it works:
- Supports a practical water plan for outdoor use and emergencies
- Helps you think through storage and access before you need it
- Complements a handwash/dish setup without permanent plumbing
Minimum safety rules you should lock in now
- Keep cooking heat at least 24 inches away from wood framing
- Use non-combustible under and around the grill (pavers, concrete, stone, metal)
- Plan for airflow: grills need ventilation and clearance
- Do not use pressure-treated wood for surfaces that touch food
Finding salvaged materials that are safe and durable
The cheapest outdoor kitchens are built from the best “free” materials—because they were built for durability in the first place. You’re looking for structural pieces that can handle weather without twisting into a potato chip.
Reliable sources for salvage
- Facebook Marketplace / Craigslist “free” listings
- Habitat ReStore
- Demolition leftovers (ask permission)
- Old deck boards (non-rotted sections)
- Concrete pavers, patio stone, leftover retaining wall block
- Salvaged base cabinets (solid wood is best; avoid particle board)
- Stainless tables from restaurant auctions
- Old grills (even if the burners are shot, the cart can be repurposed)
What to avoid (it’s not worth the headache)
- Particle board cabinets (swell and crumble outdoors)
- Moldy or spongy lumber
- Unknown chemical spills on countertops or boards
- Warped countertop slabs that won’t sit flat
- Railroad ties (creosote) anywhere near food prep
Quick quality checks that save hours later
- Sight down boards for twist and bow
- Push a screwdriver into suspect wood—if it sinks easily, pass
- Check steel for heavy rust at joints (surface rust is fine)
- Tap concrete caps—ringing is good, dull crumbling is bad
If you plan to wash, prep, and store food outside more often, think about the broader system: water, food storage, and what you can cook when the power’s out.
“As many preparedness educators emphasize, ‘A resilient backyard starts with water and food planning before you scale projects.’” Resources like The Lost SuperFoods can help you build a pantry strategy that pairs well with outdoor cooking—especially if you’re experimenting with grilling, smoking, dehydrating, or no-grid meal planning.
Designing a sturdy base with simple, low-cost construction
A budget outdoor kitchen fails for two reasons: it sits on a bad base, or it’s framed too lightly. Your base doesn’t need to be fancy—it needs to be flat, stable, and water-resistant.
Option A: Paver pad (best blend of cost + longevity)
This is the sweet spot for under $300 builds because you can often find pavers secondhand.
Steps:
- Mark the pad 6–8 inches larger than your kitchen footprint.
- Remove sod and dig 3–5 inches.
- Add and compact gravel (or crushed stone).
- Add a thin leveling layer of sand.
- Lay pavers tight and level; sweep sand into joints.
This gives you a non-combustible surface under the cook zone, keeps legs out of mud, and makes leveling the frame much easier.
Option B: Concrete blocks as the structure
If you can get cinder blocks free or cheap, they can become both the “cabinet” and the support.
- Stack blocks dry (no mortar) for maximum flexibility
- Use patio caps or concrete pavers on top as the counter support
- Add shelves by sliding boards through block openings
Option C: A simple wood frame (works if protected)
Wood framing is fine if:
- It’s kept off soil (on pavers or a deck)
- It has proper bracing (diagonal bracing or plywood sheathing)
- The cook zone is separated by non-combustible material
Leveling is the hidden skill that makes it look professional
Use shims and take time here. A level counter makes everything easier:
- Cutting prep feels natural
- Trays don’t slide
- Doors and drawers (if you have cabinets) behave
Many professionals rely on tools and checklists to streamline DIY planning—especially when you’re balancing weatherproofing, layout, and safety in one build.
Building the frame and cook station without overspending
Now you’re ready to assemble the “bones” of the kitchen. The goal: a rigid platform that supports a counter, plus a defined area for the grill that won’t torch your structure.
A simple, strong layout that works almost everywhere
- Left: prep counter (2–4 feet)
- Middle: grill bay with non-combustible surround
- Right: landing/storage (1–2 feet + shelves below)
If your grill is on wheels, you can treat it as a slide-in appliance: leave an opening under the counter where the grill rolls in and out.
Create a heat-safe grill surround
Even on a budget, you can do this safely:
- Put the grill on pavers or concrete board
- Add a “heat shield” panel behind it (sheet metal, cement board, or salvaged brick)
- Maintain airflow and clearance around vents
Problem-Solution Bridge: Struggling with safe water access at the cook station—especially when handling raw meat outdoors? A water plan solves more than convenience; it prevents bad hygiene shortcuts. Water Freedom System is often mentioned as a simple way to think about water independence, which pairs naturally with an outdoor kitchen where handwashing and rinse water matter.
Fast ways to add lower storage without buying cabinets
- Slatted shelf from reclaimed deck boards
- Plastic bins inside a framed bay (keeps critters out)
- Salvaged locker or metal cabinet (great outdoor durability)
- Curtain front (cheap and practical) using outdoor fabric
Don’t skip anchoring and bracing
Common budget mistake: everything looks fine until someone leans on the counter. Add:
- Corner blocking
- A back rail
- A plywood back panel or diagonal brace
If wind is a factor, anchor the frame to the paver pad with masonry screws (or weigh it down with block storage).
Creating a weatherproof countertop from reclaimed materials
The countertop is what makes the outdoor kitchen feel “real.” It’s also where budget builds fail if you pick a surface that can’t handle sun, rain, and temperature swings.
Best reclaimed countertop options (low cost, high payoff)
Concrete pavers or patio caps
- Extremely weatherproof
- Modular (easy to replace)
- Heavy (stable)
Salvaged stone or granite remnant
- Check local countertop shops for leftovers
- Often cheap if you can transport it
Stainless steel sheet over plywood
- Great for food safety
- Easy to wipe down
- Can be found as scrap or used restaurant pieces
Butcher block (only if protected well)
- Must be sealed and maintained
- Better as a removable cutting surface than a permanent top outdoors
A budget-friendly “paver counter” that looks intentional
- Build a flat support deck (cement board or exterior plywood)
- Set pavers in a thin bed of mortar or construction adhesive rated for exterior use
- Leave small joints; fill with sand or suitable grout
- Add a simple edge: metal angle, brick, or wood trim kept away from grill heat
Seal and protect without going overboard
- Stone: use a penetrating sealer if you have it (optional but helpful)
- Wood: exterior-rated oil/sealer; reapply as needed
- Stainless: clean and keep covered when not in use
“As a site safety instructor might put it, ‘Outdoor counters fail at the edges—water gets in, swelling starts, and structure loosens.’” That’s why edge protection and keeping the counter slightly sloped for drainage (even 1/8 inch) can prevent long-term problems.
Adding a simple sink, water system, and cleanup workflow
You don’t need a plumbed sink to enjoy the convenience of one. A smart cleanup system keeps your outdoor kitchen functional—and keeps guests from tracking mess inside.
The simplest “sink” setup
- Large stainless bowl or bus tub (set into the counter or placed on top)
- Two 5-gallon jugs: one clean, one greywater
- A spigot or pump dispenser for handwashing
- Biodegradable soap and paper towels
- A catch bucket under the drain (or just dump tub water responsibly)
Handwashing matters more than dishwashing
If you only add one thing, add a handwashing station. It’s the difference between “we can cook outside” and “this is a real working kitchen.”
💡 Recommended Solution: Water Freedom System
Best for: backyard water independence mindset (handwashing + rinse water)
Why it works:
- Encourages a reliable water workflow outdoors
- Supports sanitation when cooking away from indoor plumbing
- Fits the self-sufficient outdoor kitchen approach
Lighting and power without permanent wiring
For under $300, keep it simple:
- Solar string lights for ambiance
- Solar motion light for task lighting
- Outdoor-rated extension cord only when needed (avoid permanent trip hazards)
If you want an outdoor kitchen that stays useful during power interruptions—lighting, recharging, or cooking support—some homeowners explore off-grid power planning.
While a standard generator is popular, Ultimate OFF-GRID Generator is often positioned as an alternative approach for people aiming to reduce reliance on the grid with DIY-friendly concepts.
Finishing touches that make it look built-in (and last longer)
This is where you turn “a counter on blocks” into something that feels like an outdoor room. The best part: finish work can be almost free.
Add a backsplash or heat wall
- Salvaged brick, stone, or metal panel behind the grill
- Cement board with exterior paint
- Old corrugated metal roofing (looks great and handles weather)
Weatherproof the structure with easy upgrades
- Raise all wood at least 1 inch off the ground
- Add a sloped “roof” to the back edge so water doesn’t pool
- Install a cheap cover: tarp, grill cover, or DIY canvas
Low-cost organization that boosts usability
- Magnetic strip for tools (on metal backing)
- Pegboard on the side (under cover)
- Hooks for tongs and spatulas
- Herb planter box on the end cap
Make it comfortable for real cooking sessions
- Add a small side table for drinks
- Keep a lidded bin for charcoal or pellets
- Store a fire extinguisher nearby (not hidden)
Tools & Resources (optional, but helpful):
- The Self-Sufficient Backyard — helpful for planning a yard that supports cooking, storage, and practical homestead-style upgrades
- SmartWaterBox — complements your outdoor kitchen with a water-readiness mindset
- The Lost SuperFoods — useful if you want to connect outdoor cooking with long-term pantry planning
Conclusion: A functional DIY outdoor kitchen under $300 is absolutely doable
A DIY outdoor kitchen: build one for under $300 with salvaged materials works when you focus on what matters: a stable base, a safe cook zone, a durable counter, and a simple water and cleanup workflow. The magic isn’t in fancy appliances—it’s in smart layout and tough materials that were built to last.
Start with what you can source for free, design around your grill, and upgrade over time. Your first build doesn’t need to be your final version. But if you get the foundation and safety right now, you’ll have a backyard kitchen you can cook on for years—whether it’s for weekend barbecues or a more self-reliant lifestyle.
FAQ
What is the cheapest base for a DIY outdoor kitchen?
A salvaged paver pad or a dry-stacked cinder block base is usually the cheapest and most durable. Both resist heat and moisture better than wood sitting near soil.
Can I build a DIY outdoor kitchen with pallets?
Yes, but be selective. Use only heat-treated pallets marked HT (avoid chemical-treated). Keep pallets away from direct grill heat, brace the structure well, and protect it from standing water.
How do I keep an outdoor countertop from rotting or warping?
Use weatherproof materials like pavers, stone, or stainless. If you use wood, seal it thoroughly, keep it covered, and design edges so water can’t soak into end grain.
How far should a grill be from wood in an outdoor kitchen?
Plan at least 24 inches of clearance from wood framing and add non-combustible barriers (cement board, metal, brick). Always follow the grill manufacturer’s clearance guidelines if available.
Can a DIY outdoor kitchen really be built for under $300?
Yes—if you source reclaimed materials, keep the layout compact, and avoid permanent plumbing/electrical. Build the “core” now (base + counter + safe cook zone) and add upgrades later.
RANK MATH SEO BLOCK
SEO Title (≤60 chars): DIY Outdoor Kitchen Under $300 (Salvaged Materials)
Meta Description (≤160 chars): DIY Outdoor Kitchen: Build One for Under $300 With Salvaged Materials using a safe base, durable counter, and simple cleanup setup.
URL Slug: diy-outdoor-kitchen-under-300-salvaged-materials
Focus Keyword: DIY Outdoor Kitchen: Build One for Under $300 With Salvaged Materials
Suggested Schema Type: HowTo / FAQ