
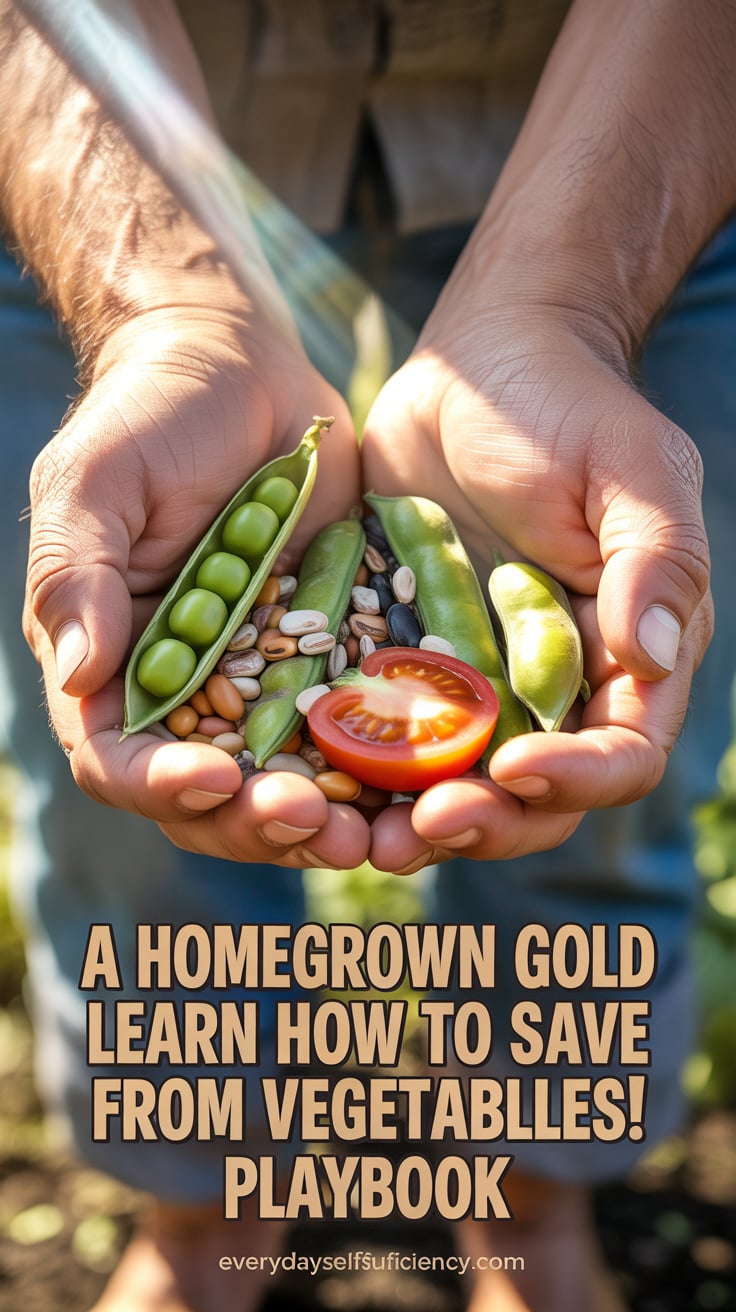
If you want to learn how to save seeds from vegetables, you’re in the right place. This comprehensive guide shows you, step by step, exactly how to save seeds from vegetables you already grow—so you can preserve your favorite flavors, protect your food security, and reduce gardening costs year after year. Whether you’re a backyard grower or an urban balcony gardener, you’ll learn how to save seeds from vegetables using proven techniques for harvesting, cleaning, drying, and storing seeds with high germination rates. You’ll also discover how to avoid cross-pollination, how to plan your garden for seed saving, and how to build resilience into your seed bank for long-term self-sufficiency.
Right after you learn how to save seeds from vegetables the right way, you’ll naturally want to preserve food as well. For a smart, practical blueprint to stock long-lasting foods that pair perfectly with homegrown seed saving, see The Lost SuperFoods.
- Build your self-reliant pantry with The Lost SuperFoods: The Lost SuperFoods
In this in-depth guide, you’ll get a practical seed-saving system built for real life. We’ll cover the differences between open-pollinated and hybrid vegetables, isolation distances and hand-pollination, dry processing vs. wet fermentation, and the best ways to store seeds for long viability. You’ll find germination test methods to check old seed, tips to revive slow seeds, and troubleshooting for mold, pests, or off-type plants. If your goal is to truly learn how to save seeds from vegetables and keep doing it successfully every season, this is the resource you’ll refer to again and again.
For more homestead-ready skills and self-sufficiency ideas, visit Everyday Self Sufficiency: Everyday Self Sufficiency Home
Table of Contents
Seed Basics and Why Seed Saving Matters
If you truly want to learn how to save seeds from vegetables, start with the core principles: seed types, pollination, and why choosing the right parent plants matters. Most vegetable seeds fall into two categories: open-pollinated (OP) and hybrid (F1). Open-pollinated varieties, including heirlooms, breed true—meaning their seeds will produce plants very similar to the parent. Hybrids, by contrast, are controlled crosses bred for uniform traits like disease resistance. Seeds saved from hybrids often segregate in the next generation, producing unpredictable results. For stable seed saving, choose open-pollinated or heirloom varieties when you can.
Understanding pollination is critical as you learn how to save seeds from vegetables. Some vegetables are self-pollinating—tomatoes, peas, and beans typically self-pollinate within flowers, making them easy for beginners. Others are cross-pollinating—like squash, cucumbers, melons, corn, and many brassicas—and need larger isolation distances or active hand-pollination to prevent unwanted crosses. For example, summer squash and pumpkins can cross with each other if they’re in the same species, leading to odd-tasting fruits the following year. Lettuce usually self-pollinates but can still outcross at low rates; peppers can self-pollinate yet still cross if pollinators are abundant; corn is wind-pollinated and demands careful isolation.
Another key concept as you learn how to save seeds from vegetables is selection. Seed saving isn’t just about keeping seeds; it’s about choosing the right plants to parent the next generation. Select for vigor, earliness, productivity, flavor, disease resistance, and shape uniformity. Roguing—removing off-types and weak plants—strengthens the genetics you keep.
You’ll also need clean, disease-free plants to avoid transmitting seed-borne pathogens. That’s one reason fermentation is helpful for tomato seed cleaning—it reduces some surface-borne diseases. Crop rotation and healthy soil biology reduce disease pressure and produce better-quality seed.
Finally, seed saving is seed sovereignty. When you learn how to save seeds from vegetables, you disconnect from supply chain fragility, protect diversity, and build a local seed bank adapted to your microclimate. Over seasons, your saved seed becomes uniquely suited to your conditions, often outperforming store-bought packets.
Key takeaways:
- Prefer open-pollinated varieties for true-to-type results.
- Learn your crops’ pollination habits to prevent crosses.
- Select the best plants as seed parents; rogue the rest.
- Aim for clean, disease-free plants; use fermentation where appropriate.
Planning Your Garden for Seed Saving
A strong plan makes it much easier to learn how to save seeds from vegetables successfully. Start by mapping your beds and grouping crops by their pollination type. Separate different varieties of cross-pollinated crops to avoid unwanted mixing. For example, if you’re growing two varieties of Cucurbita pepo (many zucchinis and summer squash), keep only one variety for seed in a given year or separate them widely. If space is limited, plant different species that won’t cross—e.g., grow a C. pepo zucchini and a C. moschata butternut; they won’t cross.
Isolation distance guidelines vary:
- Tomatoes: often minimal isolation needed, though 10–50 feet reduces rare crossing.
- Peppers: 100–300 feet recommended if saving pure varieties; bag blossoms or hand-pollinate in small gardens.
- Squash and pumpkins: 800 feet to a half mile for purity; hand-pollination with taping or bagging is effective in small spaces.
- Cucumbers and melons: 800+ feet or hand-pollination.
- Corn: at least 1/4 mile or time isolation; stagger planting so your seed variety sheds pollen when others do not.
- Brassicas (kale, cabbage, turnip, etc.): long distances (1/2 mile plus) or cage isolation with pollinators.
As you learn how to save seeds from vegetables, population size matters. Some species need larger populations to maintain vigor and avoid inbreeding depression. Lettuce, tomatoes, and beans tolerate smaller populations; corn, brassicas, and carrots benefit from larger breeding populations (ideally 20–200 plants for long-term vigor, though home gardens can work with fewer in a pinch).
Use these practical controls:
- Time isolation: stagger planting so different varieties flower at different times.
- Physical barriers: row covers or mesh cages with introduced pollinators such as bumblebees for brassicas.
- Hand-pollination: for squash and cucumbers, bag male and female flowers before opening, then transfer pollen manually and re-bag to ensure purity.
- Blossom bagging: bag a few pepper or tomato flowers to collect pure seed, removing bags after fruit sets.
Label everything early and often. Tag plants designated for seed with variety, date, and notes on traits you want to keep. Keep a simple seed log recording planting dates, isolation method, number of plants, and any roguing decisions. Good notes help you learn how to save seeds from vegetables more precisely each season, steadily improving your results.
Harvest Timing—When Are Seeds Mature?
Knowing when seeds are truly mature is central to learning how to save seeds from vegetables. Many crops eaten immature must be left on the plant longer to produce viable seed. Harvest timing by crop:
- Tomatoes: For true maturity, let fruits fully ripen—often beyond eating stage—to a deep, uniform color. Seeds continue maturing as the fruit softens. Overripe tomatoes are perfect for seed saving and fermentation.
- Peppers: Allow peppers to reach full color (red, yellow, orange, chocolate). Seeds from green, immature peppers are usually less viable.
- Cucumbers: Eating cucumbers are harvested immature; for seed, allow them to fully mature and turn yellow or orange on the vine. The interior will be soft and seedy; that’s ideal for wet processing.
- Squash and pumpkins: Let fruits mature fully with hard rinds and cure a couple of weeks post-harvest to finish seed development. Many winter squash seeds are ready at harvest stage; curing improves seed quality.
- Melons: Harvest at full slip or when aroma and color indicate maturity. If unsure, let the fruit sit a few days before seed extraction.
- Beans and peas: Let pods dry completely on the plant until they rattle; seeds will be hard. If rain threatens, pull whole plants and finish drying under cover to prevent mold.
- Lettuce: Allow plants to bolt and form fluffy seed heads. Harvest when a portion of the heads show fluff daily; multiple pickings are common. Shake into a paper bag or snip seed heads and dry on screens.
- Brassicas (kale, mustard, radish): Let seed pods brown and dry on the plant; harvest before pods shatter. Use gloves—pods are brittle. Finish drying in a breathable bag or on a screen.
- Onions and leeks: Wait for seed heads to turn gray-black and begin to open. Cut umbels and dry in bags to catch shattering seeds.
- Carrots, beets, chard: These are biennials; they need a cold period (vernalization) and produce seed in the second season. Save the best roots, replant or overwinter, then harvest dry seed heads.
As you learn how to save seeds from vegetables, remember: seed maturity often means letting fruits or seed structures remain longer than you would for eating. Patience equals viability. Use breathable containers like paper bags for collecting; avoid plastic at harvest because trapped moisture causes mold. Dry seeds on screens or paper in a shaded, airy location; direct sun can overheat delicate seed embryos.
Dry Processing—Cleaning and Saving Dry Seeds
Dry processing is the simplest way to learn how to save seeds from vegetables that produce dry pods or seed heads. Beans, peas, lettuce, brassicas, onions, and many herbs fall into this category. The basic process:
- Harvest mature, dry material. Collect pods or seed heads when they’re dry and papery. If rain threatens, harvest slightly early and finish drying indoors.
- Cure and dry. Spread in a thin layer on a screen, hardware cloth, or paper in a warm, shaded, ventilated area. Aim for 7–14 days until seeds are fully dry and snap rather than bend.
- Thresh. Gently break pods or rub seed heads to free seeds. For beans and peas, shell by hand; for lettuce and brassicas, rub between gloved hands or gently flail inside a clean bin.
- Winnow. Use a fan or gentle breeze to blow away chaff while seeds drop into a container. Adjust angle and height to remove as much debris as possible without losing seed.
- Final clean. Sieve through strainers of different mesh sizes to separate fines and chaff. Pick out stones or bug frass if present.
Mid-content resource: Consistent moisture helps prevent pods from molding before they dry—especially in humid climates. If you garden where humidity spikes, having a reliable, off-grid-friendly water system makes it easier to time irrigation and drying. Explore SmartWaterBox to stabilize your seed garden’s watering and storage needs: New Water Offer: SmartWaterBox
Practical tips to learn how to save seeds from vegetables with dry processing:
- Use paper bags and label clearly at harvest; never mix varieties in the same bag.
- Prevent pests: dry thoroughly and then freeze seeds for 48–72 hours to kill weevils in beans and peas. Allow seeds to return to room temp before opening the container to avoid condensation.
- If space is tight, pull entire plants of beans or brassicas and hang them upside down inside a paper bag. Seeds fall into the bag as pods dry.
- For lettuce, harvest daily as heads fluff. A gentle shaking over a clean tub captures ripe seed while leaving unripe heads to mature further.
- Don’t rush drying. Seeds that feel cool to the touch or bend instead of snap are not dry enough for storage and may mold.
Integrate desiccants in storage: food-safe silica gel packets or dried rice help keep moisture low in jars. The drier your seeds, the longer they last.
Wet Processing and Fermentation—Tomatoes, Cucumbers, Squash
Wet processing applies to pulpy or slime-coated seeds. If you want to learn how to save seeds from vegetables like tomatoes, cucumbers, and some squash, you’ll use rinsing or fermentation to remove gels and improve health.
Tomatoes (fermentation method):
- Scoop seeds and gel into a clean jar. Add a splash of water to swirl.
- Label with variety and date. Cover loosely to allow gas to escape.
- Ferment 2–4 days at room temperature. A moldy film forms on top—this is normal. Stir daily.
- Add water, let good seeds sink, and pour off floating pulp, mold, and hollow seeds.
- Repeat until the water runs clear. Strain and spread seeds on a labeled plate or screen to dry 7–10 days until brittle.
Benefits: Fermentation breaks down the germination-inhibiting gel and reduces some seed-borne diseases, helping you learn how to save seeds from vegetables that are cleaner and more vigorous.
Cucumbers:
- Allow fruits to fully ripen to yellow-orange on the vine.
- Halve lengthwise, scoop seeds and pulp into a bowl, and add water.
- Rub seeds gently to separate from the pulp. Viable seeds tend to sink; immature ones float.
- Pour off the pulp and floaters; repeat as needed. Strain and dry on screens 7–10 days.
Squash and pumpkins:
- Scoop seeds from fully mature, cured fruits.
- Separate stringy pulp by hand. Rinse thoroughly in a colander.
- Pat dry on a towel, then spread in a single layer to finish drying 10–14 days. Stir daily to prevent clumping.
Peppers:
- Let fruits fully color. Slice and scrape seeds onto a plate. Air-dry 7–10 days. No fermentation needed.
Melons:
- Similar to cucumbers: rinse and decant method. Dry thoroughly.
Safety and success tips as you learn how to save seeds from vegetables with wet processing:
- Keep batches small and labeled; mix-ups are common in fermentation.
- Don’t over-ferment; beyond 4–5 days can damage embryos.
- Dry out of direct sun in a warm, airy spot; a fan helps.
- Seeds must be fully dry before storage; brittle is the goal.
When in doubt, do a quick paper towel germination test 2–4 weeks after drying to confirm viability before committing to storage.
Drying, Curing, and Storing Seeds for the Long Haul
Once you learn how to save seeds from vegetables, you’ll want them to last. Longevity depends on two factors you can control: temperature and moisture. Use the rule of 100: the sum of storage temperature (°F) and relative humidity (%) should be under 100 for good longevity, with lower being better.
Drying to safe moisture:
- Aim for seeds that snap or shatter when bent. If using a hygrometer jar, target 6–8% moisture for many vegetables.
- Use gentle heat and airflow; avoid ovens or direct sun.
- A small, enclosed bin with a fan and desiccant speeds drying without heat stress.
Packaging:
- Short-term (1–3 years): paper coin envelopes inside a sealed jar with desiccant. Label with variety, species, year, and notes.
- Long-term: glass jars with tight lids or mylar bags with oxygen absorbers and silica gel. Store cool and dark.
- Freezer storage: Many vegetable seeds (orthodox seeds) freeze well if thoroughly dry. Place sealed, labeled containers in the freezer. Thaw unopened to room temperature before exposing to air to prevent condensation.
Storage locations:
- Best: a dedicated seed box in a refrigerator or freezer.
- Good: a cool closet or basement shelf in sealed containers.
- Avoid: garages or sheds with wide temperature swings and humidity.
Pest prevention:
- Freeze-dosing dry bean and pea seeds kills weevils.
- Keep storage containers rodent-proof.
- Inspect annually; discard moldy or infested packets.
Labeling and records:
- Every packet should include variety, species, year saved, source, and any selected traits.
- Maintain a simple spreadsheet or notebook. Good records are essential to learn how to save seeds from vegetables at scale without losing track of purity or age.
Shelf-life expectations (approximate, under cool-dry conditions):
- 2–3 years: onion, leek, parsnip.
- 4–5 years: sweet corn, pepper, carrot.
- 5–6 years: tomato, peas.
- 6–8+ years: beans, cucumber, lettuce, brassicas, squash (often longer if frozen).
Tools, Supplies, and Product Recommendations for Seed Savers
As you learn how to save seeds from vegetables, a few affordable tools make everything easier, cleaner, and more reliable. You don’t need fancy equipment—just a well-organized kit and a few strategic upgrades.
Core supplies:
- Paper coin envelopes, waterproof labels, and a fine-tip permanent marker.
- Mesh screens or hardware cloth for drying. Nested kitchen strainers for cleaning.
- Fans for airflow; a small dehumidifier if your climate is humid.
- Glass jars, mylar bags, silica gel desiccant packs, and oxygen absorbers.
- Blossom bags or organza gift bags for hand-pollination and isolation.
- A sturdy notebook or digital spreadsheet to track varieties and batches.
Storage and resilience tools that pair well with seed saving:
- Water resiliency matters for high-quality seed crops—consistent watering during flowering and seed fill reduces stress and improves seed quality.
- Off-grid-friendly systems ensure your garden doesn’t fail during outages.
Product recommendations:
- Aqua Tower: If you want a compact, efficient water solution that supports your garden’s seed crops even during dry spells or disruptions, consider Aqua Tower. Reliable water means better pollination, fuller pods, and consistent seed fill. Explore Aqua Tower: Aqua Tower
- SmartWaterBox: A smart complement for water storage and management, especially in small-space or urban setups where every gallon counts. Stable moisture levels protect seed plants from stress, boosting viability. See SmartWaterBox: New Water Offer: SmartWaterBox
- The Lost SuperFoods: Master long-term pantry building to complement your seed saving. Once you learn how to save seeds from vegetables, preserving harvests completes the loop of self-reliance. Tap into practical recipes and storage methods: The Lost SuperFoods
- Home Doctor: A reliable homestead needs first-aid know-how. From safe fermentation practices to dealing with minor garden-related injuries, this guide supports a resilient lifestyle around your seed-saving work: Home Doctor
How to use these effectively:
- Set up a seed drying station with mesh screens and a fan in a room where you can maintain steady temperature and humidity. Use silica gel in closed containers to pull the last bit of moisture before freezing or refrigeration.
- Keep a dedicated seed log: date, variety, isolation method, number of parent plants, processing method, drying time, and storage location.
- For cross-pollinated crops, keep organza bags and soft ties in your field kit for quick isolation of late flowers you want to keep pure.
Germination Testing, Shelf Life, and Reviving Old Seeds
Testing is how you close the loop when you learn how to save seeds from vegetables. A simple germination test confirms viability before you scale up.
Paper towel test:
- Place 10 seeds on a damp (not dripping) paper towel.
- Fold, slide into a labeled zip bag with a small air gap, and keep warm near the crop’s preferred germination temperature.
- Check daily; count normal sprouts at the end of the typical germination window (e.g., 5–10 days for lettuce, 5–14 for tomatoes/peppers, up to 10–21 for carrots).
- Germination percentage = number sprouted / total tested x 100. If you tested 10 seeds, each sprout is 10%.
Soil test:
- For finicky species, sow 25–50 seeds in a labeled flat, as you would normally plant. Track emergence.
Enhancing old seed:
- Pre-soak: Soak seeds in room-temperature water for 4–12 hours to rehydrate, then sow.
- Warm stratification: For some herbs or carrots, a few days warm and moist can help break dormancy.
- Cold stratification: Some biennials like carrots or certain herbs respond to a 2–4 week cold, moist period.
- Priming: Soak seeds briefly until just imbibed, then dry and sow soon after.
- Scarification: Nick or sand tough seed coats (not common for most vegetables) to speed uptake.
- Use bottom heat: A seedling heat mat at 75–80°F improves emergence for warm-season crops like peppers.
Shelf life reality:
- Under room conditions, expect average lifespans noted earlier. Under cool-dry or frozen storage, many seeds exceed their typical lifespans significantly. Tomatoes, beans, lettuce, and squash often remain viable 7–10+ years if properly dried and frozen.
“Can you grow 20 year old seeds?” Sometimes—especially beans, tomatoes, and squash if stored cold and dry. Viability declines, so test first. You may get a small percentage to sprout. Use tricks like pre-soaking, kelp-infused water, or a very dilute hydrogen peroxide dip (1–3%) for 10 minutes to sanitize surface mold, then rinse well and sow. Even a handful of survivors can resurrect a beloved heirloom. Once you learn how to save seeds from vegetables, you can regenerate a variety from just a few plants and rebuild a fresh seed supply.
Troubleshooting and Advanced Techniques
Even when you know how to save seeds from vegetables, you’ll face challenges. Here’s how to solve the most common:
Cross-pollination:
- Symptom: Off-type fruits or unexpected traits next season.
- Solution: Increase isolation, switch to hand-pollination with bagging, or grow one variety per species for seed. Rogue off-types early.
Mold during drying:
- Symptom: Seeds clump, smell musty, or show white fuzz.
- Solution: Increase airflow, thin layers, extend drying time. Use desiccant in a closed jar to finish. Discard heavily moldy batches.
Low germination:
- Symptom: Few sprouts in tests.
- Solution: Seeds may be immature or not dry enough before storage. Improve maturity at harvest, dry thoroughly, and store cooler and drier. Try pre-soaking or bottom heat.
Insect damage:
- Symptom: Holes in bean seeds; frass in packets.
- Solution: Freeze-dosing after drying kills weevils. Move to sealed, rodent-proof jars.
Label loss or mix-ups:
- Symptom: Unknown variety identity.
- Solution: Label at every step—plant, harvest, drying tray, storage packet. Redundant labeling prevents heartbreak.
Advanced selection and breeding:
- Mass selection: Save seed from your top 10–20% best plants each season for rapid improvement in vigor, earliness, or flavor.
- Rogueing: Remove plants that show disease or off-type traits before they flower.
- Landraces: If you’re less concerned with strict purity and more with local adaptation, plant diverse lines and save from the survivors each year. Over time, you’ll develop a resilient landrace perfectly suited to your microclimate.
- Population sizes: For outcrossers (corn, brassicas), strive for more parent plants to maintain genetic health.
Urban and small-space seed saving:
- Use blossom bags and hand-pollination to guarantee purity in tight quarters.
- Time isolation: stagger bloom times to avoid overlap.
- Grow different species to eliminate crossing risk (e.g., one C. pepo and one C. moschata).
Record-keeping:
- Keep a running log of isolation methods, number of plants, and germination rates year to year. This feedback loop is how you truly learn how to save seeds from vegetables with professional consistency.
Build Your Self-Reliant Seed and Food System
If you’re committed to seed sovereignty, pair your seed-saving skills with pantry resilience. The Lost SuperFoods gives you a practical blueprint for calorie-dense, shelf-stable foods that complement your homegrown seeds. It’s a natural next step after you learn how to save seeds from vegetables.
- Secure your pantry with The Lost SuperFoods: The Lost SuperFoods
- Keep your garden watered and resilient with SmartWaterBox: New Water Offer: SmartWaterBox
- Add a compact garden water solution with Aqua Tower: Aqua Tower
- Homestead health and safety with Home Doctor: Home Doctor
Conclusion
Now you truly know how to save seeds from vegetables—from selecting open-pollinated varieties and preventing cross-pollination to perfect harvest timing, dry and wet processing, and long-term storage. You’ve seen how to ferment tomato seeds, rinse cucumber and melon seeds, cure squash seeds, dry beans and peas, and store everything cool and dry for years of viability. You’ve learned how to conduct germination tests, revive old seed, and troubleshoot mold, pests, or low vigor. Most of all, you’ve seen how seed saving turns your garden into a self-renewing system, yielding not just food but future harvests in every envelope of seed you create.
Keep selecting the best plants, keep excellent notes, and save seed each season. With practice, the techniques you’ve used to learn how to save seeds from vegetables will become second nature—and your garden will reward you with resilience, savings, and flavors you can’t buy in any store.
FAQ
How do I collect and save seeds?
To preserve seeds from vegetables, start with fully mature seed: overripe fruits for tomatoes and peppers; yellowed cucumbers; fully cured winter squash; dry pods and seed heads for beans, peas, lettuce, and brassicas. Clean seeds using dry processing (threshing and winnowing) for dry seeds or wet processing (rinsing/fermentation) for pulpy seeds. Dry thoroughly until seeds are brittle. Package in labeled paper envelopes placed inside an airtight jar with silica gel. Store cool and dark—ideally in a fridge or freezer. The rule of 100 applies: temperature (°F) + relative humidity (%) under 100. This approach is the backbone when you learn how to save seeds from vegetables and keep them viable for years.
How to preserve seeds from vegetables?
Choose parent plants: healthy, true-to-type, and productive. Rogue off-types early.
Isolate varieties: use distance, timing, blossom bags, or hand-pollination to avoid cross-pollination.
Harvest at true maturity: overripe fruit for tomatoes/peppers; dry pods for beans/peas; dry seed heads for lettuce/brassicas.
Process: dry process for pods and heads; wet process and ferment tomatoes; rinse cucumbers/melons; scoop and rinse squash.
Dry: spread thinly in a warm, shaded, ventilated area 7–14 days.
Store: labeled packets in sealed jars with desiccant; refrigerate or freeze for extended life.
Following this simple workflow is the most reliable way to learn how to save seeds from vegetables without losing quality.
What are the three basic methods of seed collection?
When people learn how to save seeds from vegetables, they usually rely on three core collection/processing methods:
Dry processing: For beans, peas, lettuce, brassicas, onions, and many herbs. Collect dry pods or heads, thresh to free seeds, and winnow out chaff.
Wet processing: For cucumbers, melons, and squash. Scoop seeds from ripe fruits, rinse to separate from pulp, and dry.
Fermentation: Primarily for tomatoes (sometimes for eggplant). Ferment the seed gel 2–4 days to dissolve the coating and reduce seed-borne diseases; rinse and dry thoroughly.
All three aim to produce clean, dry, high-viability seeds ready for storage.
Can you grow 20 year old seeds?
Sometimes, yes—especially if they were stored cold and dry. Beans, tomatoes, squash, and lettuce can surprise you even after 15–20 years when frozen or kept very cool with low humidity. To maximize success:
Do a germination test first with 10–25 seeds.
Try a 4–12 hour pre-soak or a mild kelp solution to rehydrate.
Provide bottom heat for warm-season crops like peppers and tomatoes.
Sanitize surface mold with a brief 1–3% hydrogen peroxide dip, rinse, and sow.
Even a few sprouts let you regenerate the variety. Once you grow a plant or two, you can learn how to save seeds from vegetables again—this time from fresh, vigorous plants—and rebuild your seed stock for the future.