
If you want quick, low-cost greening that anyone can do with minimal tools, learning How to Make seed bombs is one of the fastest, most rewarding projects you can start today. From wildflower corridors for pollinators to edible landscapes in neglected spaces, seed bombs let you restore soil, add color, and spark biodiversity—without digging or expensive inputs. In this ultimate tutorial, you’ll discover How to Make seed bombs step by step, what seeds to choose for your climate, how clay and compost affect germination, and smart tips for storage, deployment, and success in both urban and rural settings.
For off-grid or drought-prone gardeners, reliable water makes or breaks a seed-bomb project. If you’re building resilience alongside your seed efforts, consider the compact, self-contained Aqua Tower to stabilize irrigation and keep new plantings alive during dry spells.
Use this guide as your go-to reference on How to Make seed bombs—optimized for true results, not just pretty theory.
Explore more self-reliance topics on the Everyday Self Sufficiency.
Table of Contents
What seed bombs are and why they work
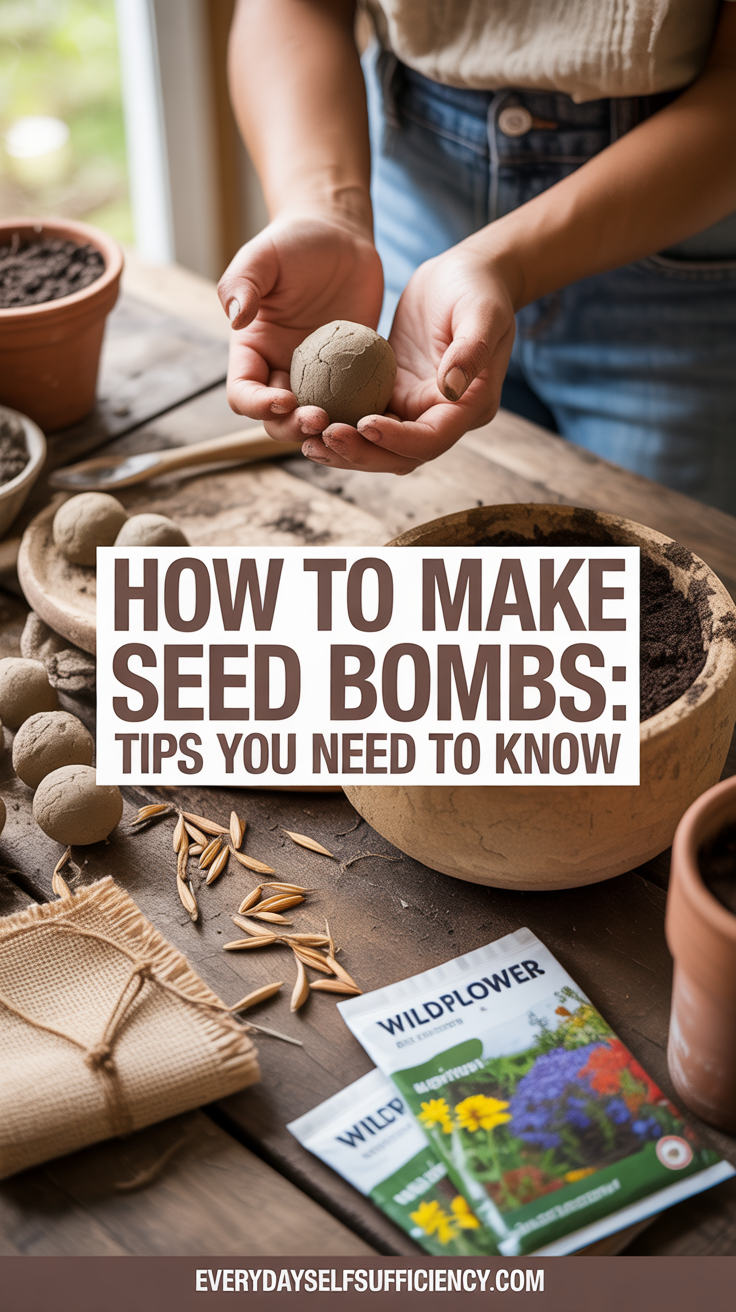
Seed bombs—also called seed balls—are compact spheres of clay, compost, and seeds that you can toss, place, or plant in under-cared-for spaces. The clay binds everything together and protects seeds from birds and pests; the compost feeds early growth. When rain hits, the clay softens, releasing seeds into a nutrient-rich microbed. Learning How to Make seed bombs means you’re crafting a time-release capsule that increases germination odds with minimal effort.
Core benefits of seed bombs:
- Protection: Clay shells deter birds, ants, and wind.
- Micro-fertilizer: Compost feeds seedlings at the root zone.
- Water efficiency: Clay retains moisture at the seed interface.
- Accessibility: How to Make seed bombs requires no tilling, digging, or heavy gear.
Where seed bombs shine:
- Urban guerrilla gardening: Tree pits, weedy verges, vacant lots (always follow local rules).
- Pollinator corridors: Median strips, neglected edges, fencelines.
- Soil rehab: Early cover crops for erosion control and organic matter.
- Education: Low-mess, high-impact projects with kids or community groups.
Why moisture matters
Seed bombs are a delivery system. Their success hinges on moisture cycles. When the clay shell hydrates and dries in pulses, the structure fractures and seeds get a mix of oxygen and water, encouraging germination. If you’re learning How to Make seed bombs for dry climates, increase clay percentage slightly for moisture retention and schedule deployment before seasonal rains.
Keys to higher germination:
- Fresh, viable seed.
- Correct seed mix for light and rainfall.
- Right clay-to-compost ratio.
- Timed deployment (rain window).
- Proper storage before use.
To stay water-ready after you deploy, a supplementary source can make the difference between blooms and busts. For portable resilience and emergency watering, the New Water Offer: SmartWaterBox helps stabilize early seedling stages when rains skip a beat.
Core materials and tools for How to Make seed bombs
When you’re gathering supplies for How to Make seed bombs, simplicity is the rule. You can make effective seed bombs with only three ingredients, plus water.
Ingredients
- Clay: Natural powdered clay (red clay, bentonite, or potter’s clay). Avoid polymer clays.
- Compost: Mature, sifted compost (or worm castings). Avoid hot, unfinished compost.
- Seeds: Choose region-appropriate mixes—native wildflowers for pollinators, grasses for erosion control, edibles for food resilience.
- Water: Just enough to make the mix cohesive, not sticky soup.
Optional boosters
- Mycorrhizal inoculant (dust): Enhances root development and nutrient uptake.
- Biochar (finely ground): Increases water retention and microbial habitat.
- Rock dust or basalt: Adds trace minerals and improves soil structure.
- Cayenne or cinnamon: Light dusting to deter ants pre-deployment.
Basic tools
- Mixing tub or bowl (non-metal preferred).
- Measuring cup or scale for ratios.
- Sieve for compost.
- Tray or screen for drying.
- Wax paper or old newspaper to prevent sticking.
Ideal ratios for How to Make seed bombs
- Standard: 5 parts dry clay : 1–2 parts compost : 1 part seed (by volume).
- Arid climates: 6 parts clay : 1 part compost : 1 part seed (more water retention).
- Rich soils or cool climates: 4 parts clay : 2 parts compost : 1 part seed (more nutrition).
- Micro seeds (poppies): Reduce compost and mix seeds in after hydrating the clay/compost to avoid burying them too deep inside the ball.
Seeds to prioritize
- Native wildflowers: Coneflower, black-eyed Susan, yarrow, milkweed (region-dependent).
- Nurse plants: Fast-germinating annuals like clover or phacelia to shade slower perennials.
- Beneficial insect magnets: Alyssum, borage, calendula, dill, fennel.
- Edible resilience: Kale, mustard greens, arugula, chard; herbs like cilantro and parsley.
- Soil healing: White clover, crimson clover, vetch, buckwheat as living mulch.
Avoid invasive species or anything restricted in your state or municipality. If you’re not sure, consult local native plant societies or extension offices.
Pro tip
Sift compost so chunks don’t create air pockets that crack your seed bombs too deeply while drying.
Step-by-step instructions: How to Make seed bombs the right way
Here’s the proven, repeatable process for How to Make seed bombs that hold together, dry fast, and germinate strong.
- Prep dry ingredients
- Measure your dry clay and sifted compost into a bowl at your chosen ratio.
- If using mycorrhizae or rock dust, stir them in now for even distribution.
- Hydrate gradually
- Mist or sprinkle water while mixing by hand. Stop when the mixture holds shape when squeezed but doesn’t stick to your palms. If it’s sticky, add a bit more dry clay.
- Add seeds smartly
- For standard mixes, fold in seeds until evenly integrated. For tiny seeds, roll the bombs first, then roll the outside of each ball on a plate of seeds to coat the surface. This keeps minuscule seeds near the outside where they can catch light and break through quickly.
- Form the bombs
- Pinch off marble-to-golf-ball-size chunks (1–3 cm for micro seeds, 3–4 cm for normal seeds).
- Roll gently until smooth. Don’t compress too hard; you want a firm sphere without squeezing out all pore space.
- Dry thoroughly
- Place on a drying rack, old window screen, or newspaper in a warm, ventilated area out of direct sunlight.
- Rotate after 12–24 hours for even drying.
- Drying window: 24–72 hours depending on humidity and size.
- Cure and store
- After drying, cure for a week in a breathable bag or cardboard box. Label seed type and date.
- Store cool and dry. Avoid sealed plastic in humid climates; it can condense and pre-germinate seeds.
Deployment window for How to Make seed bombs
- Time with rain. For spring or fall rains, toss or place 24–48 hours before a forecasted system.
- In Mediterranean or monsoon climates, aim for the start of your rainy season.
- In cold-winter regions, fall deployment allows natural stratification for species like milkweed and coneflower.
Placement tips
- Gently press seed bombs into contact with soil; don’t just toss onto hard pavement.
- Avoid deep shade unless you’re using shade-tolerant species.
- In bare dirt, rough up the surface with your heel to improve contact.
Troubleshooting texture
- Crumbling while forming: Mix is too dry—add a splash of water.
- Sticky hands, smear-prone balls: Too wet—dust with more clay.
- Cracking during dry: Compost too chunky—sift better; or dry more slowly.
Mid-content water resilience tip: If you plan a large neighborhood greening push, a portable supply system like Aqua Tower can help you pre-wet sites and support seedlings through the first two weeks.
Choosing the best seeds by climate, soil, and intent
Your seed mix is the soul of your project. When you plan How to Make seed bombs, match species to your site’s sunlight, rainfall, soil type, and goals.
By goal
- Pollinators: Mix early, mid, and late bloomers. Example template: phacelia (early), coreopsis (mid), aster/goldenrod (late).
- Soil repair: Clover, vetch, buckwheat for quick biomass and nitrogen.
- Edible landscapes: Fast greens (mustard, arugula), hardy herbs (parsley, cilantro), bee-friendly edibles (borage).
- Erosion control: Perennial grasses + clover, with ground-hugging flowers like creeping thyme in sunny, well-drained sites.
By climate
- Arid/High heat: Desert marigold, globe mallow, sunflower, native milkweed; select drought-tolerant clovers.
- Temperate: Coneflower, black-eyed Susan, bee balm, yarrow, lupine, calendula, poppies.
- Cool/cold: Lupine, viola, calendula, hardy clovers; fall-sown perennials that like stratification.
- Humid subtropical: Coreopsis, gaillardia, blanketflower, cosmos, zinnia; basil, roselle in long summers.
Site realities
- Sunlight: Full-sun mixes need 6–8 hours; for partial shade, include woodland-edge natives.
- Soil pH and drainage: Most wildflowers like neutral to slightly acidic soils with decent drainage. Heavy clay sites benefit from species tolerant of temporary wetness (monarda, milkweed varieties, sedges).
Seed quality matters
- Buy fresh seed from reputable suppliers or local native plant groups.
- Local eco-region seed has higher success and ecological value.
- Blend sizes: Combine quick annuals for first-year color with sturdy perennials for persistence.
Advanced tip
Layer seeds by germination speed. If you’re mastering How to Make seed bombs for lasting meadows, include:
- Sprinters (germinate in 5–10 days): buckwheat, mustard, phacelia.
- Midfielders (2–4 weeks): coreopsis, cosmos.
- Anchors (stratification or slower start): milkweed, echinacea, prairie dropseed.
Clay, compost, and the science behind seed bombs
Understanding why seed bombs work turns a craft into a strategy. The core of How to Make seed bombs is building a micro-environment that buffers moisture, nutrients, and oxygen.
Clay’s role
- Protection: Keeps birds and ants from immediate access.
- Water dynamics: Clay hydrates and dries slowly, moderating moisture swings.
- Structure: Forms a crust that cracks into a mosaic, opening channels for emerging roots.
Compost’s role
- Nutrition: Supplies early-stage nitrogen, phosphorus, and micronutrients.
- Microbial life: Welcomes beneficial microbes that prime root systems.
- Porosity: When sifted, compost creates micro-pores for air exchange.
Why ratios matter
- Too much clay: Seed bombs become bricks—slow to crack, poor emergence.
- Too much compost: Crumble-prone balls that dry too fast and blow away.
- Balanced mix: Holds shape, softens with rain, and breaks open on a reliable timetable.
Water—friend and foe
- Early hydration is critical; repeated wet-dry cycles are beneficial.
- Constant saturation in poor-draining spots can rot seeds.
- In hot climates, surface-baked seed bombs can harden. Solve with higher compost, surface-scored balls, or deployment just before a cool front.
Add-ons that help
- Mycorrhizal inoculant: Especially valuable in degraded soils; enhances root exploration.
- Biochar: Increases cation exchange capacity and moisture storage.
- Rock dust: Feeds soil life and supports long-term resilience.
For those building a broader resilience plan alongside How to Make seed bombs, food backup is smart. Pair your seed-bomb meadows with pantry insurance from The Lost SuperFoods to round out your self-reliance strategy.
Deploying seed bombs in urban and rural landscapes (ethics and legality)
When you’re excited about How to Make seed bombs, it’s tempting to toss them everywhere. But smart deployment considers permission, ecology, and neighbors.
Ethics and permission
- Private property: Always ask first. Many owners happily approve pollinator plantings.
- Public spaces: Check municipal codes. Some cities welcome native wildflower projects and even provide seed.
- Ecology: Use native species; avoid invasives. Don’t seed sensitive habitat without guidance.
Urban strategy
- Tree pits: Choose salt-tolerant, compact species; add organic mulch after sprouting.
- Fencelines and verges: Press bombs into soil cracks; water discreetly once post-rain.
- Planters and rubble: Expect heat stress—use drought-hardy annuals (zinnia, cosmos, borage).
Rural strategy
- Field margins: Seed buffers that curb erosion and welcome beneficial insects.
- Erosion gullies: Mix grasses and clover; deploy before forecasted multi-day rains.
- Hedgerows: Long-blooming natives to support pollinators and beneficial predators.
Timing and density
- Toss with intent: 1–2 seed bombs per square foot for dense wildflower patches; 1 per 2–3 square feet for meadow look.
- Stagger deployment: Two or three waves within a season increases odds against weather variability.
Community approach
- Organize a neighborhood seed-bomb day. Provide labeled mixes (Pollinator Mix A, Soil Repair Mix B).
- Teach kids How to Make seed bombs to instill care for biodiversity.
- Leave discreet signs where appropriate, explaining native species benefits.
Watering and aftercare
- In true guerrilla contexts, you may rely solely on rain. If feasible, a stealth watering round 5–7 days after first rain boosts success.
- For organized, permitted spaces, consider a simple rain-harvesting or container supply like the New Water Offer: SmartWaterBox to bridge dry weeks.
Variations, recipes, and kid-friendly projects
How to Make seed bombs can be adapted for different goals, ages, and aesthetics. Try these proven variations.
Wildflower burst (temperate)
- 5 parts clay, 1.5 parts compost, 1 part mixed native wildflower seeds.
- Add a pinch of mycorrhizae.
- Size: 2–3 cm.
- Deployment: Fall or early spring.
Pollinator power (long bloom)
- Annuals: phacelia, cosmos, calendula.
- Perennials: echinacea, coreopsis, gaillardia.
- Mix sprinters with anchors for year-round color.
Edible edges
- Greens: arugula, kale, mustard.
- Herbs: cilantro, parsley, dill.
- Flowers you can eat: borage, nasturtium, calendula.
- Ratio: Slightly higher compost for nutrient demand.
Shade-friendly mix
- Woodland edge natives; avoid full-sun divas.
- Smaller bombs; press into leaf litter gaps.
Micro-seed technique
- Make small balls without seeds; roll damp balls onto a plate of tiny seeds (poppy, yarrow). Gently press so seeds adhere near the surface.
Kid-safe craft day
- Use gloves if kids have sensitive skin.
- Pre-label seed types with simple icons (bee = pollinator, leaf = edible, shield = soil healer).
- Keep sizes small; they dry faster and are easier to throw.
Color coding
- Mix in a tiny pinch of non-toxic mineral pigment or use colored paper bits (see next part) to visually differentiate bombs by seed type.
Recommended safety and cleanup
- Avoid using any invasive or noxious species.
- Clean mixing area promptly; clay dust can leave a film on floors.
Quick win tip
If kids are making a lot at once, set up drying racks with labeled zones. Include a simple chart of when each mix will bloom so they can watch the timeline.
Paper-based seed bombs, storage, and long-term success
Beyond clay-and-compost, you can make paper-based seed bombs. They’re great for crafts, weddings, or classrooms, and they’re a helpful variation to understand as you master How to Make seed bombs.
Paper-based method
- Shred uncoated, non-glossy paper. Soak in warm water 30–60 minutes.
- Blend into a pulp; squeeze out excess water.
- Fold in seeds gently.
- Press pulp into small balls or cookie-cutter shapes on a screen.
- Dry completely (24–72 hours). Store in paper envelopes.
What paper is best for seed bombs?
- Uncoated office paper, kraft paper, and egg cartons work well.
- Avoid glossy magazines or heavily dyed paper that may contain coatings or inks unfriendly to germination.
Clay vs. paper seed bombs
- Clay bombs: Better moisture buffering, pest protection, and ruggedness in the field.
- Paper bombs: Better for gifting and indoor starts; decompose quickly once wet.
Storage do’s
- Cool, dark, and dry. Cardboard boxes or paper bags breathe and protect seeds.
- Label with species and date. Most wildflower seeds keep 1–3 years if stored well; some (like parsley) lose viability faster.
- Avoid heat sources and humidity.
Longevity boosters
- For long-term self-reliance: Maintain a seed inventory and refresh annually by growing out and saving seed.
- Create seasonal deployment routines aligned with regional rains to keep patches reseeding naturally.
If you’re integrating How to Make seed bombs into broader preparedness, water security is the first domino. Consider compact systems like Aqua Tower to keep young plantings and container starts from failing during dry spells.
Troubleshooting, common mistakes, and scaling up
Even with the best technique, real-world conditions vary. Here’s how to troubleshoot How to Make seed bombs and scale your project.
Low germination
- Cause: Old or low-viability seed. Fix: Source fresh, local seed; do germ tests (10 seeds on damp paper towel).
- Cause: Overly hard clay shells. Fix: Add more compost, score surfaces with a toothpick.
- Cause: Missed rain window. Fix: Re-deploy ahead of a better forecast; lightly water once after toss.
Seedlings wilt after sprout
- Cause: Heat/drought stress. Fix: Early morning watering once or twice; add species with heat tolerance next round.
- Cause: Poor soil contact. Fix: Press bombs in more firmly at deployment.
Bombs fall apart pre-dry
- Cause: Too much water or rough handling. Fix: Add dry clay; form smaller sizes; let them rest on screens.
Wildlife interference
- Birds/ants: Use cayenne dust on the outside or deploy just before overnight rain.
- Pets: Avoid deploying in accessible yards; label projects.
Scaling up for community projects
- Standardized recipes: Print ratios on cards.
- Team stations: One station mixes, one rolls, one dries, one packs.
- Label and map: Track which mixes go where for learning and iteration.
- Seasonal workflows: Spring wildflower rounds, summer soil-healing rounds, fall perennial/native anchors.
Data-driven improvement
- Photo sites before and after.
- Note rainfall, temperature extremes, and bloom timing.
- Adjust species mix by results.
Urban playbook
- Start with permitted spaces (school gardens, community beds).
- Use signage to educate and reduce accidental removal.
- For guerrilla attempts, prioritize natives, avoid obstructing visibility, and keep areas tidy.
Preparedness tie-in
If your goal with How to Make seed bombs includes building robust, resilient city plots, equip yourself with urban-specific strategies from the New Survival Offer: URBAN Survival Code. Pair know-how with compact water security via the New Water Offer: SmartWaterBox so your green patches don’t wither after week one.
Conclusion: Mastering How to Make seed bombs for real-world impact
You now have a complete blueprint for How to Make seed bombs—from material science and seed selection to deployment, ethics, and scaling. The magic is simple: a protective clay shell, a nutritive core, and timing with moisture. Done right, seed bombs restore urban corners, stabilize soil, feed pollinators, and even produce edible greens with near-zero infrastructure.
Next steps:
- Pick your goal: pollinators, soil repair, or edible resiliency.
- Match a seed mix to your climate and site.
- Follow the ratios and drying method above.
- Deploy with the rain.
- Iterate from results and build seasonal rhythms.
Recommended gear and guides
- Water security and seedling success: Aqua Tower
- Portable water backstop: New Water Offer: SmartWaterBox
- Food resilience compendium: The Lost SuperFoods
- Urban readiness and site strategies: New Survival Offer: URBAN Survival Code
FAQ: How to Make seed bombs (expert answers)
What paper is best for seed bombs?
Uncoated, non-glossy paper like office paper, kraft paper, or egg cartons. Avoid glossy magazines and heavily inked materials; coatings can impede water penetration and seedling emergence.
How do seed bombs work?
The clay shell protects seeds from predators and wind, retains moisture, and cracks open with wet-dry cycles. Compost provides early nutrients and microbial life. When rain comes, the shell softens and seeds germinate in a nutrient-rich micro-site.
How many seeds per seed bomb?
For marble-sized bombs, 3–10 seeds per ball is common, depending on seed size. In mix ratios, that often translates to roughly 1 part seed to 5–7 parts clay/compost combined by volume. For tiny seeds, surface-roll the bombs on seeds so they’re not buried too deep.
Why do we use clay in seed bombs?
Clay binds the ball, shields seeds from birds and ants, slows moisture loss, and forms a cracking crust that creates pathways for sprouts. It’s the core ingredient that makes How to Make seed bombs effective in rough, unmanaged conditions.
Disclosure: Some links above are affiliate links. If you purchase through them, we may earn a small commission at no extra cost to you. This supports our ability to produce free, practical guides like this one on How to Make seed bombs.