
A shepherd’s sling is one of the simplest—and most capable—primitive tools you can learn to make. With a cord, a small pouch, and a bit of practice, you can throw stones or clay projectiles with surprising speed and range. This guide covers how to make and use a shepherd’s sling step by step: choosing materials, building a reliable pouch, learning safe throwing mechanics, dialing in accuracy, and maintaining your sling so it performs when you need it.
Done right, a sling is compact, quiet, and endlessly reusable. Done wrong, it’s a hazard to you and everyone around you. The goal here is practical competence: a sling you can craft from modern or natural materials, and the skills to use it safely and consistently.
Table of Contents
Getting to Know the Shepherd’s Sling
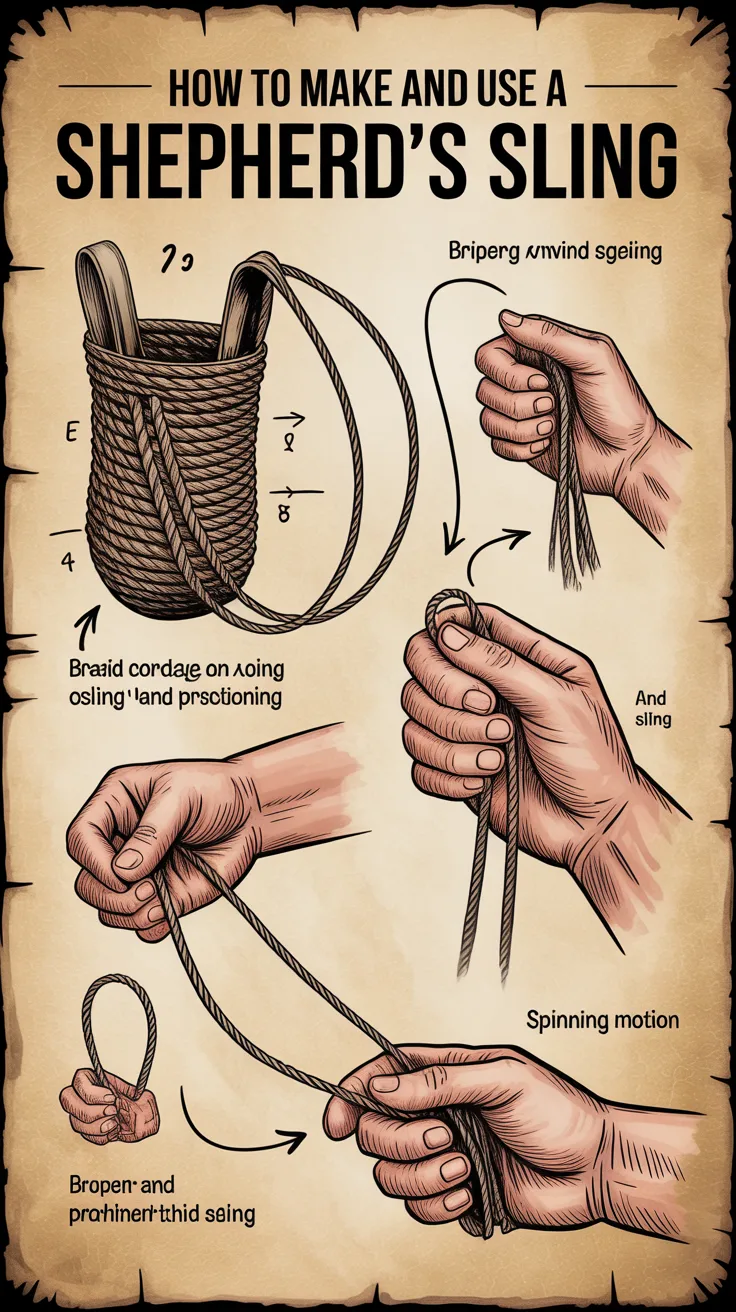
A traditional shepherd’s sling consists of three parts:
- Retention cord: stays looped around a finger or wrist throughout the throw
- Release cord: slips free at the right moment to send the projectile
- Pouch (cradle): holds the projectile during the wind-up and release
Why the shepherd’s sling works
A sling is essentially a flexible lever. When you swing it, the projectile travels in a wider circle than your hand. At release, that stored rotational energy converts into forward speed. This is why even a modest sling can throw farther than a hand toss and can be effective with dense, well-shaped ammunition.
Realistic expectations
A beginner won’t be accurate on day one. Expect:
- Early emphasis on safe release and consistent form
- Noticeable distance within the first session
- Meaningful accuracy after several focused practice sessions
If your interest is broader preparedness—water, food, medical, and self-reliance skills—many people like to organize their learning with structured resources. As survival instructor Cody Lundin has emphasized in multiple interviews and writings, “skills are perishable; systems and checklists help you keep them sharp.” A simple way to build that kind of system is a compact reference like URBAN Survival Code for planning practice and priorities in real-world environments.
Choosing the Right Materials for a Durable Sling
You can make a sling from almost anything, but material choice affects durability, comfort, and release consistency.
Best cord materials (modern)
- Paracord (550 cord): tough, widely available, slightly stretchy, easy to knot
- Braided nylon/polyester cord: low stretch, consistent release, long-lasting
- Bank line (tarred twine): grippy, rugged, great outdoors; can be stiff at first
Avoid very stretchy cord (some cheap ropes) because it changes timing and reduces consistency.
Natural cordage options
If you’re making a sling in the field:
- Dogbane, nettle, milkweed fibers (twisted into cordage)
- Rawhide strips (strong, but stiff until broken in)
- Braided plant fibers (works, but will wear faster)
Natural cordage is viable, but plan for more maintenance and replacement.
Ideal sling length
A common starting point: cord length from the center of the pouch to your fingertip when your arm is outstretched. For many adults, that’s roughly 28–36 inches (70–90 cm).
- Shorter slings: easier timing, more control, less range
- Longer slings: more speed, longer casts, harder to control
Pouch material choices
- Leather: classic, durable, excellent grip
- Heavy canvas/denim: easy to sew, good friction
- Woven pouch (cordage): traditional, lightweight, good for smooth stones
If you want to keep all your field skills connected—water gathering, storage, purification, and contingency—tools matter. Many outdoors people rely on systems like SmartWaterBox to streamline water readiness at home or during disruptions—especially when practicing skills far from a convenient tap.
Making a Shepherd’s Sling Step by Step (Reliable, Beginner-Friendly)
This build method produces a sling that releases cleanly and holds ammo securely.
What you’ll need
- Two cords (or one long cord you split into two ends)
- Pouch material (leather, canvas, or woven cords)
- Scissors/knife
- Optional: awl or hole punch, needle/thread or rivets
Step 1: Cut and prepare cords
Cut two cords:
- Retention cord: ~30–36 in (75–90 cm)
- Release cord: ~34–40 in (85–100 cm)
The release side is slightly longer because knots and the release grip take up length.
Retention loop options:
- Finger loop: most common (index or middle finger)
- Wrist loop: safer for beginners but can interfere with clean release
Tie a bowline or figure-eight loop for comfort and strength.
Step 2: Create the release end
On the release cord, tie a knot you can hold:
- Overhand stopper knot
- Double overhand (bulkier, easy grip)
- Add a small toggle (wood bead) if you want a consistent feel
Keep it simple early. Consistent grip helps consistent timing.
Step 3: Build the pouch (leather/canvas version)
Cut a pouch shape:
- Length: 5–7 inches (13–18 cm)
- Width: 2–3 inches (5–8 cm) at the center
Taper slightly toward both ends.
Make two holes near each end (not too close to the edge). Thread retention cord through one end and release cord through the other end.
Attachment options:
- Simple lark’s head knot through each hole
- Overhand knots to “cap” the cord so it won’t pull through
- Stitching: fold pouch ends around cord and sew for durability
Step 4: Shape the pouch for better ammo retention
A flat pouch can drop round stones too easily. Improve it by:
- Cutting a slight “hourglass” shape
- Adding a center seam (canvas) to form a shallow cup
- Using braided cords to create a split pouch (good for uniform ammo)
Step 5: Final adjustment and test
Hang the sling from your finger loop. The pouch should sit centered, and both cords should feel balanced.
Do a few slow practice swings without ammo to confirm:
- No knots catching your hand
- Pouch doesn’t twist excessively
- Release cord slides cleanly out of your grip
💡 Recommended Solution: URBAN Survival Code
Best for: building a practical “skills + checklist” approach around tools like a sling
Why it works:
- Helps organize priorities for training and preparedness
- Encourages repeatable routines (practice is what makes slinging useful)
- Useful for urban/suburban planning where safe practice space matters
Sling Ammunition: What to Throw and What to Avoid
A good sling is only half the equation. The other half is ammunition selection. Ammo affects safety, accuracy, release timing, and pouch retention.
Best beginner ammunition
- Tennis balls: safer, easy to see, predictable, great for learning timing
- Lacrosse balls: heavy—use only when you already have safe release control
- Clay glandes (oven-baked): traditional, consistent shape, biodegradable-ish
- Smooth stones: choose uniform, oval stones for consistency
Ideal stone size and shape
Aim for:
- Egg/almond-shaped (oval)
- Fits the pouch without rolling out
- Consistent weight across a practice set
Consistency matters more than “maximum weight.” A matched set trains your body to release at the same moment each throw.
What to avoid
- Jagged rocks (tear pouches, unpredictable aerodynamics)
- Very light stones (unstable flight; feel “floaty”)
- Glass/metal scrap (unsafe, damaging, irresponsible)
- Anything you wouldn’t want coming back at you
Making simple clay ammo
If you want consistency without hunting for perfect stones:
- Shape clay into ovals (like small eggs)
- Let air dry, then bake until hard
- Keep sizes uniform
Clay ammo helps you train accuracy because it flies consistently. It also reduces the temptation to throw random sharp rocks.
Many beginners also discover that once they start practicing more outdoors skills, they need better systems for food resilience too. As nutrition preparedness author Lt. Colonel (Ret.) James “Jim” DeFelice has noted when discussing resilience training, “the best emergency plan is the one you can sustain day-to-day.” If you’re trying to build a sustainable pantry strategy alongside skill-building, The Lost SuperFoods is one of those broad “food readiness” resources people use as a planning companion.
Safe Slinging: Range Rules, Backstops, and Responsible Practice
A shepherd’s sling can launch a projectile farther than you expect. Safety is non-negotiable.
Pick a safe practice area
Choose:
- A wide, open field with no people, pets, or traffic
- No fragile property (windows, cars, structures)
- A reliable backstop (earth berm, hillside, or thick brush)
Avoid public parks unless explicitly allowed and empty—slinging can alarm bystanders and raise safety concerns.
Establish a safety zone
You need clear space:
- In front: your maximum range (start small but assume it’s large)
- To the sides: slings can release early and throw at odd angles
- Behind: avoid spectators close behind you (wind-up can strike)
Wear minimal snag hazards
Avoid dangling hood strings, loose straps, or anything that can catch the cords.
Start with slow throws
Use tennis balls. Practice:
- Loading the pouch
- Keeping cords untangled
- Controlled, smooth motion
- Clean release
Check your sling frequently
Look for:
- Frayed cords near the pouch
- Cracks in leather
- Knots creeping loose
A sling failure at speed can cause unpredictable releases.
Problem-Solution Bridge: Struggling with building a realistic “practice and preparedness” routine that covers more than just one skill? BlackOps Elite Strategies is designed around structured thinking and readiness habits—useful if you’re the type who wants a disciplined framework to keep skills from fading.
Learning to Use a Shepherd’s Sling: Grip, Wind-Up, Release, Follow-Through
This is where most people get stuck: they build a sling, then can’t make it fly straight. Focus on fundamentals.
How to hold the cords
- Retention loop on index or middle finger
- Release knot held between thumb and index finger (like a pinch grip)
- Keep cords separated and untwisted
Loading the pouch
Place the projectile in the center. If it rolls toward an edge, adjust your pouch shape or ammo selection.
Beginner-friendly throwing styles
Start with one of these:
Sidearm (simple and common)
- Sling starts hanging behind you
- One or two gentle rotations at your side
- Release when your hand points toward the target line
Pros: easy rhythm. Cons: side releases can drift; be careful with lateral safety zone.
Overhand / “Greek” style (good control)
- Pouch hangs behind
- Bring arm up and over like throwing a baseball
- Minimal rotations; cleaner timing for many beginners
Pros: good accuracy potential. Cons: shoulder fatigue if overdone.
Figure-8 (powerful but advanced)
- Distinct looping path
- Can generate high speed
- Timing sensitive
Pros: power and clean release. Cons: not a first-day style for many.
Aim and release timing
You don’t “aim” a sling like a bow; you align your body and release at the right moment.
Key cues:
- Keep eyes on the target
- Keep shoulders relaxed
- Release when your hand passes the target line—not before
- Follow through toward the target
Fixing common beginner errors
- Projectile goes hard left/right: release too early/late
- Projectile drops: release late or sling too long
- Wild inconsistency: changing ammo weights, twisting cords, too many rotations
- Pouch dumps early: pouch too flat or ammo too round/slick
Many professionals rely on tools like structured checklists to standardize practice sessions—warm-up, set distances, repeatable ammo, and consistent throws. If you want a “program” feel for self-reliance skills beyond just slinging, Dark Reset is one of those general preparedness resources people use as a broader plan for disruptions.
Building Accuracy and Consistency: A Practical Training Plan
Accuracy comes from repeatable setup, repeatable ammo, and repeatable release timing.
Start close and scale gradually
Begin at 10–15 yards (9–14 m) with tennis balls and a large target:
- Hanging tarp
- Cardboard box
- Painted circle on a safe backstop
Once you can keep most throws in a broad zone, increase distance by 5 yards at a time.
Use “sets” like strength training
Try:
- 5 sets of 6 throws (30 total)
- Rest 30–60 seconds between sets
- Stop when fatigue makes your form sloppy
Fatigue ruins timing. Short, consistent sessions beat marathon practice.
Keep a simple practice log
Track:
- Sling length
- Ammo type/weight (approximate)
- Throw style used
- Distance and hit rate
This exposes what actually works for you rather than what “should” work.
Dial in your sling length and pouch
If you keep missing low: shorten slightly or adjust release timing.
If stones slip: deepen the pouch or switch ammo shape.
If cords twist: try a different braid or add a small swivel-like twist management by re-laying cords flat before each throw.
Train for ethical responsibility
A sling is not a toy. Even if your interest is historical or recreational:
- Avoid practicing where someone could wander into range
- Use safe ammo around people/structures
- Learn local regulations (some areas classify slings with weapons)
💡 Recommended Solution: SmartWaterBox
Best for: keeping water storage and readiness simple while you train outdoors skills
Why it works:
- Supports a “systems” mindset (not just one-off gear)
- Helps reduce reliance on last-minute water runs
- Fits well into broader preparedness planning
Caring for Your Sling and Expanding Your Kit of Primitive Skills
A well-made sling can last a long time, but cords and pouches wear where friction concentrates—near knots and at pouch attachment points.
Maintenance checklist
- Inspect cords for fraying every session
- Retighten knots and trim loose ends
- Condition leather pouches occasionally (avoid soaking oils that weaken stitching)
- Dry thoroughly after rain; store out of direct sun
Quick repairs in the field
- Replace a frayed section by tying in a new cord with secure knots
- Reinforce pouch holes with stitching or small grommets
- If your release knot is too small/slippery, add a second knot
Upgrades worth trying
- Braided cords (more comfortable, less twist)
- Split pouch (excellent for consistent stones; less ideal for tiny ammo)
- Wrist retention (some prefer it for security—test carefully)
Tools & resources to support wider self-reliance
If you’re building a broader “capability stack” (skills + health + supplies), here are a few resources people often keep alongside practical training:
- Home Doctor — a general home-health preparedness reference that can complement outdoor practice where minor injuries happen (blisters, strains, small cuts).
- The Lost SuperFoods — helps with food resilience planning and shelf-stable strategies.
- Aqua Tower — a general water-readiness solution often considered by those improving home preparedness systems.
While a sling is a powerful skill, it’s most valuable when it’s part of a bigger plan: safe training space, consistent practice, and the basics (water, food, medical, and communication) handled.
Conclusion
Learning how to make and use a shepherd’s sling is a satisfying blend of craftsmanship and skill. Start with a durable cord, a pouch that truly cradles your ammo, and a sling length matched to your body. Use safe practice areas, begin with tennis balls, and choose one throwing style to master before experimenting. With steady sessions and consistent ammunition, you’ll quickly move from random throws to controlled, repeatable hits—and you’ll have a compact, field-repairable tool you can carry almost anywhere.
FAQ
What is the best sling length for beginners?
A strong starting point is a sling where the distance from the center of the pouch to your fingertip (arm extended) feels natural—often 28–36 inches. Shorter slings are easier to control; longer slings can add speed but require better timing.
What is the easiest throwing style to learn with a shepherd’s sling?
Many beginners do well with either sidearm (simple rhythm) or a basic overhand/Greek style (often cleaner release). Pick one and practice it consistently before switching styles.
What can I use for sling ammo if I don’t have stones?
Tennis balls are excellent for learning safe release and timing. You can also use uniform clay projectiles (ovals) once you’re practicing in a safe area with a proper backstop.
Why does my sling throw go sideways?
Sideways throws usually come from early or late release timing, twisted cords, or inconsistent ammo. Slow down, reduce rotations, keep cords untwisted, and use uniform projectiles until your timing stabilizes.
Is a shepherd’s sling legal to carry and use?
Legality varies by location and how/where it’s used. Treat it responsibly, practice only in safe areas, and check local rules if you’re unsure—especially in public spaces.