
Building your own solar generator is one of the smartest ways to gain energy independence, lower your bills, and ensure you have power when the grid goes down. This step-by-step guide shows you exactly how to build your solar generator, from sizing and selecting components to safe assembly, testing, and future upgrades. Whether you’re crafting a portable power box for camping or a rolling home backup unit, you’ll learn practical methods and best practices that work in the real world.
If you’re also strengthening your overall resilience, complement your DIY power project with the URBAN Survival Code for practical urban preparedness strategies.
Table of Contents
Planning and sizing for success
If you want to know how to build your solar generator the right way, start with an energy plan. A well-sized system runs quieter, lasts longer, and costs less over time.
Define your use case
- Portable/camping: light, compact, quiet, 300–1,000 W inverter, modest battery and panels.
- Home backup/cart: more capacity, 1,000–3,000 W inverter, larger battery bank and array.
- Worksite/van-life: medium to large capacity, durable enclosures, efficient charging.
List your loads and run-time
- Write down each device, watts, and hours per day.
- Example loads: LED lights (10 W), laptop (60 W), Wi-Fi router (10 W), phone charging (10 W), small fridge (60–120 W running, higher surge).
- Convert to Watt-hours (Wh): watts × hours. Sum all for daily Wh demand.
Size your battery bank
- Target at least 1.5–2× your daily Wh so you’re not fully draining the battery daily.
- Battery types:
- LiFePO4: high cycle life, lightweight, safer chemistry, more usable capacity per Ah.
- AGM/Gel (sealed lead-acid): lower upfront cost, heavier, lower usable capacity, slower charging.
- Battery voltage: 12 V for small builds, 24 V for medium, 48 V for larger inverters and efficient wiring. Higher voltage reduces current and cable size.
Size your solar array
- Daily solar production depends on panel wattage, sun hours, orientation, and system efficiency.
- As a rule of thumb, size panels to recharge your typical daily usage in one sunny day, with margin.
- Example: If you use 1,000 Wh daily, a 300–400 W array may work in peak-sun conditions; add more for cloudy regions or winter.
Choose your inverter
- Pure sine wave preferred for sensitive electronics and compressors.
- Inverter continuous rating ≥ your maximum simultaneous load.
- Surge rating should cover motor/compressor startups (often 2–3× running watts).
Select your charge controller
- MPPT is more efficient and flexible with panel voltages, ideal for most builds.
- PWM is simpler/cheaper but less efficient; better for small, budget builds with matched panel/battery voltages.
Safety, protection, and monitoring
- Fuses or DC breakers at every battery, panel, and load branch sized to cable ampacity.
- Proper wire gauge to avoid voltage drop and heat.
- Battery Management System (BMS) for lithium batteries (many LiFePO4 packs have integrated BMS).
- Shunt-based battery monitor for accurate state-of-charge readings.
A solid plan prevents rework and protects your investment—especially important for portable builds where space and weight matter.
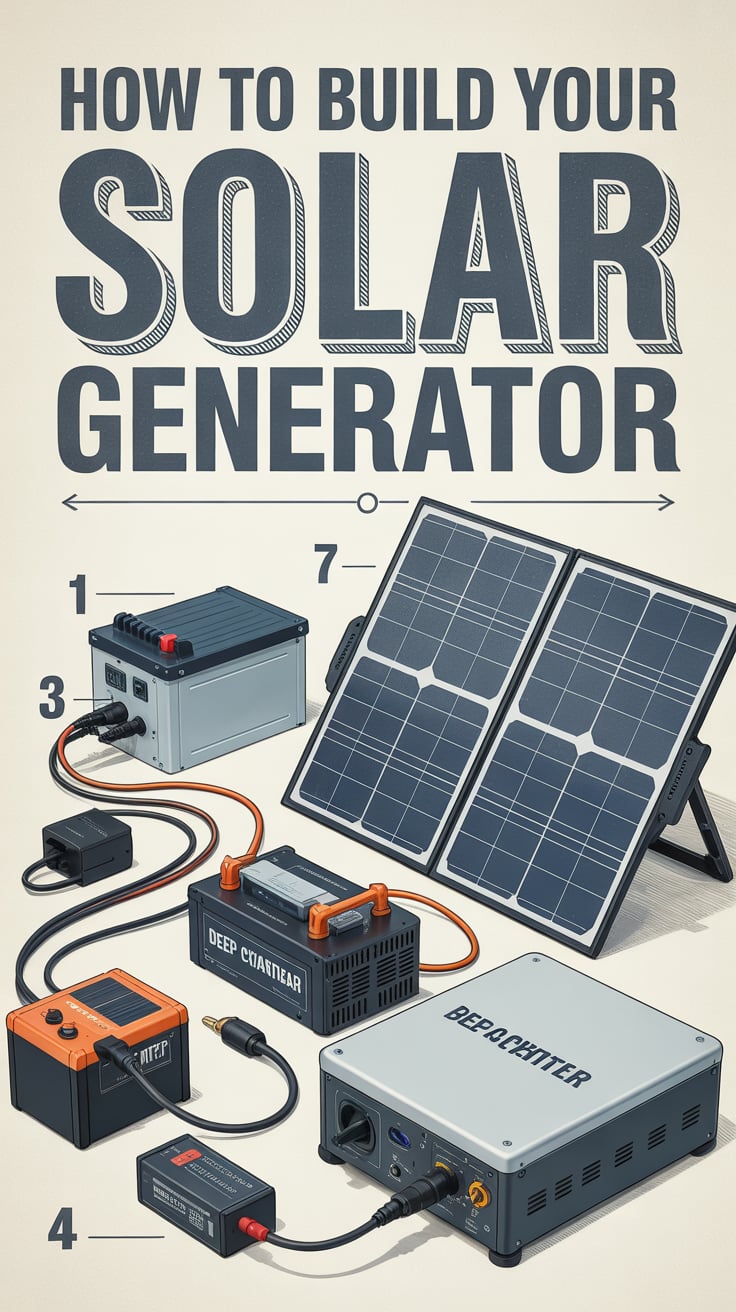
Components and tools you’ll need
Gather the right parts before you start. A clean, compatible set of components makes assembly smoother and safer.
Core components
- Solar panels: Rigid or folding. Consider total wattage, voltage, and connector type (MC4 is common).
- Charge controller: MPPT for efficiency and headroom; ensure it matches your battery voltage.
- Battery bank: LiFePO4 or sealed lead-acid. Choose capacity based on your Wh needs and desired autonomy.
- Inverter: Pure sine wave, with continuous and surge ratings to match your loads.
- DC distribution: Fuse block or DC breakers, bus bars, and a shunt for monitoring.
- AC side: Inverter AC outlets, GFCI protection, and optional transfer switch if interfacing with home circuits (follow local codes; consult a licensed electrician for house wiring).
- Cables and connectors: Appropriately sized battery cables (e.g., 4 AWG to 2/0 AWG depending on current), MC4 extension leads, ring terminals, lugs, heat shrink.
Protection and control
- Inline fuses/DC breakers for:
- Between panels and controller
- Between controller and battery
- Between battery and inverter
- Each branch circuit as needed
- On/off disconnects for safe service.
- Grounding hardware and bonding jumpers (follow NEC/local guidance).
- Inline fuses/DC breakers for:
Monitoring and configuration
- Battery monitor with shunt, or a smart BMS app for LiFePO4.
- Charge controller display/app for voltages, currents, and settings.
- Multimeter for voltage, continuity, and diagnostics.
Enclosure and mounting
- Portable box: Rugged plastic case with vents, handles, strain reliefs; consider a fan for thermal management.
- Rolling cart: Plywood or metal frame, casters, panel mounts, cable glands.
- Weather protection for panels and connectors.
Tools and materials
- Wire cutters, strippers, crimpers for large lugs and small terminals.
- MC4 crimp tool and wrench.
- Heat gun for heat-shrink tubing, cable glands, zip ties, adhesive mounts.
- Label maker or tape for circuit identification.
- Personal protective equipment: safety glasses, gloves, insulated tools.
Optional expanders
- PV combiner box for multiple panel strings.
- Additional panels for seasonal boosts.
- DC-DC charger for charging from a vehicle alternator (van/RV setups).
- Remote monitoring gateway for off-site data.
Choose components that work as a system: matching voltages, current ratings, and connectors saves time and avoids headaches.
How to build your solar generator: system design and wiring
Before you fasten anything down, map the power flow. A clear layout reduces errors and makes future maintenance painless.
High-level architecture
- PV array → charge controller → battery bank → inverter → AC loads.
- DC loads can connect to a fused DC distribution panel directly from the battery (via appropriate fusing and switches).
Panel configuration
- Series wiring increases voltage; parallel increases current.
- Match the array’s voltage and current limits to your controller’s specifications.
- For MPPT controllers, running the array at a higher voltage (within spec) can reduce wiring losses.
Protection and disconnects
- PV side: A breaker or fuse rated for the array current; a PV disconnect between panels and controller.
- Battery side: A main battery fuse/breaker near the positive terminal feeding the DC bus and inverter.
- Controller-to-battery: Fuse per controller recommendations; always connect controller to battery before connecting panels (prevents overvoltage on the controller input).
Battery wiring
- Keep cables short and thick for high-current paths.
- For multi-battery banks, use proper series/parallel methods with balanced cabling to ensure even charging/discharging.
- For LiFePO4 with integrated BMS, follow manufacturer charge/discharge limits.
Inverter connection
- Connect inverter DC inputs to the main battery bus via a properly sized fuse/breaker.
- Ensure solid, clean ground bonding per inverter manual.
- Use GFCI-protected outlets on the AC side.
- If integrating with home circuits, use a transfer switch or interlock kit installed by a qualified electrician to prevent backfeed.
Grounding and bonding
- Bond negative DC to chassis ground where appropriate and permitted by code.
- Earth-grounding of frames and enclosures improves safety; consult local requirements.
Cable management and ventilation
- Route high-current cables away from signal wires to reduce interference.
- Provide airflow around batteries, inverters, and controllers; avoid enclosing them in sealed, hot spaces.
Labeling and documentation
- Label each cable, fuse, and switch with its function and rating.
- Keep a simple wiring diagram on the inside of the enclosure for quick servicing.
When in doubt, prioritize safety: correct fusing, correct wire gauges, and clear disconnects. That’s the backbone of a reliable, serviceable solar generator.
Assemble the portable or rolling power unit
With design in hand, you’re ready to build. The following process works for a portable box or a rolling cart—adapt dimensions and mounting to your form factor.
Prepare the enclosure
- Dry-fit the main components: battery, controller, inverter, bus bars, and fuse blocks.
- Mark mounting holes, ventilation paths, and cable runs.
- Drill and deburr openings for cable glands, fans, and panel meters.
Mount the DC core
- Secure bus bars and the main battery breaker/fuse close to the battery to minimize unfused cable length.
- Install the shunt for the battery monitor on the negative line (between battery negative and system negative).
- Mount the charge controller with clearance for cooling; route controller negative directly to the shunt’s system side.
Install the battery bank
- Place the battery in a stable cradle or strap system.
- Connect the negative to the shunt, then positive through the main breaker to the positive bus bar.
- Verify polarity before tightening lugs. Use torque specs where provided.
Wire the charge controller
- Connect controller output to the DC bus (through recommended fuses).
- Leave the PV input disconnected for now.
- Program initial battery settings (chemistry, absorption/float voltages, max current).
Wire the inverter
- Connect inverter DC leads to the bus bars via a dedicated fuse/breaker matched to inverter’s max current.
- Mount AC outlets or wire to a small sub-panel with GFCI.
- Keep DC leads as short as practical to reduce voltage drop.
Add DC distribution (optional)
- Install a fused DC panel for 12/24 V accessories (lights, pumps, radios, USB chargers).
- Fit appropriate fuses for each device and label circuits.
External connections and panel harness
- Terminate MC4 connectors on PV input leads; route through a PV disconnect/breaker to the controller.
- Add strain reliefs for all external cables; avoid sharp bends and pinch points.
- Install meters or displays where they’re easy to read.
First power-up sequence (without PV)
- Double-check every connection with a multimeter for continuity and correct polarity.
- Close the main battery breaker; power up the controller and inverter with no loads.
- Verify system voltage on the monitor and set the inverter’s low-voltage cutoff per battery specs.
Connect the panels
- Verify open-circuit voltage (Voc) of the panel/string with a multimeter matches your design.
- With the controller already connected to the battery, close the PV disconnect; confirm charging current appears on the controller display.
Tip: Keep a build log with photos of each step; it helps with troubleshooting and future upgrades.
While you’re building power autonomy, consider water resilience to match. A compact, off-grid option like SmartWaterBox can complement your solar generator for emergencies or remote trips.
Commissioning, testing, and safety checks
A careful commissioning process ensures your solar generator performs safely from day one.
Visual inspection
- Confirm tight lug connections; no exposed copper; heat-shrink applied.
- Check cable routing for chafe points; add protective loom if needed.
- Verify correct labeling on breakers/fuses and clear access to disconnects.
Electrical verification
- Battery voltage at rest: confirm healthy levels per chemistry.
- Charge controller: verify correct battery profile, absorption/float settings, max charge current.
- PV array: confirm expected Voc and Isc within safe limits; test on a sunny day for real-world watts.
Inverter tests
- No-load test: turn the inverter on; observe idle power draw if available.
- Light load test: plug in a small device (e.g., LED lamp), check for stable operation.
- Step-load test: add loads incrementally (laptop, fan, then a fridge or power tool) while monitoring inverter status and battery voltage sag.
Protection validation
- Trip-test DC breakers and resets to ensure they operate as designed.
- Confirm GFCI outlets trip at the test button.
- Simulate an overcurrent condition with a controlled test load if you have proper tools (optional, advanced).
Thermal and acoustic checks
- Run a 30–60 minute load test; use an infrared thermometer to spot hot connections.
- Listen for abnormal fan noise or buzzing, which can indicate loose hardware or resonance.
Safety and storage
- Place a Class C-rated fire extinguisher nearby; never cover ventilation openings.
- Store lithium batteries within their recommended temperature ranges.
- Transport with disconnects open; secure the unit to prevent tipping.
Documentation
- Record system settings, fuse ratings, and a wiring diagram in a binder or digital note.
- Note serial numbers for warranty support.
After commissioning, your solar generator should start and charge reliably, run your planned loads, and stay cool and quiet under typical use.
How to build your solar generator for maximum efficiency
With the system running, optimize for more usable energy, longer component life, and less maintenance.
Panel placement and tilt
- Face panels toward true south (north in the southern hemisphere) with seasonal tilt adjustments.
- Avoid shade during peak sun hours; even a small shadow on one panel can slash output.
- Clean glass periodically with water and a soft brush to remove dust and pollen.
Energy management
- Schedule heavy loads (charging power tools, running the blender) during peak solar production.
- Use efficient DC appliances where practical; skip inefficient inverters for small charging tasks if your unit provides DC outputs.
- Replace vampire loads with energy-savvy alternatives (LED bulbs, efficient laptops).
Battery care
- For LiFePO4, avoid extreme temperatures and deep discharges to maximize cycles.
- For sealed lead-acid, avoid chronic partial charging; allow periodic full charges to prevent sulfation.
- Set proper low-voltage cutoffs and temperature compensation (if supported).
Wire and connection health
- Check torque on lugs after the first week of use and every few months.
- Inspect flexible cables near hinges and handles for wear.
Expandability tips
- Adding panels: confirm charge controller can handle added current/voltage; otherwise, add another controller.
- Adding batteries: keep chemistry, capacity, and age similar; mixing old and new or different chemistries can shorten life.
- Higher system voltage: if you outgrow 12 V, consider a rebuild to 24/48 V for reduced current and smaller cables.
Monitoring and data
- Track daily Wh production vs. consumption; adjust habits based on real data.
- If available, enable remote monitoring to catch issues while you’re away.
Seasonal adjustments
- In winter, increase tilt, clear snow promptly, and consider a slight panel oversize buffer.
- In hot climates, allow extra ventilation; heat reduces controller and inverter efficiency.
The best solar generator is one you actually use—make it part of your routine, not just an emergency tool.
Troubleshooting common issues and advanced upgrades
Even a well-built solar generator can hiccup. Here’s how to diagnose and improve.
Common issues and fixes
- Low charging or no charging:
- Check PV disconnect and fuses; confirm voltage at the controller input.
- Clean connectors; inspect MC4s for arcing or bent pins.
- Verify controller settings for correct battery voltage profile.
- Inverter shuts down under load:
- Battery voltage sag suggests undersized cables, weak battery, or excessive load.
- Increase cable gauge, reduce load, or test battery health.
- Confirm inverter low-voltage cutoff isn’t set too high.
- Uneven battery performance (multi-battery banks):
- Check for balanced cabling; measure voltage drop across leads; re-terminate if needed.
- Overheating:
- Improve airflow, add a fan, reduce continuous load, or relocate to cooler space.
- Low charging or no charging:
Diagnostic tools
- Multimeter for voltage across system nodes.
- Clamp meter for current on DC/AC legs.
- IR thermometer to spot hot spots at lugs and breakers.
- Battery monitor logs to correlate events with loads and charging.
Advanced upgrades
- Automatic transfer switch (ATS): Seamlessly powers selected home circuits during outages. Install by a licensed electrician.
- Vehicle charging: Add a DC-DC charger to charge while driving (great for van or RV).
- Extra PV string: Add a second MPPT controller and independent string for redundancy.
- Remote displays: Mount a wall display for SOC, PV watts, and load power at a glance.
- Portable expansion: Create a folding panel kit with quick-connects for travel.
System hardening
- Use covered bus bars and insulated tools to prevent accidental shorts.
- Keep a maintenance kit with spare fuses, MC4s, and a basic crimp set.
- Store a printed wiring diagram and a laminated quick-start guide on the unit.
Power is one pillar of resilience. Food, water, and first aid are others. Pair your generator with a water solution like SmartWaterBox so your essentials remain covered when the grid is down.
Take the next step in resilience
Your solar generator gives you clean, quiet electricity anywhere. To round out your preparedness, consider medical self-reliance and shelf-stable nutrition alongside power and water. A practical resource like Home Doctor can be a useful addition to your kit, especially when professional care is delayed.
Recommended preparedness resources
If you’re building a self-reliant setup, these resources complement your DIY power project:
- URBAN Survival Code — Practical urban resilience and contingency planning to match your off-grid power goals.
- SmartWaterBox — A compact approach to off-grid water autonomy that pairs well with portable solar.
- The Lost SuperFoods — Ideas for long-lasting foods to keep your household powered and nourished in any situation.
Choose only what fits your needs and context—being intentional prevents clutter and ensures you rely on tools you trust.
Conclusion
You now know how to build your solar generator from the ground up: plan your loads and capacity, select compatible components, assemble with correct fusing and wiring, commission safely, then optimize and expand. A well-built system can power lights, communications, refrigeration, and tools—silently and reliably—wherever you are. Treat it like any mission-critical tool: document, maintain, and improve it over time. With a balanced approach to power, water, and basic supplies, you’ll have a resilient setup ready for both everyday use and emergencies.
FAQ
What does it cost to build a solar generator?
Costs vary widely based on size and chemistry. Small portable builds can be budget-friendly; larger cart systems with LiFePO4 batteries and pure sine inverters cost more. Price components by capacity rather than chasing the lowest upfront numbers.
How long does it take to build?
If you have all parts and basic tools, a straightforward build can be assembled over a weekend. Allow extra time for planning, enclosure fabrication, and careful commissioning.
Should I choose 12 V, 24 V, or 48 V?
12 V works for small, portable systems under about 1,000 W. 24 V is a sweet spot for medium builds, reducing current and cable size. 48 V is better for larger inverters and higher efficiency, but requires compatible components.
Which battery is best for DIY solar generators?
LiFePO4 offers long cycle life, high usable capacity, and fast charging—ideal for portable and home backup units. Sealed lead-acid (AGM/Gel) is cheaper upfront but heavier and less tolerant of deep discharges.
How to build your solar generator to run a fridge?
Choose a pure sine inverter with sufficient surge capacity (often 2–3× the fridge’s running watts), size a battery bank with adequate Wh for overnight cycling, and provide enough solar panel wattage to recharge daily. Test with a clamp meter to confirm real-world draw.
Can I connect my solar generator to home circuits?
Yes, but only through a transfer switch or interlock installed by a licensed electrician to prevent dangerous backfeed. Never plug into a wall outlet to “backfeed” your home.