
A wickiup is a classic Indigenous-inspired, dome-shaped bushcraft shelter built with a tripod of poles and layers of interwoven brush, boughs, and debris. If you want to master how to build a wickiup shelter for survival, camping, or preparedness, this long-form guide is your blueprint. You’ll learn how to build a shelter step by step, how to select the right site, the best materials, and how to customize a wickiup for rain, wind, or extreme cold. This is the most practical field manual you’ll find on how to build a wickiup shelter and why it still matters for self-reliance today.
Boost your field resilience with clean water on demand: SmartWaterBox
Table of Contents
Part 1: What a Wickiup Is and Why It’s Still the Best Primitive Shelter
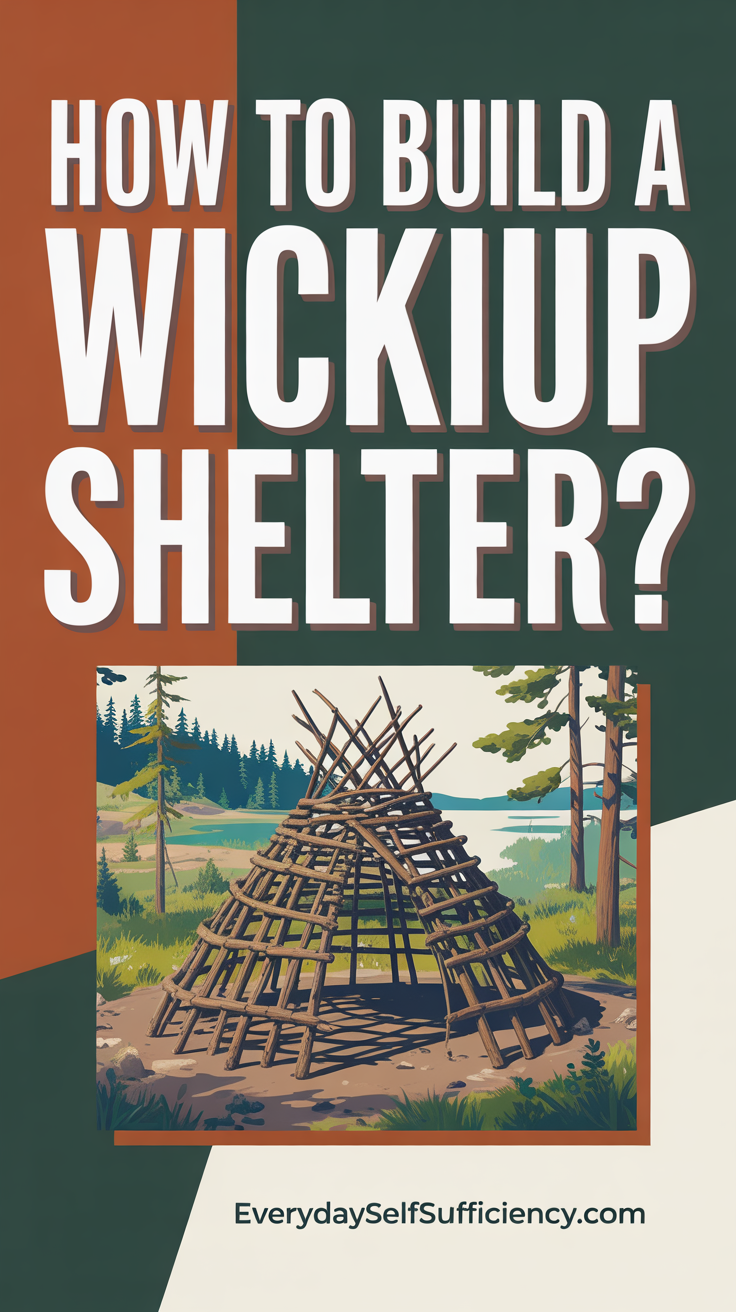
To understand how to build a wickiup shelter, start with the design philosophy. A wickiup is a semi-permanent, conical or dome-like frame made from poles and saplings, covered with layered thatch—think wattle of sticks and thatch of brush, leaves, grass, bark, or boughs. This structure is related to a teepee, but a wickiup’s frame is usually more curved and woven, offering excellent stability and insulation. If you’re serious about how to build a wickiup shelter that stands up to weather, you’ll love its forgiving, modular construction.
Historically, variations of the wickiup (also wikiup) were used by several Indigenous peoples of the American West and Southwest, prized for quick construction with local materials and a warm, sheltered interior with a controllable smoke hole. Learning how to build a wickiup shelter helps you apply timeless principles—stability, drainage, insulation, and ventilation—without needing a heavy toolkit.
Key reasons to choose a wickiup:
- Durability and weather resistance: Once you learn how to build a wickiup shelter, you’ll appreciate how its curved profile sheds wind and water.
- Scalable: You can build a one-person micro-wickiup or a family-sized shelter for extended stays.
- Fire-friendly: With a smoke hole, a wickiup safely supports a small contained fire for heat and cooking.
- Material flexibility: Knowing how to build a wickiup shelter means you can use whatever’s abundant—conifer boughs, tall grasses, leaf litter, bark shingles, or evergreen branches.
When you research how to build a wickiup shelter, you’ll find its design forgiving. Imperfect poles still work. The woven lattice naturally strengthens as you add layers. The curved dome creates convection circulation, which is a big deal for smoke and warmth. If your survival plan includes adaptable, low-tool shelters, mastering how to build a wickiup shelter gives you a foundation that outperforms simple lean-tos and quick windbreaks.
Related skills that pair well with how to build a wickiup shelter include:
- Selecting safe sites away from hazards
- Building raised beds to reduce conductive heat loss
- Managing smoke holes and ventilation
- Layering debris for weatherproofing
- Crafting natural cordage and tripod lashings
For a comprehensive library of self-reliant know-how beyond how to build a wickiup shelter, bookmark our self-sufficiency guide.
Part 2: Site Selection and Safety—How to Build a Wickiup Shelter That Lasts
If you want to know how to build a wickiup shelter that truly protects you, site selection is where success starts. Before you cut a single pole, walk the area and assess hazards. The best shelter begins with the safest ground.
Checklist for picking the right site:
- Drainage: Your wickiup must sit on high, slightly convex ground. Avoid depressions that collect water. A simple drainage test: if rainwater would pool where you stand, move.
- Wind: When choosing how to build a wickiup shelter, turn the doorway leeward, away from prevailing winds. Use natural windbreaks like boulders or dense brush—but don’t tuck under dead limbs.
- Widowmakers: Scan above for dead branches or unstable trees. Anything that could fall in a storm disqualifies the spot.
- Water access: Close to water but not in a floodplain. Stay well above any obvious flood line. If you can hear a stream but don’t see signs of past flooding, you’re likely in a good zone.
- Resources: How to build a wickiup shelter efficiently? Choose a site with ample straight saplings, brush, and debris within a short haul. Don’t exhaust yourself carrying materials.
Orientation matters. To master how to build a wickiup shelter that breathes and heats well, face the door slightly off true leeward to balance wind protection with clean air intake. If you’ll run a small fire, a gentle funnel effect through the doorway helps draw smoke up to the vent.
Ground prep is step one in how to build a wickiup shelter:
- Rake away sharp debris.
- Scrape down to mineral soil where your fire will sit.
- Create a slight trench or swale outside the perimeter to shed runoff.
- Consider a cold sink by digging a shallow pit near the doorway; cool air will settle there, keeping your sleeping area warmer.
How to build a wickiup shelter for multi-day use? Plan a footprint wider than your wingspan. Stake out a circle with a cord to visualize diameter. Standard diameter: 8–12 feet for 1–3 people.
Remember, part of how to build a wickiup shelter is anticipating the environment—rising winds at night, shifting weather fronts, temperature drops, and wet ground. If you nail the site, you’ve solved half the shelter’s job before you start.
Part 3: Materials and Tools—Gathering What You Need in the Field
You can learn how to build a wickiup shelter using nothing but a knife and natural materials, yet a few compact tools make everything safer and faster. Your goal: gather 15–30 sturdy poles (1–2 inches thick, 8–12 feet long), plus dozens of thin saplings or branches for weaving, and lots of thatch material for insulation.
Best materials for the frame when learning how to build a wickiup shelter:
- Poles/saplings: Willow, hazel, alder, maple, poplar, birch, young oak—straight, springy, and not rotten.
- Weavers: Thin, flexible withes—willow shoots, vine maple, young hazel.
- Cover: Conifer boughs, cattails, tall field grasses, palm fronds (in tropics), bark sheets, leaf litter, bracken fern, reeds.
- Ties/lashings: Natural cordage (basswood, cedar inner bark, stinging nettle fiber), spruce roots, or modern paracord/bankline.
Minimal tool kit for how to build a wickiup shelter:
- Folding saw or bow saw for clean, safe pole cutting
- Fixed-blade knife for shaping stakes and notches
- Small hatchet/hand axe for splitting and pointing stakes
- Gloves to protect hands when weaving
Health and safety are part of how to build a wickiup shelter. A first-aid reference can be a lifesaver when you’re working with blades and green wood. Keep a compact kit and a field manual ready: Home Doctor
Sourcing cover material is where many people underestimate the volume needed. If you’re serious about how to build a wickiup shelter that sheds rain, you’ll want several big piles ready. Think in terms of cubic yards, not armfuls. For evergreen boughs, cut responsibly from multiple trees to avoid damage, and don’t strip any one tree.
If you’re in a grassland or cattail-rich area, bundle thatch into thick sheaves before building. When you know how to build a wickiup shelter with grass bundles, you can produce overlapping shingles that rival a tarp in wet weather.
Finally, staging materials smartly near the build site keeps momentum up. Lay frame poles in one stack (longest on top), weavers in another, and cover materials in multiple piles around the perimeter. This is a small productivity hack that matters a lot when learning how to build a wickiup shelter efficiently.
Part 4: The Tripod and Main Frame—Your Step-by-Step Build Begins
Now the hands-on part of how to build a wickiup shelter begins. The tripod is your foundation. Choose three strong, straight poles of equal length. Make a simple tripod lashing with paracord or natural cordage: two wraps around all three poles, then several frapping turns between poles to cinch tight. Stand the tripod, spreading legs evenly to form your shelter’s diameter.
Core sequence for how to build a wickiup shelter:
- Tripod up: Ensure each leg is well-seated on firm ground. The apex should be high enough for you to sit upright.
- Add ribs: Lean additional long poles around the tripod to create the primary ribs, evenly spaced like a dome’s skeleton.
- Door frame: Select two sturdy poles to frame the entry. Add a short lintel pole across the top of the doorway to stabilize the opening.
- Lash key joints: Where poles cross, tie quick clove hitches or overhand lashings to prevent shift. You don’t need to lash every crossing—focus on the doorway and structurally critical junctions.
How to build a wickiup shelter so it resists wind:
- Slightly angle ribs so they brace one another.
- Bury the butt end of ribs a few inches or stake them with forked pegs.
- Add a spiral of thin withes around the frame to lock ribs in place.
If you anticipate heavy weather, drive “deadman” anchors (sticks tied to your frame and buried horizontally) for added hold. This little touch can make how to build a wickiup shelter storm-worthy in gusty conditions.
As you proceed, you’ll see the shape emerge. You can refine how to build a wickiup shelter by ensuring symmetry so that thatch layers hang evenly. Imperfect symmetry is fine; prioritize strength at the doorway and any load-bearing ribs.
When your frame feels tight, tug on it. A solid frame is the difference between a comfortable night and a collapse in wind. Practicing how to build a wickiup shelter a few times will rapidly improve your eye for spacing and strength.
Part 5: Weaving, Thatching, and Waterproofing—Turning a Frame into a Home
The magic of how to build a wickiup shelter is in the skin you put on the bones. Start with a lattice weave: take thin, flexible saplings and spiral them around the frame, weaving in and out of ribs. This creates purchase points that hold your cover material. The tighter your weave, the easier it is to secure thatch.
How to build a wickiup shelter that stays dry:
- Bottom-up layering: Always start near the ground and work upward, like shingles. Each new course overlaps the one below by at least 50%.
- Thickness: Aim for a total thatch thickness of 6–12 inches for rain; more in windy conditions.
- Variety: Mix materials—grass bundles, leaf litter, fern, and boughs—to fill gaps. The diversity of textures sheds water better.
Door and smoke hole management are essential skills in how to build a wickiup shelter. Leave a small adjustable vent at the apex. You can shape it by how you layer near the top or tie small sticks to create an adjustable cap. The door should have a simple flap—woven mat, bark panel, or a bough bundle tied at the top. This gives you control over airflow and heat.
If water challenges are a big part of your environment, complement field shelters with a reliable purification plan: SmartWaterBox
Extra waterproofing strategies for how to build a wickiup shelter:
- Mud and daub: In wet, cold conditions, smear a clay-silt mix on the inside lattice and cover with more thatch. This adds mass and blocks drafts.
- Bark shingles: Where available, carefully harvested bark sheets make outstanding shingles when overlapped.
- Drip edge: Build a small earthen berm or lay a ring of branches outside the wall to keep runoff from re-soaking the base.
Inside, create a raised bed using green boughs or a debris mattress. This is central to how to build a wickiup shelter for warmth—your biggest heat loss is to the ground. A thick bed reduces conductive losses dramatically.
Finally, keep a tidy interior. A well-ordered space is safer when you light a small fire. Mastering how to build a wickiup shelter is about the complete system: wall thickness, airflow, sleeping platform, fire placement, and drainage all working together.
Part 6: Fire, Ventilation, and Smoke Management—Warmth Without Risk
A hallmark of how to build a wickiup shelter is integrating a safe, effective hearth. Done right, you get radiant heat, cooking, and morale-boosting light. Done wrong, you risk carbon monoxide, burns, or sparks in the thatch.
Key fire principles when you learn how to build a wickiup shelter:
- Fire size: Think candle, not bonfire. A small, tight fire on mineral soil is plenty.
- Shielding: Use green sticks or stones as a spark screen. Avoid resinous wood that pops excessively.
- Placement: Centered under the smoke hole with ~1–2 feet clearance from all walls.
Ventilation is a must in how to build a wickiup shelter. You need balanced intake (door cracked) and exhaust (apex vent). In calm weather, open the door slightly; in wind, adjust the door so airflow still draws smoke upward. If smoke builds, lower the fire, open the door more, and confirm the vent isn’t blocked by thatch.
A simple heat reflector (short wall of green logs) behind the fire focuses warmth toward your bed. In sub-freezing temps, add hot rock bottles—heat fist-sized stones by the fire and wrap them in cloth for a safe, slow heat release.
Cook simply: stews, bannock, or pemmican-based meals. For shelf-stable nutrition that pairs perfectly with field shelters, explore The Lost SuperFoods
Fire safety reminders for how to build a wickiup shelter:
- Keep a quenching pot of water or damp sand.
- Never leave a fire unattended; bank coals safely at night.
- Brush walls with a green bough occasionally when dry to knock off embers.
With practice, you’ll learn how to build a wickiup shelter that supports a tiny, steady flame and drafts smoke like a chimney. That’s when your shelter moves from basic to elite.
Part 7: Winterizing—How to Build a Wickiup Shelter for Extreme Cold
If you’re wondering how to build a wickiup shelter for extreme cold, the principles are similar—but every detail gets amplified. Your wall must be thicker, your bed higher, and your air control more precise.
Cold-weather tactics for how to build a wickiup shelter:
- Extra thatch: Double the wall thickness; aim for 12–18 inches. Fill interior gaps with leaf litter.
- Door plug: Build a fitted door plug—a woven mat or bough panel that seals better than a flap.
- Cold sink: Dig a slightly deeper pit near the door to trap cold air; sleep on a raised bed platform.
- Reflective liner: Hang an emergency reflective blanket on the side opposite the fire to bounce radiant heat.
In windy snow conditions, how to build a wickiup shelter includes anchoring everything: drive stakes, lash the frame more, and bank snow around the outer wall to create a natural insulative berm. Snow, when stable, is an excellent insulator.
For multi-night winter camps, how to build a wickiup shelter might also include a small clay-lined hearth or a Dakota-style micro fire pit to improve draft. Always keep a clear smoke path at the apex. If condensation drips, add a drip stick—a small stick placed under the apex to channel water away from the fire zone.
Extreme cold also stresses your body. Add margin for error with practical medical guidance designed for off-grid life: Home Doctor
Food and water in the cold demand forethought. Melt snow safely and ration fuel. For a broader preparedness base beyond how to build a wickiup shelter, explore our emergency preparedness checklists. The better your pre-trip planning, the warmer and safer your wickiup nights will be.
Part 8: Leave No Trace, Camouflage, and Long-Term Upgrades
Part of how to build a wickiup shelter like a pro is understanding impact. You’re using living materials; harvest ethically. Cut from multiple trees rather than stripping one. Collect fallen branches when adequate for weaving. When you break camp, scatter debris, fill holes, and let the site recover.
Camouflage is both aesthetic and strategic. If you’re learning how to build a wickiup shelter for discreet camping or training, choose materials matching local colors. Randomize textures on the outside wall, and avoid straight edges that draw the eye. Keep reflective gear inside the shelter.
Long-term upgrades to refine how to build a wickiup shelter:
- Flooring: Lay small poles as a slat floor, then add a thick debris mattress.
- Interior wattle: Weave an inner lattice and stuff with dry leaves for a double-wall effect.
- Bark or shingle panels: In stable camps, bark shingles vastly improve waterproofing.
- Rain apron: Build a slight overhang above the doorway with a mini ridge of thatch to deflect water.
Security and situational awareness also matter. For those who train for austere or urban displacement scenarios that complement how to build a wickiup shelter in rural terrain, study adaptable tactics in URBAN Survival Code
Finally, consider your exit plan. A hallmark of true bushcraft is leaving the forest as you found it. Document how to build a wickiup shelter with photos, then dismantle with the same care you used to build. Scatter the thatch layers thinly, return poles to natural positions, and erase high-traffic signs.
Part 9: Troubleshooting, Checklists, and Pro Tips for Faster Builds
Even when you know how to build a wickiup shelter, field variables can challenge your plan. Use this troubleshooting guide to keep the build on track.
Common problems when learning how to build a wickiup shelter:
- Sagging roof: You need more ribs or a tighter interior lattice. Add spiral withes and more intermediate ribs.
- Leaks in rain: Your shingle overlap isn’t deep enough. Rework bottom-up; double the thickness on the windward side.
- Smoke build-up: Open the door wider, increase the apex vent, and lower the flame height. Eliminate resinous woods.
- Wobbly frame: Tighten lashings, bury butt ends, and add guy lines tied to deadman anchors.
Rapid-build checklist for how to build a wickiup shelter:
- Select a site with built-in windbreak and abundant materials.
- Cut three perfect tripod poles first; the rest can be imperfect.
- Stage materials by type around the perimeter.
- Spiral lattice early; it speeds up thatching dramatically.
- Overlap like shingles; thick on windward, moderate leeward.
- Create a fitted door plug for cold conditions.
Pro tips:
- Pre-bundle thatch into forearm-thick sheaves; it installs faster and denser.
- Use forked sticks as instant stakes, saving cordage.
- Place a fire on a flat rock slab to protect soil and simplify cleanup.
- Craft a quick debris rake from a branch to speed ground prep.
Recommended survival resources to complement how to build a wickiup shelter:
- Water resilience for any camp: SmartWaterBox
- Long-lasting nutrition insights: The Lost SuperFoods
- Off-grid medical confidence: Home Doctor
- Urban and movement-focused tactics: URBAN Survival Code
If you’re building a resilience library that goes beyond how to build a wickiup shelter, consider advanced strategy training as well: BlackOps Elite Strategies
Keep all notes, sketches, and measurements. Each time you practice how to build a wickiup shelter, you’ll cut your build time and boost reliability. With a practiced eye, a solo builder can raise a storm-worthy frame in under two hours and finish thatching by day’s end, even in tough conditions.
Conclusion: Mastering How to Build a Wickiup Shelter for Real-World Resilience
You now have a complete field-tested process for how to build a wickiup shelter from site selection to winterization. This shelter excels because it balances strength, insulation, and airflow, using materials you can source almost anywhere. Practice makes the process intuitive—your hands will start reading wood grain, your eye will judge lattice spacing, and your instincts will dial in a perfect smoke hole.
Next steps:
- Set a weekend challenge to build a 10-foot wickiup and sleep in it.
- Practice doorway seals, fire management, and debris bed construction.
- Document what worked and what to improve.
Build capability where it matters most:
- Water independence for any camp: SmartWaterBox
- Practical off-grid medical know-how: Home Doctor
FAQ
Q: How to build a shelter step by step?
A: The simplest sequence mirrors how to build a wickiup shelter. 1) Choose high, well-drained ground with a windbreak and no overhead hazards. 2) Erect a sturdy tripod and add evenly spaced ribs. 3) Spiral a lattice of thin withes around the frame. 4) Thatch from the bottom up with overlapping layers (boughs, grasses, leaves) to a thickness that blocks wind and sheds rain. 5) Leave an apex vent and build a fitted door plug for airflow control. 6) Inside, create a raised debris bed and a small, well-managed hearth under the vent. This is the most reliable step-by-step approach if you want a warm, stable shelter fast.
Q: What is a Wickiup shelter?
A: A wickiup is a dome or cone-like bushcraft shelter built from a tripod frame, additional ribs, and a woven lattice covered with thick natural thatch. It’s related to a teepee but generally more curved and debris-insulated. Learning how to build a wickiup shelter gives you a fire-friendly, weather-resistant, and scalable structure for survival camps or extended stays.
Q: What is the easiest shelter to build?
A: For pure speed, a leaf-litter debris hut or a simple lean-to is faster than a full wickiup. However, if you need a durable, multi-day home with a small hearth, mastering how to build a wickiup shelter is arguably the best balance of effort-to-comfort. With practice, a solo builder can raise a strong wickiup in a day using local materials.
Q: How to build a shelter in extreme cold?
A: In deep cold, thicker walls, tighter seals, and smarter airflow are essential. Double your thatch, add a fitted door plug, build a raised bed, and manage a tiny fire under a controlled smoke hole. Bank snow around the outside for extra insulation, and consider reflective liners to bounce heat. These principles are central to how to build a wickiup shelter for winter and are transferable to other shelter types too.