
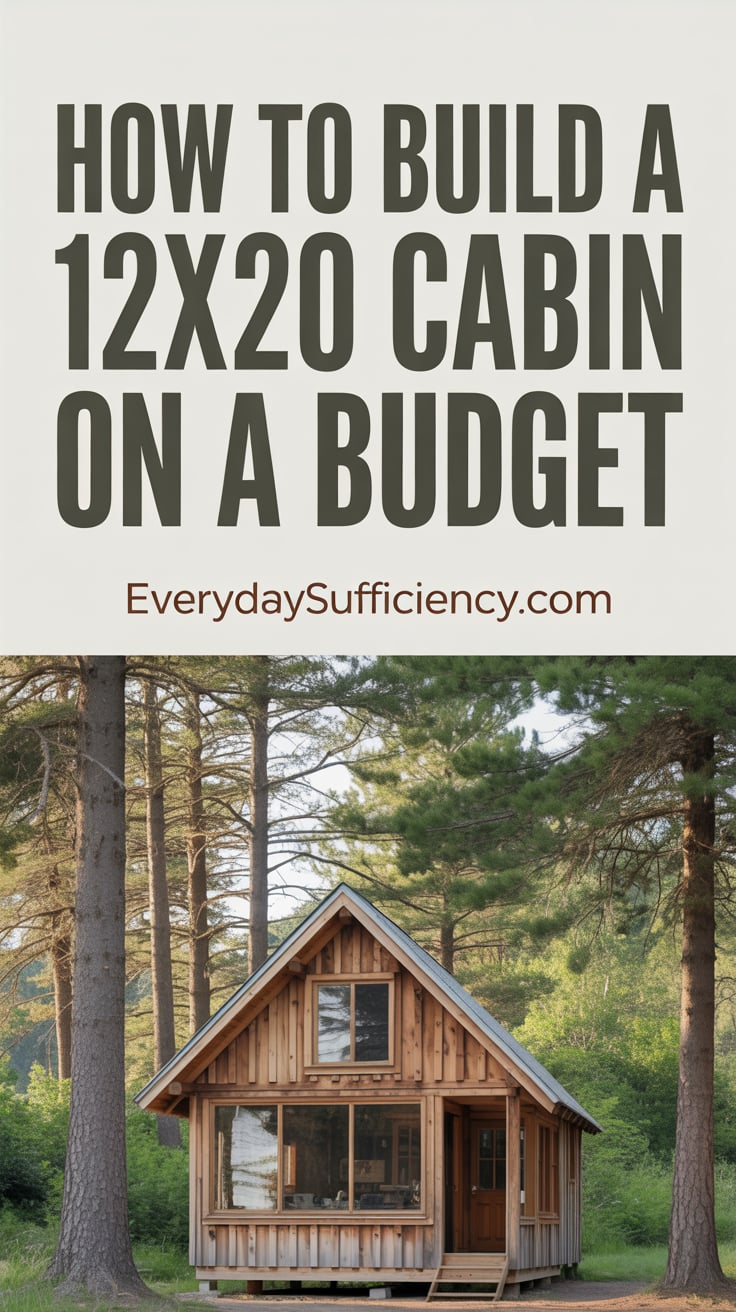
Building a compact, comfortable cabin doesn’t have to drain your savings. If you’re wondering how to build a 12×20 cabin on a budget that’s sturdy, weather-ready, and smartly outfitted for weekend escapes or full-time minimalist living, this guide gives you a realistic path. You’ll learn how to plan, frame, weatherproof, and finish—while avoiding common money traps that inflate costs.
If off-grid water is part of your plan, consider starting your design around a simple catchment-and-filtration setup so you can break ground with confidence. A beginner-friendly option like New Water Offer: SmartWaterBox can help you understand practical ways to secure and manage water around a small cabin.
Budget-first plan and site strategy
A rock-solid budget starts with a list of must-haves and nice-to-haves. For a 12×20 footprint (240 square feet), treat it like a studio: a sleeping nook, multipurpose living area, compact kitchenette, and possibly a tiny bath. Prioritize a dry shell and safe structure over interior finishes—paint and trim can wait.
Key budget moves:
- Right-size the design. A rectangle (12×20) saves lumber and layout time compared to complex shapes.
- Keep the roof simple. A single-slope (shed) or basic gable cuts labor and waste.
- Use pier or skid foundations where allowed. They’re often faster and cheaper than full slabs.
- Shop the “value triangle”: price, durability, and availability. Choosing what’s in stock locally can slash delays and delivery fees.
Site selection and prep:
- Sun and wind: Place the long wall to soak up winter sun and shield prevailing winds. Trees to the west offer summer shade.
- Drainage: Elevated ground with a gentle slope reduces grading costs and moisture problems. Plan a swale or gravel path to move water away.
- Access: Good truck access saves you on delivery surcharges and time lost hauling materials.
Permits and codes:
- Confirm whether your cabin is an accessory structure, a dwelling, or a recreational building in your jurisdiction. Requirements differ.
- Ask your local building department about frost depth, setbacks, and snow/wind loads.
- If you’re new to code research, consult the International Residential Code for baseline guidance. See: International Code Council (ICC).
Simple schedule:
- Week 1–2: Design, permits, materials, and site prep.
- Week 3: Foundation and floor framing.
- Week 4: Walls and roof framing.
- Week 5: Sheathing, roofing, door/window install.
- Week 6–7: Weatherproofing, insulation, basic interior.
Pro tip: Break the project into standalone “good stopping points” (foundation complete, framed and dried-in, basic interior). Cash-flow is easier when you can pause between phases without risking damage.
Helpful internal resources:
- [How to pour a small concrete slab](INTERNAL LINK PLACEHOLDER)
- [Best shed roofing materials](INTERNAL LINK PLACEHOLDER)
External resources:
- International Residential Code (ICC): https://codes.iccsafe.org
- OSHA Safety Topics (ladders, PPE): https://www.osha.gov/topics
- APA – The Engineered Wood Association: https://www.apawood.org
Foundation choices that save money without sacrificing strength
For most budget builds, a pier or skid foundation makes financial sense, especially for a 12×20 footprint. Always check local code and frost-line depth.
Pier foundation basics:
- Layout: A simple grid, e.g., three rows of piers (at 0′, 10′, 20′) with spacing about 6–8 feet on center along the 20′ length. Exact spacing depends on your beam and joist sizes.
- Piers: Precast concrete deck blocks can work for very light non-habitable structures; for greater reliability, use poured concrete piers on footings below frost depth.
- Beams: Pressure-treated beams (e.g., double or triple 2x beams) carry joists. Ensure bearing and connections meet local code.
Skid foundation basics:
- Skids: Pressure-treated 6×6 skids set on a compacted gravel bed. Runners can be set parallel to the 20′ axis with 3 skids (two edges, one center).
- Drainage: A 4–6-inch thick layer of compacted, washed gravel spreads load and sheds water. A slight crown prevents pooling under the cabin.
Moisture protection:
- Cap beams with peel-and-stick flashing tape to protect tops of framing members.
- Use a ground vapor barrier (6–10 mil polyethylene) under the cabin to reduce ground moisture wicking into the structure.
- Keep at least 6–8 inches of clearance and airflow under the cabin floor.
Anchoring against uplift:
- Simple tie-downs or driven anchors, as required by your wind zone.
- Connect beams to piers with appropriate hardware (post bases, straps, or brackets) per manufacturer instructions.
Budget tips:
- Rent, don’t buy, specialty tools like augers or tamper plates.
- Buy pressure-treated lumber in full lengths you can efficiently cut with minimal waste.
- Slope the site lightly away from the foundation so you can defer gutters until later without pooling issues.
Safety note: Pier drilling and lifting beams demand caution. Follow ladder and PPE guidance from OSHA.
Framing the floor for a solid, squeak-free base
A stiff floor is the backbone of a cabin that feels “real” underfoot. Oversimplifying here risks bounce, squeaks, or fastener failures. Plan your joist span and spacing with care and verify with your local code official.
Floor framing steps:
- Sill and beam setup: Set beams level and square. Confirm the 12×20 rectangle by checking diagonals match.
- Rim boards: Install rim joists around the perimeter, fastening to beams with structural screws or hangers where appropriate.
- Joists: Common layouts are 16 inches on center; some builds manage 24 inches on center with thicker decking. Choose what meets code and your load needs.
- Blocking: Add solid blocking mid-span to reduce twist and squeaks.
Subfloor choices:
- Tongue-and-groove plywood or OSB rated for subfloors. Glue-and-screw the panels, staggering seams. Use construction adhesive on joist tops to prevent future squeaks.
- Consider a weather-resistant subfloor adhesive if you expect rain before you dry-in.
Air and critter control:
- Before closing the perimeter, consider installing metal mesh or skirt boards to discourage pests.
- If you’ll insulate the floor joist cavities later, plan access points or insulate before decking if the schedule allows.
Budget tips:
- Look for “contractor packs” on fasteners and adhesives—bulk savings add up.
- Buy sheet goods when lumberyards run promos; a few dollars per sheet matters across a whole floor.
- Keep cutoffs organized for blocking, nailers, and utility chases.
Internal resource:
- [Off-grid solar for beginners](INTERNAL LINK PLACEHOLDER) — plan wire chases before subfloor if you’re running DC lines beneath the cabin.
Walls and roof framing that maximize strength per dollar
Wall framing doesn’t need to be complex—straight, square, and plumb wins every time. Keeping openings modest and aligned helps maintain structural integrity and simplify sheathing.
Wall framing approach:
- Plates and studs: Typical 2x studs at 16 inches on center. Top plates doubled, with staggered joints at corners.
- Openings: Keep windows consistent in width to standardize header sizes and minimize waste. Plan one door on the sheltered side.
- Corners: Use 3-stud corners or ladder blocking to allow insulation at corners, not just solid wood that leaks heat.
- Shear strength: Full sheathing (plywood/OSB) nailed per APA recommendations provides racking resistance. Space nails appropriately (e.g., 6 inches on edges, 12 inches in field—verify with local code).
Roof layout:
- Choice: A shed roof saves complexity and reduces leak-prone valleys. A simple gable is the next easiest.
- Span and pitch: Choose a pitch that sheds snow and fits your climate. Plan rafter spans with code tables or truss design references.
- Overhangs: Small eaves (8–12 inches) reduce splashback and protect siding without major cost.
Roof decking:
- Install roof sheathing with proper panel spacing and H-clips if required. Glue isn’t typical here; rely on correct nailing.
- Add drip edge along eaves and rakes before underlayment.
Budget tips:
- Frame walls flat on the deck and raise them—faster, safer, and more accurate than stick-building in the air.
- Use adjustable braces to temporarily plumb walls until sheathing locks everything square.
- Buy fasteners in bulk and keep nail gun pressures dialed to avoid overdriving.
Authority resource:
- APA – The Engineered Wood Association has fastening schedules and sheathing tips to reduce waste and increase performance.
Weatherproofing, roofing, and siding that stand up to storms
What keeps a budget cabin feeling expensive is a dry, draft-free shell. Invest most of your attention here: water management, air sealing, and durable surfaces.
Roofing:
- Underlayment: Synthetic underlayment provides reliable, long-lasting protection during install. Follow manufacturer overlaps.
- Shingles or metal: Asphalt shingles are budget-friendly and DIYable. Metal can cost more upfront but is lightweight and durable; prices vary by region and supply.
- Flashing: Use proper flashing at penetrations (stovepipe, vents) and at transitions. Never rely on caulk alone for critical water details.
Siding and trim:
- Budget favorites: Board-and-batten, horizontal lap (engineered wood or fiber cement), or even high-quality exterior ply with battens for a rustic look.
- Priming and paint: Prime all cut ends and edges. Two coats of exterior paint go a long way toward longevity.
- Kickout flashing at roof-wall intersections is crucial to divert water away from siding.
Windows and doors:
- Install self-adhered flashing tape at sills before window install. Follow a “shingle” approach so water always flows outward.
- Consider fewer, better windows for budget and performance. Choose basic, energy-conscious units sized to standard rough openings.
Air sealing:
- Seal sheathing seams with homeowner-friendly tapes compatible with your wrap.
- Foam and caulk gaps at plates, corners, and penetrations. A tight shell reduces long-term energy costs more than almost any other step.
Budget tips:
- Time your installs for dry weather windows. If rain arrives, protect subfloors and openings with tarps and temporary overhangs.
- Use a single WRB (water-resistive barrier) system consistently rather than mixing products.
External resource:
- U.S. Department of Energy – Air sealing and insulation guidance: https://www.energy.gov/energysaver/weatherize/air-sealing-your-home
Insulation, finishes, and smart storage that don’t break the bank
Once the shell is dry, you can finish in layers as budget allows. Start with what saves energy and comfort, then add finishes and furniture.
Insulation basics:
- Prioritize air sealing, then insulate. Heat lost through air leaks can dwarf R-value gains.
- Use batt, blown-in, or rigid foam strategies that match your climate and wall depth. Don’t forget the floor and ceiling, where most heat exchanges occur.
- Install a continuous interior air barrier where required; tape seams, seal penetrations.
Interior finishes:
- Walls/ceiling: Painted plywood or panels can be cheaper than drywall and are more forgiving for DIYers. If you do drywall, start with ceilings—finished ceilings make the interior feel complete quickly.
- Flooring: Affordable options include painted subfloor, vinyl plank, or reclaimed hardwood. Finish nail trim pieces to hide gaps and give a polished look.
- Lighting: Choose LED fixtures to reduce power draw if you’ll go solar later. Locate switches near the entry and bed for convenience.
Smart storage:
- Build a raised platform bed with drawers to double storage.
- Use high open shelves on the 12-foot wall for bins and seasonal gear.
- Add a fold-down table that serves as desk and dining.
Basic services planning:
- If grid power isn’t available yet, pre-run conduit for future service or for a small solar charge controller and battery placement.
- Ventilation matters in a tight cabin—consider a small, efficient fan or passive vents to manage humidity from cooking and breathing.
Budget tips:
- Choose one “feature wall” or ceiling detail (like wood planks) and keep the rest simple to stretch dollars.
- Paint with light colors to amplify natural light and reduce the need for more fixtures.
Step-by-step guide to utilities and off-grid options for a 12×20 cabin on a budget
If you plan to live light or off-grid, utilities can still be affordable with careful design. Keep loads small, systems simple, and maintenance minimal.
Water options:
- Rain catchment: A small roof area can feed a first-flush diverter and storage barrels. Place tanks near the cabin for gravity feed to a sink.
- Filtration: Pair catchment with a filtration/purification method suited to your source water and usage. A resource like New Water Offer: SmartWaterBox can help you plan an approachable, DIY-friendly pathway to safe water handling.
- Groundwater access: If your site allows shallow water sourcing, a planning guide such as Joseph’s Well may provide ideas for evaluating and reaching local water resources.
- Purification backup: Keeping a compact, gravity-based or emergency-ready purifier can be a smart second line of defense. Explore options like Aqua Tower for supplemental water safety strategies.
Power:
- Keep electric loads lean: LED lights, phone charging, a laptop, and a small fan are realistic for a starter solar kit.
- Plan a small DC system with expansion in mind—dedicated space for batteries, a vented area for safety, and protected conduit runs.
- If grid is nearby, install an outdoor-rated inlet for a generator as a temporary solution.
Heat and cooking:
- In cold climates, a small, code-compliant wood stove or vented propane heater can be cost-effective. Observe clearances and install proper chimney components.
- For cooking, a two-burner propane stove or induction plate (if solar supports it) balances cost and practicality.
Waste:
- Composting or waterless toilet options reduce plumbing complexity. Verify what’s allowed locally.
- Greywater: Some jurisdictions allow subsurface dispersal of sink/shower water—ask your building department.
Food and resilience:
- Stock a compact pantry of shelf-stable foods to ride out supply hiccups or storms. For long-term storage ideas and recipes, see The Lost SuperFoods.
- Medical readiness matters in remote cabins. A practical reference like Home Doctor can offer guidance for handling common health concerns when professional care is distant.
Internal resource:
- [DIY rainwater harvesting guide](INTERNAL LINK PLACEHOLDER)
Cost-saving materials, tools, and scheduling tactics
Even well-designed builds leak money through inefficiencies. With a few habits, you’ll keep the project on time and under budget.
Material strategy:
- Standardize dimensions: Keep wall heights and window widths consistent to reduce offcuts.
- Buy ahead for price stability: Sheathing, WRB, and roofing can spike seasonally—lock in when prices dip.
- Use commodity finishes: Paint-grade trim, basic door slabs, and stock windows are typically cheaper than special orders.
Tools:
- Essential kit: Circular saw, impact driver, speed square, level, chisels, nail set, hammer, chalk line, and a pair of sturdy sawhorses.
- Rent intermittents: Framing nailer, roofing nailer, plate compactor, and scaffolding can be far cheaper to rent for the exact days you need.
- Keep blades sharp: Fresh blades save time and scrap.
Scheduling:
- Stage deliveries: Don’t fill the site with everything at once. Keep lumber off the ground, stickered and covered.
- Work by weather: Frame and roof during a fair-weather stretch; push interior tasks to rainy days.
- Batch tasks: Cut all studs at once. Install all window flashings in one go. This reduces setup time and error rates.
Quality control checklist:
- Square: Check diagonals before sheathing floors and walls.
- Fasteners: Verify nail patterns match sheathing recommendations.
- Flashing: Photograph window and door flashing layers for your records and future maintenance.
- Safety: Establish ladder setup routines and PPE habits. Regularly review OSHA guidance for common site hazards.
Small upgrades with big returns:
- Add a simple air gap behind siding with furring strips if using certain claddings; this improves drying.
- Install door thresholds and drip caps carefully—these are small details that stop big leaks.
- Gaskets behind outlet plates on exterior walls help reduce drafts inexpensively.
Authority resource:
- U.S. Department of Energy – Insulation materials overview: https://www.energy.gov/energysaver/insulation
Example budget and timeline that actually works
Budgets differ by region, supply, and what you can reuse or salvage. The best way to stay on target is to assign ranges and track real receipts as you go.
Typical cost buckets to track:
- Foundation and site: Gravel, piers/skids, anchors, layout tools.
- Structure: Framing lumber, sheathing, connectors, fasteners, adhesives.
- Exterior: WRB, flashing tape, roofing, siding, trim, paint.
- Openings: Door(s), windows, locks and handles.
- Utilities: Inlets, basic wiring or conduit, small heater, plumbing basics or catchment components.
- Interior: Insulation, wall/ceiling panels, flooring, paint, fixtures.
- Tools and rentals: Nailer, compressor, ladders or scaffolding, auger or compactor.
Time allocation (owner-builder pace):
- Planning and permits: 1–2 weeks, overlapping with materials quotes.
- Foundation and floor: 2–3 days with a helper.
- Walls and roof framing: 3–5 days.
- Sheathing, WRB, roofing, siding: 5–7 days.
- Windows/doors and flashing: 1–2 days.
- Interior insulation and finishes: 5–10 days depending on complexity.
Contingency planning:
- Weather delays: Keep tarps and temporary roof underlayment on hand.
- Material substitutions: Be ready to swap comparable materials if a product is backordered.
- Skill gaps: Budget a few hours for learning—videos from reputable builders, local workshops, or building guides can save costly mistakes later.
Sourcing tips:
- Habitat for Humanity ReStores often have windows, doors, and surplus building materials at steep discounts.
- Ask local lumberyards about “oops” orders or returns.
- Compare delivery fees vs. your own hauling costs, including time and fuel.
When you’re ready to extend capability—especially for water:
- Revisit sizing and filtration ideas with New Water Offer: SmartWaterBox to evolve a simple system as your cabin use grows.
- Explore concept resources like Joseph’s Well for planning access to local water sources.
External resource:
- International Code Council (IRC access and references): https://codes.iccsafe.org
Conclusion: A practical path to a small, strong, and affordable cabin
You now have a step-by-step path for how to build a 12×20 cabin on a budget without sacrificing safety or durability. Start with clear priorities and a clean site, choose a simple foundation and roof, and focus your dollars on the shell: framing, sheathing, roofing, flashing, and air sealing. Finish the inside in phases, keep your loads small if you’re going off-grid, and keep learning as you go. With a thoughtful plan and the right resources—plus small, strategic upgrades like careful flashing and smart storage—you’ll end up with a dry, efficient, and welcoming cabin that punches above its price tag.
If water independence is on your checklist, a resource like New Water Offer: SmartWaterBox, along with backup strategies from Aqua Tower and planning insights from Joseph’s Well, can help you build confidence in your off-grid setup. For pantry resilience and backcountry health readiness, consider The Lost SuperFoods and Home Doctor.
FAQ
How much does it cost to build a 12×20 cabin on a budget?
Costs vary by region and materials, but many owner-builders aim to complete a basic dry shell for less than a comparable factory shed by choosing a pier or skid foundation, simple roof, and standard windows. Track actual receipts for framing, sheathing, WRB, roofing, and siding to stay on target.
What foundation is best for a 12×20 cabin?
Pier or skid foundations are popular for tight budgets, provided they meet local code and soil conditions. Piers on proper footings below frost depth offer reliable support; skids on compacted gravel are quick to install. Plan for drainage, anchoring, and moisture control beneath the cabin.
What roof style is most budget-friendly?
A shed roof is usually the simplest and can use fewer framing parts. A basic gable is also DIY-friendly and widely understood. Keep pitches appropriate for your climate, and use straightforward flashing details to prevent leaks.
How do I insulate a small cabin effectively?
Air sealing is step one—seal sheathing seams and penetrations. Then insulate walls, ceiling, and floor with materials appropriate to your climate and wall depth. Even modest insulation dramatically improves comfort in a small space.
Can I build off-grid utilities for a small cabin cheaply?
Yes—keep loads small and systems simple. Start with rain catchment and basic filtration, a compact solar setup for lights and charging, and a safe, efficient heater. Resources like New Water Offer: SmartWaterBox can help you plan water independence from day one.
Do I need permits for a 12×20 cabin?
Rules vary widely. Some jurisdictions exempt small non-habitable structures; others require permits for anything with utilities or intended occupancy. Confirm setbacks, frost depth, and snow/wind loads with your local building department and consult the IRC where applicable.
How can I save the most money without compromising durability?
Keep the design simple, time your purchases, and focus on a tight, well-detailed shell. Standardize openings, buy fasteners in bulk, protect lumber from weather, and invest in proper flashing and air sealing. These steps add longevity without a big price jump.
Are there safety guidelines I should follow as a DIY builder?
Yes—use protective gear, keep a clean site, respect tool manuals, and set ladders and scaffolding correctly. Review OSHA ladder and PPE guidance to reduce risk. Photograph critical assemblies (flashing, anchors) for future reference and inspections.