
Getting reliable, year‑round water is often the line between a homestead that thrives and one that struggles. This guide walks you through 8 off grid water systems for homestead that are actually usable, covering sources, storage, treatment, and day‑to‑day practicality. You’ll see what works in different climates and terrains, how to size and maintain each approach, and how to combine systems for redundancy so you’re never left dry.
If you’re exploring well options or mapping water sources on your land, a practical resource like Survival Water Box can help you evaluate local options and plan a safe, off‑grid installation.
Before you choose a system, take stock of these basics:
- Source reliability across seasons (drought, freeze, storms)
- Elevation and gravity potential on your site
- Daily household demand and peak use (cooking, laundry, animals, gardens)
- Storage capacity and treatment steps for potable water
- Maintenance effort, replacement parts, and skill level
- Local codes and water rights
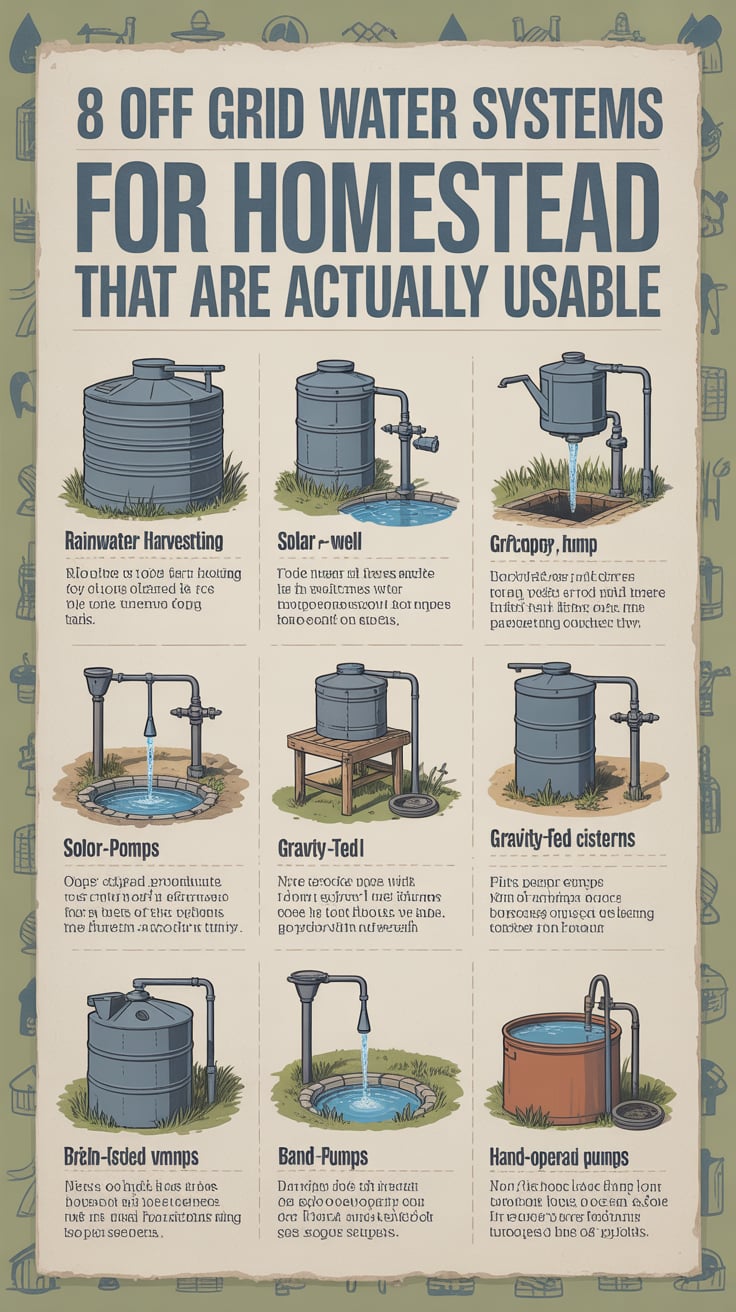
Below are eight systems homesteaders rely on—plus how to make them work together as a simple, resilient water plan.
Table of Contents
Wells that work off‑grid: drilled and hand‑dug done right
Wells remain the backbone of many homesteads because they tap a protected groundwater source and can be pumped without grid power. Two main options are used off‑grid: drilled wells and hand‑dug wells. Each can be paired with redundant pumping so you’re never dependent on a single device.
Drilled well
- What it is: A narrow borehole drilled deep enough to reach a reliable aquifer, lined with casing and a sanitary seal.
- Why it’s usable: When properly sited and constructed, drilled wells offer consistent quality and quantity, often with less surface contamination risk.
- Off‑grid pumping options: A solar‑powered submersible pump paired with a pressure tank can supply household pressure, while a manual pump (lever/hand or deep‑well manual unit) provides backup. Some homesteaders add a cistern as a buffer so the electric pump can run in efficient bursts.
- Practical tips:
- Site the well upslope from septic and barns; keep a sanitary radius clear.
- Ask for a well log or local hydrogeology input to assess likely depth and yield.
- Set up a gravity‑safe backup: an elevated tank or a manual pump that operates even if electronics fail.
- Test water regularly and treat for iron, hardness, or bacteria as needed.
Hand‑dug well
- What it is: A wider, shallower well excavated by hand or machine, lined (stone, concrete rings, or modern liners) and capped to prevent contamination.
- Why it’s usable: In areas with a high water table or where drilling is impractical, a properly lined and sealed hand‑dug well can supply livestock and, with treatment, household water.
- Off‑grid pumping options: Bucket and windlass, hand pump, or shallow well jet pump powered by solar with battery storage.
- Practical tips:
- Use a sanitary cap and tight‑fitting well head to keep out insects and surface runoff.
- Install a concrete apron and drainage to shed rain.
- Treat as a surface‑influenced source: plan on robust filtration and disinfection for drinking water.
Wells shine for reliability, but your real resilience comes from redundancy: pair a solar pump with a manual pump and keep spare parts for wear items. If you’re designing or rehabilitating a well, a how‑to resource like Survival Water Box can help you compare options and avoid common pitfalls.
Rainwater harvesting with first‑flush and a protected cistern
Roof‑to‑tank rainwater systems are among the most scalable off grid water systems for homestead use, from small cabins to full‑time family homes. Rainwater is soft, easy to filter, and abundant in many climates; the key is clean capture and adequate storage.
Core components:
- Catchment: A clean roof with leaf guards and screened gutters. Metal roofing is ideal for potable harvest, but many surfaces work with appropriate filtration.
- Conveyance: Downspouts feeding to a first‑flush diverter that discards the initial dirty runoff, followed by fine screens before entering storage.
- Storage: Food‑grade barrels, IBC totes, or large above/below‑ground cisterns sized to your rainfall pattern and demand. Opaque tanks help prevent algae.
- Treatment: Sediment filter and fine filtration (or slow sand) followed by disinfection (boil, UV, or chlorine) for potable use. For non‑potable (gardens, flushing), simpler filtration may suffice.
- Delivery: Gravity feed from an elevated tank or a small solar‑powered pump for pressure.
Usability best practices:
- Roof hygiene matters. Keep gutters clear and trees trimmed to reduce debris load.
- Size storage for dry spells. It’s common to fill quickly in storms, then rely on tanks for weeks; aim for enough capacity to bridge your longest no‑rain period.
- Keep it dark and closed. Algae and mosquitoes are your enemies; use insect‑proof screens and opaque tanks with tight lids and vents.
- Plan freeze protection. Bury lines below frost depth, insulate exposed sections, and consider burying cisterns in cold climates.
Rainwater is also an ideal backup to a well or spring—giving you a second source that doesn’t depend on a pump. For households wanting a neat, integrated treatment step that works off‑grid, a compact module like SmartWaterBox can streamline filtration and disinfection without complicated installation.
Developed spring with gravity‑fed distribution
If your land has a reliable spring, you’re looking at one of the simplest, most power‑free water systems available. A properly “developed” spring protects the source, collects clean water before it meets surface contaminants, and moves it to where you need it—often by gravity.
How it works:
- Locate the emergence point(s) where groundwater flows to the surface.
- Excavate and build a spring box: a watertight collection basin that captures water as it emerges, excluding soil and surface runoff. Include:
- An intake screen to keep out debris
- Overflow that returns excess to the environment without eroding
- A sealed lid to keep out animals and insects
- A drain for cleaning
- Plumb to a settling tank or directly to an elevated cistern/tank if the spring sits uphill from the homestead.
- Distribute via gravity whenever possible. Gravity‑fed lines are quiet, reliable, and immune to power outages.
Why it’s usable:
- Minimal moving parts: daily operation is passive.
- Clean starting point: water often needs less treatment than surface sources, though testing and disinfection are still recommended for potable use.
- Freeze resilience: buried lines and a protected spring box resist freezing, especially with continuous low‑flow.
Design tips:
- Protect the recharge area. Keep livestock, manure, and chemicals well away upslope.
- Use food‑grade pipe and fittings. Install cleanouts and shut‑offs where you can reach them.
- Add storage near the home. A modest tank provides buffer during peak use and maintenance.
- Treat for potability. A simple treatment train—sediment filter to remove fine particles, followed by boil/UV/chlorine—adds safety without much complexity.
Gravity is the homesteader’s best friend. If you can arrange your spring source above your tap, you gain a water system that keeps working when weather, fuel, or electronics don’t.
Ram pump to elevated storage for free pumping
A hydraulic ram pump uses the momentum of moving water to lift a portion of that water uphill—without any electricity or fuel. If you have a creek or stream with steady flow and at least a modest drop in elevation, a ram pump can push water to an elevated tank that gravity‑feeds your homestead.
Core idea:
- Water flows downhill through a drive pipe to the ram pump.
- The pump’s waste valve cycles open and closed rapidly, building pressure and forcing a fraction of the water through a delivery line to a higher elevation.
- The only energy input is the height drop (head) from source to pump; the more drop, the more lift potential.
Why it’s usable:
- No external power: ram pumps run continuously and can fill storage day and night.
- Rugged and simple: few moving parts, easy to service with basic tools.
- Pairs perfectly with a gravity system: fill an elevated cistern, then distribute by gravity.
Design and maintenance:
- Site the pump below the water source with a straight, rigid drive pipe. Avoid sharp bends and flexible hose for the drive run.
- Use a screened intake and a settling box at the source to keep grit out.
- Plan for periodic cleaning and valve replacement. Keep a small kit of spare valves and seals.
- Don’t overpull from a stream. Respect water rights and ecology; ensure sufficient bypass flow remains.
Integration tips:
- Combine a ram pump (source) with a covered cistern (storage) and a simple treatment train (safety). The result is a fully off‑grid potable supply if the raw source is clean enough to treat.
- Add a manual bypass so you can work on the pump without draining the system.
- Provide freeze protection by burying lines and using drain‑back where appropriate.
When your site has the right terrain and flow, a ram pump is one of the most elegant off‑grid water lifters available—turning a small creek into steady, elevated storage without a watt of electricity.
Surface water with slow sand filtration and post‑disinfection
Ponds, lakes, and streams are accessible but more exposed to contamination. For many homesteads, surface water is excellent for irrigation and livestock; with proper treatment, it can also be a viable potable source. A proven, low‑tech approach is slow sand filtration, followed by a disinfection step.
System overview:
- Intake: Draw from below the surface (not the muddy bottom) using a screened intake or small floating skimmer to reduce sediment and algae.
- Pre‑settling: A settling barrel or tank lets heavy particles drop out before filtration.
- Slow sand filter: A tall, sand‑filled vessel where water percolates slowly through fine sand. Over time, a biological layer forms that removes pathogens and organics.
- Post‑filtration: A fine sediment/polish filter can improve clarity if needed.
- Disinfection: Boiling, UV, or controlled chlorination makes water safe for drinking and cooking.
Why it’s usable:
- Slow sand is forgiving, passive, and tolerant of variable water quality.
- Materials are accessible: barrels/totes, washed sand, gravel, and common plumbing parts.
- Performance improves as the biological layer matures, as long as flow rates remain appropriate.
Operating tips:
- Keep flows gentle. Slow sand must operate at slow, even rates; rushing reduces effectiveness.
- Protect from freezing and sun. Insulate or bury filters in cold climates; keep units dark to prevent algae.
- Maintain carefully. When flow slows excessively, skim a thin layer of clogged sand and top up with washed sand.
- Monitor taste and clarity. Surface water quality changes seasonally; adjust pre‑settling and disinfection accordingly.
Pairing with technology:
- Using a compact treatment module like SmartWaterBox after filtration can consolidate final polishing and disinfection into a tidy, maintainable step.
- Always keep a manual fallback: pot, stove, and a measured approach to boiling or chlorination if electronics fail.
Surface water demands more attention than wells or springs, but with the right treatment chain, it can anchor a dependable off‑grid system—especially for homesteads blessed with ponds or steady streams.
Haul‑and‑store done right for lean homesteads
Not every property has an immediate, economical source. When drilling isn’t feasible (cost, geology) and rainfall is erratic, a haul‑and‑store system can bridge months or even serve long‑term with careful planning. Done right, it’s safe, scalable, and surprisingly practical.
Core elements:
- Source: A public fill station, neighbor’s well (with permission), or community supply. Fill on a predictable schedule.
- Transport: Food‑grade containers in a trailer or truck bed. Secure tightly; avoid prolonged sun exposure during transport.
- Storage: IBC totes, buried cisterns, or multiple linked barrels located in shade or underground. Opaque, covered, and vented through screens.
- Distribution: Gravity from elevated storage to a small pressure pump (solar‑powered) or direct gravity feed where pressure isn’t critical.
- Treatment: Even “clean” hauled water benefits from a final polish—sediment filtering and a disinfection step at the point of use.
Why it’s usable:
- Predictable and budget‑friendly: Start small and scale tank capacity as funds allow.
- Low infrastructure risk: No drilling gamble; fewer buried lines.
- Flexible: Works as a primary approach while you develop rainwater, or as a drought backup for a well.
Best practices:
- Rotate storage. First in, first out to keep water fresh.
- Keep everything labeled. Potable versus non‑potable containers should never mix.
- Sanitize tanks and lines on a schedule using appropriate sanitizing solutions and rinses.
- Add level gauges and alarms. Tracking volumes prevents accidental run‑out.
Interim doesn’t mean inferior. Many off‑grid families use haul‑and‑store as the backbone while they save for a well or wait on the right drilling window—then keep it as a drought fallback once they upgrade.
Atmospheric water and solar distillation as supplemental sources
Atmospheric water generation (AWG) and solar stills can produce potable water by condensing moisture or distilling. While not usually a sole household source, they’re useful supplements, especially in specific climates or for drinking‑only needs.
Atmospheric water generation:
- Concept: Pull moisture from humid air and condense into water. Some units incorporate filtration and UV.
- Off‑grid practicality: Device requirements vary; some can operate with solar power but may need robust arrays and battery storage depending on climate and output goals.
- Best use cases: Humid regions, emergency drinking supply, or a supplemental trickle into storage.
Solar stills and distillation:
- Concept: Sunlight heats water; vapor condenses on a cool surface and drips into a collection container, leaving many contaminants behind.
- Off‑grid practicality: Minimal moving parts; buildable DIY. Output is modest but reliable in strong sun.
- Best use cases: Brackish water, contaminated sources, or small daily drinking volumes.
Integration tips:
- Treat AWG as a top‑off to drinking water reserves, not your only source.
- Use distilled water for cooking and drinking, supplementing other sources that handle bulk volume (washing, irrigation).
- Collect in clean, covered containers and remineralize if desired for taste.
If you want a turnkey supplement that’s easy to deploy alongside rain or a well, a ready‑to‑use unit like Water Freedom System can add resilience without changing your existing plumbing. And if you prefer a compact, modular treatment box you can move between sources, consider SmartWaterBox to simplify filtration/disinfection at the point of use.
Recommended tools and resources for a resilient setup
- Survival Water Box: Practical guidance for siting, selecting, and maintaining off‑grid wells and pumps.
- SmartWaterBox: Compact treatment and disinfection module that pairs with rainwater, springs, and hauled water.
- Water Freedom System: Turnkey supplemental water option to bolster drinking supply alongside your primary system.
A simple blueprint to combine these systems
You don’t need all eight. Aim for one primary source, one secondary source, robust storage, and layered treatment. Here’s a practical blueprint many homesteads can adopt:
- Primary source
- If you have groundwater: Drilled well with solar pump and manual backup.
- If you have terrain and flow: Spring development with gravity feed, or a ram pump from a stream to elevated storage.
- If you lack both: Rainwater catchment with a large cistern sized to your dry season.
- Secondary source
- Rainwater as backup to well/spring.
- Haul‑and‑store as drought insurance or interim primary.
- AWG/solar distillation as a drinking‑only supplement in the right climate.
- Storage
- One large cistern near the home to buffer daily use.
- An elevated day tank for gravity delivery during outages.
- Opaque, covered tanks with screened vents and easy access for cleaning.
- Treatment
- Start with sediment removal.
- Add a robust filter (cartridge or slow sand) appropriate to source quality.
- Finish with disinfection: UV, boiling, or chlorine (and carbon post‑filter if you dislike residual taste).
- Distribution
- Favor gravity wherever your site allows.
- Use a small solar‑powered pressure pump only where necessary.
- Bury lines below frost depth and include drains and shutoffs for service.
Maintenance and monitoring:
- Keep logs for filter changes, tank cleanings, and water tests.
- Inspect after storms and freezes.
- Store spare parts for valves, gaskets, and pump consumables.
- Test water periodically, especially after system changes or contamination events.
Ready to design your off‑grid water plan? Start with a site map of elevation, potential sources, and storage locations. For help evaluating well options and safe construction details, see Survival Water Box. To simplify potable treatment across sources, a compact module like SmartWaterBox can streamline your final step. And as a supplemental safeguard, Water Freedom System adds resilience without rewiring your whole system.
Conclusion
The best off grid water systems for homestead living are the ones that match your land, climate, skills, and budget—and that keep working when one piece fails. Wells (drilled or hand‑dug) deliver consistency; rainwater harvest scales beautifully; springs and ram pumps gift you gravity; surface water thrives with slow sand and disinfection; haul‑and‑store and atmospheric methods round out a layered safety net. Choose a primary and a secondary source, size storage to bridge your longest dry spell, and finish with dependable filtration and disinfection. With redundancy and simple maintenance habits, you’ll have the freedom and security that true off‑grid water brings.
FAQ
How do I choose the most reliable off‑grid water system for my homestead?
Start by mapping your site: elevation, potential sources (groundwater, rain, surface water), and seasonal patterns. If groundwater is accessible, a drilled well with a solar pump and manual backup is often the most reliable. If not, rainwater with a large cistern is the next most controllable option. Always plan a secondary source for redundancy.
Can rainwater be safe to drink on a homestead?
Yes—when captured cleanly and treated properly. Use a first‑flush diverter, screened gutters, and opaque, covered tanks. For drinking, filter for sediment and finish with a disinfection step like boiling, UV, or controlled chlorination. Test your water periodically and after any system changes.
What’s the simplest off‑grid system to set up quickly?
Haul‑and‑store is the fastest: obtain food‑grade containers, establish a reliable fill point, and set up a storage tank with a basic filter and disinfection at the point of use. Rainwater catchment can also come together quickly if you have suitable roofing and can add storage incrementally.
Do I need permits to drill a well or develop a spring?
Often, yes. Local regulations govern well drilling, setbacks from septic, and how you can use surface and spring water. Check county and state rules, water rights, and any required inspections before breaking ground. A planning resource like u003ca href=u0022https://405688dfeamhtkaftoolkg6r3r.hop.clickbank.netu0022u003eJoseph’s Wellu003c/au003e can help you understand typical site and safety considerations.
What’s the cheapest off‑grid water option that’s actually usable?
Rainwater harvest and haul‑and‑store are typically the most cost‑effective to start. They scale with your budget and can be combined with simple, reliable treatment steps. Over time, many homesteads add a well or spring system as funds allow, keeping rain or haul‑and‑store as drought backup.