
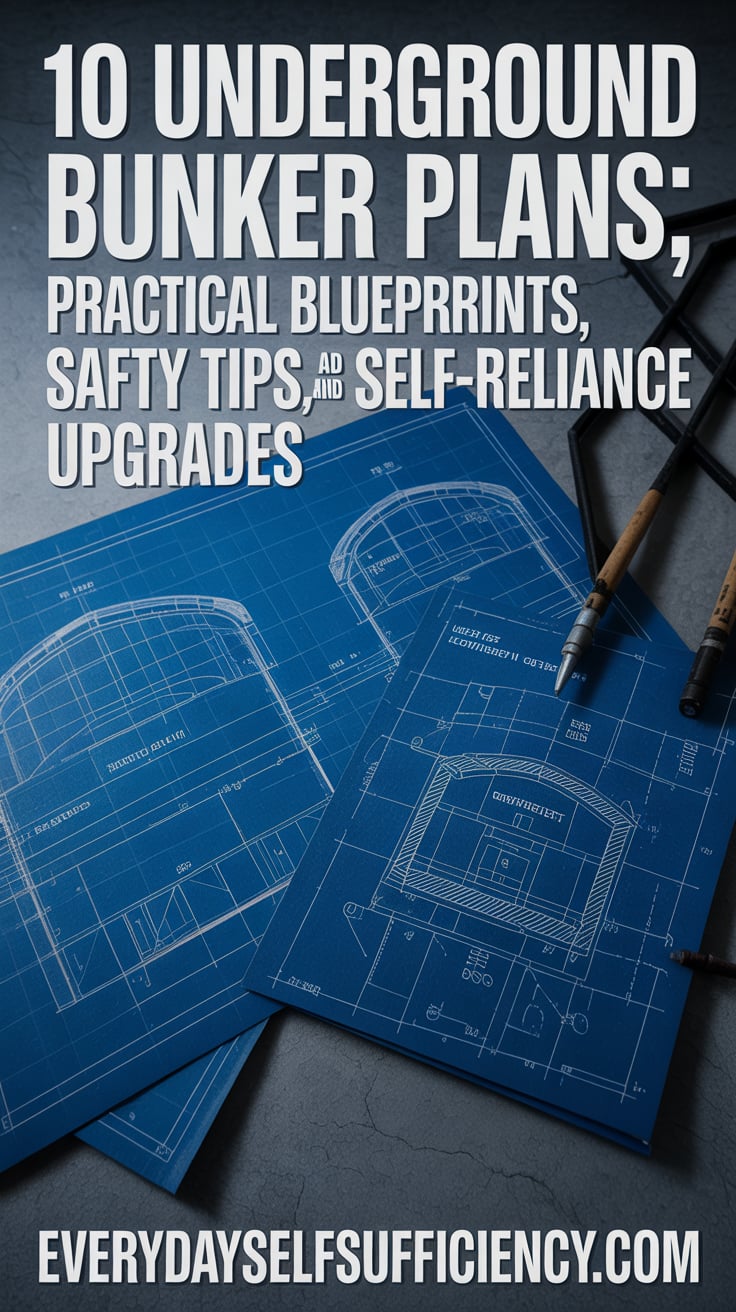
When you’re serious about continuity planning and long-term self-reliance, thinking below ground makes sense. This guide organizes 10 Underground Bunker Plans you can adapt to your property, budget, and goals, with actionable advice for site selection, structural choices, ventilation, water, power, and storage. You’ll find options from discreet crawlspace retrofits to heavy-duty, long-stay shelters—plus a clean way to integrate off-grid systems without blowing your budget. For food resilience that actually fits a bunker footprint, consider stocking shelf-stable staples and preservation methods from The Lost SuperFoods to optimize calories per cubic foot.
Read this first: safety, legality, and site selection
Before you dive into any plan, protect your build, property value, and family.
- Call before you dig. Underground utilities can run across your lot in unexpected ways. Confirm locations and depths, get professional marking, and photograph the marks for your records.
- Check codes and permits. Some jurisdictions regulate habitable underground space, egress requirements, and storm shelters. Ask about setbacks, drainage, and electrical/ plumbing inspections so you design compliance in from the start.
- Choose your soil. Dense, well-graded soils drain better and resist collapse. High clay content can expand and contract; very sandy soil may require shoring. In any excavation, sloughing sides can kill—follow safe trenching practices and never work alone.
- Map water behavior. Avoid floodplains and perched water tables. After heavy rain, observe where water collects. Plan French drains, sump basins, and an exterior waterproofing membrane for any buried structure.
- Redundancy and egress. A primary entrance plus a secondary egress (vertical escape hatch or angled tunnel) is not optional. Add passive ventilation in case of power failures, and separate living from storage for fire protection.
- Noise, light, and signature. Bury with adequate cover, muffle fans, and route vents discretely. Think OPSEC: materials delivered, workers on-site, and visible excavations all leave a trail—time your work carefully and keep documentation private.
Authority resources:
- Ready.gov: Shelter and safe room basics
- FEMA P-361: Safe room design considerations
- OSHA: Trenching and excavation safety
- CDC: Emergency water storage
The 10 Underground Bunker Plans at a glance
Use this menu to quickly pick a direction. You can build one, then expand.
- Plan 1: Crawlspace Safe-Room Retrofit. Reinforce part of an existing crawlspace with masonry or concrete, add a short kneewall, vapor barrier, and structural cap. Low visibility, moderate protection.
- Plan 2: Root-Cellar Hybrid Bunker. A compact barrel-vault (or CMU room) with earth berms. Great temperature stability and stealth, with built-in food storage racks.
- Plan 3: Culvert Tube Micro Shelter. A large-diameter corrugated steel or heavy PVC culvert, capped and buried with proper end-walls. Simple, fast, but requires correct reinforcement and drainage.
- Plan 4: Shipping Container (Reinforced Only). Containers aren’t designed for burial; if used, they need structural ribs, interior frame, corrosion protection, and a concrete envelope.
- Plan 5: Cast-in-Place Concrete Room. Excavated pit, rebar cage, poured walls/roof, waterproofed exterior, backfilled and drained. Durable, scalable, and code-friendly if engineered.
- Plan 6: Earthbag Dome/Bunker. Stacked soil-filled bags with barbed wire courses, then plastered and bermed. Cost-effective with strong compressive strength; best in arid or well-drained sites.
- Plan 7: Precast Tank Pair. Two or more rated precast concrete tanks (e.g., large cisterns), joined with gasketed penetrations, then buried with a gravel envelope. Rapid install with serious load capacity.
- Plan 8: Hillside Walk-In. A reinforced retaining-wall structure cut into a slope with a vaulted or slab roof. Natural camouflage and easier access to daylight at the door.
- Plan 9: Multi-Room Family Bunker. Zonal layout with airlock, bunks, galley, storeroom, and comms closet built in reinforced concrete or modular precast sections.
- Plan 10: Semi-Buried Micro-Cabin. An earth-bermed, three-wall buried structure with a south-facing façade for light, using heavy timber or concrete, then covered with soil and vegetation.
DIY 10 Underground Bunker Plans for small spaces
If your goal is “smaller, sooner,” these three options minimize excavation and cost while boosting resilience.
Plan 1: Crawlspace Safe-Room Retrofit
- Structure: Identify a dry, accessible area. Build a CMU (concrete masonry unit) box or install formwork for a small poured-concrete enclosure beneath the house. Cap with reinforced slab or beam-and-deck system tied to existing supports.
- Moisture control: Add vapor barrier, perimeter drain inside the crawlspace, and rigid foam on cold surfaces to prevent condensation.
- Access and egress: Short hatch ladder from the house floor for quick access; add a secondary escape through a disguised sidewalk hatch outside.
- Ventilation: Low and high vents with closable louvers; an inline fan on a timer can exchange air without drawing attention.
- Best for: Short stays, storms, and discreet storage. Pairs well with a compact battery bank and low-draw LED lighting.
Plan 2: Root-Cellar Hybrid Bunker
- Structure: A short, narrow barrel vault formed with curved plywood and rebar, or a straight CMU room with a shallow arched roof. Waterproof the exterior, add bituminous membrane, drainage mat, and gravel backfill.
- Function: Dual-purpose storage plus safe room. Install wooden racks, a cool-air intake near floor level, and a warm-air exhaust near the ceiling to exploit natural convection.
- Temperature: Stable temps help food longevity. Consider separate compartment for medical kit and off-gassing items (fuels/solvents placed outside).
- Camouflage: Blend the exposed entry with a garden shed façade or naturalized landscaping.
- Add-on: Store high-calorie, no-cook options to conserve fuel. Plans dovetail with compact pantries; see [How to stock a 90-day pantry](INTERNAL LINK PLACEHOLDER).
Plan 3: Culvert Tube Micro Shelter
- Structure: Source a heavy-gauge corrugated steel pipe or structural-grade polymer culvert sized for crawlspace height plus headroom. Build reinforced concrete end-walls with a gasketed steel door on one end and an emergency hatch on the other.
- Bedding and backfill: Lay on compacted gravel with geotextile to prevent migration. Backfill evenly to avoid deformation. Use an arch-shaped soil profile to distribute load.
- Drainage: Perimeter French drain at invert level leading to daylight or a dry well. Waterproof externally with elastomeric coating and protective board.
- Comfort: Curved walls benefit from built-in curved bunks and shelving. Place a small composting toilet cabinet at the far end with a dedicated vent stack.
- Power: Keep it simple—12V lighting, USB charging, and a manual air pump as backup to an electric inline fan.
Mid-size 10 Underground Bunker Plans for families
Moving from personal refuge to family-ready means more volume, stronger structure, and better systems.
Plan 4: Shipping Container (Reinforced Only)
- Reality check: Shipping containers are engineered for corner loads, not soil loads. Burying a raw container can lead to sidewall collapse and roof failure.
- How to do it right: Encapsulate with reinforced concrete or build an interior steel frame (vertical ribs and roof beams) that carries the soil load. Coat with corrosion protection, add a drainage layer, and maintain an air gap where possible.
- Practical tip: If reinforcement and encapsulation erase the “cheap” advantage, consider Plans 5, 7, or 8 instead, which are designed for burial.
Plan 5: Cast-in-Place Concrete Room
- Structure: Excavate, compact base, pour a reinforced slab, set forms for walls with correct rebar spacing and ties, then pour ceiling with rebar grids and topsoil cover. Use mechanical penetrations for vents and conduits.
- Durability: Excellent for long-term use. It’s easy to integrate an airlock vestibule, blast-resistant door, and interior partition walls later.
- Waterproofing: Exterior membrane plus protection board and dimple mat; tie to a perimeter drain leading to daylight or a sump with a battery backup pump.
- Comfort: Layer rigid insulation outside the concrete to moderate interior temps without stealing interior space. Finish inside with fire-resistant coatings and non-off-gassing materials.
Plan 6: Earthbag Dome/Bunker
- Structure: Earthbags filled with suitable soil, tamped in courses with barbed wire between layers. Tie a reinforced ring beam at the spring line for roof integration.
- Advantages: Materials are accessible, techniques are learnable, and domes distribute loads efficiently. Excellent for curved tunnels and alcoves.
- Moisture management: Prioritize a raised site, broad eaves at the entrance, and robust drainage. Lime or cement stucco exterior adds weather protection.
- Safety: Use engineered guidance for spans, door and window reinforcement, and roof loads.
Heavy-duty 10 Underground Bunker Plans for long-term use
When your plan is weeks or months below ground, build for redundancy, habitability, and expandability.
Plan 7: Precast Tank Pair
- Structure: Two (or more) precast concrete tanks placed side by side or end to end on a compacted gravel pad. Penetrations are core-drilled and sealed with gaskets for watertight passages.
- Speed: A crane can set units in a day, and backfill is straightforward. Interior requires minimal framing—install bunks, shelves, and a galley counter.
- Load capacity: Designed for burial loads; lids are engineered for soil cover. Add a grout key between units and a bonded waterproofing wrap.
Plan 8: Hillside Walk-In Bunker
- Structure: A cut into a slope with a retaining-wall system (reinforced concrete or segmental block with geogrid), topped by a reinforced slab or vault. Backfill on three sides, keep the front façade minimal and natural.
- Drainage: Daylight drains are much easier with a hillside. Add a curtain drain above the cut to catch hillside water.
- Habitability: Easiest plan to include daylight via a small south-facing lightwell or periscope. Better for morale during long stays.
- Security: Build an interior dogleg or offset corridor to reduce direct blast/ballistic path into the main room.
Resilient living space: plans 9 and 10 with zoned interiors
These plans treat the bunker like a tiny house with defense layers and comfort systems.
Plan 9: Multi-Room Family Bunker
- Layout: Airlock entry with mud/gear bench, main room with fold-down bunks, simple galley, water closet with dry or composting toilet, and a separate storage/mechanical room.
- Air management: Place intake at ground level with screened, directional cap; run ducting through a filtration cabinet; exhaust high and distant to prevent recirculation.
- Fire safety: Separate battery/inverter, charge controllers, and fuel storage from sleeping space. Use fire-rated doors and bulkheads.
- Daily living: Build morale into the plan—light shelves, acoustic panels, and a compact exercise corner.
Plan 10: Semi-Buried Micro-Cabin
- Structure: Three sides and the roof are earth-retained; front façade opens to a south-facing courtyard or berm cutout. Works with heavy timber plus a concrete retaining back wall or all-concrete construction.
- Benefits: Faster to build than a fully buried room, better passive ventilation, and easier natural light. Camouflage with green roof planting and native shrubs.
- Use case: Ideal as a weekend retreat that can shift to emergency shelter. Add a concealed rear hatch as secondary egress.
Off-grid systems for any bunker: ventilation, water, power, and sanitation
No matter which blueprint you pick, the systems decide your success. This is where many DIY builds win or fail.
Air and filtration
- Passive first: Design low intake/high exhaust geometry, with short, straight runs to reduce fan loads. Add backdraft dampers and screened terminations to keep pests out.
- Active next: Inline DC fans are efficient and easier to power from batteries. Use carbon and HEPA elements if your risk profile includes smoke or contaminants; maintain spares and gaskets.
- Redundancy: A manual bellows or hand-crank fan provides minimum fresh-air exchange if power fails. Avoid single points of failure.
Water sourcing and storage
- Store aggressively: Aim for ample potable storage in BPA-free containers or food-grade tanks. Follow CDC guidance on rotation and treatment.
- Collect and produce: Roof collection into a prefilter and first-flush diverter works well for aboveground sheds that conceal vents and entries. For compact, flexible options, consider atmospheric and well solutions such as Water Freedom System, Survival Water Box, or SmartWaterBox to diversify your water plan and reduce dependence on a single source.
- Treatment: Pair sediment prefilters with gravity or pump-driven purifier elements. Keep unscented bleach or other approved disinfectants sealed and labeled.
Power and lighting
- Solar basics: A modest PV array on a nearby shed or fence line, feeding a LiFePO4 battery bank, can handle lights, fans, comms, and charging. Keep the array removable for OPSEC.
- Generator etiquette: Use a small inverter generator sparingly; muffle sound and route exhaust away from intakes.
- Inside the bunker: 12V DC appliances minimize conversion losses. Motion-sensing and red-light options preserve night vision and reduce power draw.
- Internal link: Build confidence with [How to size a DIY off-grid solar kit](INTERNAL LINK PLACEHOLDER).
Waste and hygiene
- Toilets: Dry composting or desiccant toilets avoid plumbing complexity. Separate exhaust vent and carbon filter to control odor.
- Greywater: A small sump with check valve can lift greywater to a dry well; keep access cleanout ports.
- Medical: Stock practical, no-electricity treatments and reference material. A home-care manual like Home Doctor can help you handle common issues when professional care is delayed.
Food and cooking
- Storage: High-density calories in cans, jars, and sealed buckets. Organize by meal kits to speed prep and reduce waste. See [How to build a one-year food plan](INTERNAL LINK PLACEHOLDER).
- Cooking: Opt for a dual-fuel stove with carbon monoxide detector. Ventilation is non-negotiable. Thermal cookers stretch fuel and keep heat down.
- Menu: Low-water, low-odor recipes reduce moisture and scent signature. To diversify with proven preservation, explore The Lost SuperFoods.
Materials, budget planning, timelines, and drills
A methodical plan keeps you on schedule and under the radar.
Materials list (typical)
- Structure: Rebar, concrete or CMU, formwork, structural steel where needed, waterproofing membrane, dimple board, geotextile, drainage pipe and gravel.
- Systems: Vent ducting, DC inline fans, HEPA/carbon filters, wiring, breaker or fuse panel, PV modules and charge controller, batteries, LED fixtures, switches.
- Interiors: Fire-resistant wall boards, anti-microbial paint, metal bunks, modular shelving, folding tables, rubber flooring tiles for moisture tolerance.
- Water: Food-grade tanks, PEX and fittings, sediment filters, gravity purifier, pump backups.
- Safety gear: CO/smoke detectors, fire extinguishers, PPE, shoring equipment for excavation.
Budget strategies
- Phase builds: Start with a hardened room, then add systems, then expand with an airlock and secondary egress.
- Salvage wisely: Reuse metal shelving, doors, and cabinets, but never compromise on structural steel, waterproofing, or drainage.
- Design for modularity: Pre-plan penetrations and sleeves for future expansions. Keep conduits oversized and well-labeled.
Timeline (typical milestones)
- Site assessment, utilities mark-out, soil check.
- Design and engineering consultation (even an hour saves costly mistakes).
- Permitting and neighbor activity scan (for noise/visibility planning).
- Excavation with shoring as needed.
- Structural build (forms, reinforcement, pour or set precast).
- Waterproofing, drains, and backfill.
- Systems install (vent, power, water).
- Interior fit-out and stocking.
- Commissioning and drills.
Drills and maintenance
- Ventilation test: Verify exchange rates and backup manual air supply.
- Power audit: Measure daily loads; set charge/discharge rules.
- Water rotation: Label dates; keep a treatment log.
- Security and comms: Practice silent entry/exit, code words, and radio checks. Urban-specific techniques from URBAN Survival Code can sharpen your low-profile movement and logistics.
- Seasonal checklist: Inspect for moisture stains, gasket wear, pest signs, and battery health. Update medical and food stocks.
Stealth, security, and OPSEC for any bunker
A well-built bunker is only as secure as the behavior around it.
Camouflage the site
- Conceal entries with legitimate structures: a small greenhouse, wood shed, or tool hut. Break up straight lines with plantings and lattice.
- Vent disguise: Use fence posts, birdhouses, or landscape features to mask air intakes/exhausts, always maintaining free airflow.
- Soil and spoil: Move excavated soil in small batches or spread across multiple landscaping projects.
Sound and light management
- Acoustic treatments inside reduce echo and perceived volume. Use heavy curtains over doors; pad generator pads; choose soft-mount hardware.
- Light discipline: No external light leaks at night; maintain red-light protocols inside after dark.
Access control
- Stagger tool deliveries. Keep separate storage for “construction-visible” tools and “core” systems you bring later.
- Doors: Choose rated hardware. Consider an interior bracing bar so doors aren’t solely reliant on locksets.
Situational skills
- Urban and mixed environments demand flexible tactics. If you want curated playbooks, BlackOps Elite Strategies focuses on low-profile movement and protective mindset.
- Macro disruptions: Build a scenario library and rehearse. If you’re starting from scratch, Dark Reset can help you organize fundamentals into a practical action plan.
Recommended resources for bunker builders
These links help you round out a plan without reinventing the wheel.
Food and preservation
- The Lost SuperFoods: Expand calorie-dense, storage-stable menu ideas designed for low-energy preparation. Pairs perfectly with root-cellar or bunker storage.
Water resilience
- Water Freedom System, Survival Water Box, SmartWaterBox: Three complementary approaches to bunkering water independence. Combine methods to diversify risk.
Health and safety
- Home Doctor: At-home medical know-how for times when care is delayed and you’re relying on a stocked kit.
Urban fieldcraft
- URBAN Survival Code and BlackOps Elite Strategies: Skillsets for staying gray, moving supplies, and protecting your circle if you live in or near town.
Internal reads
- [Rainwater harvesting rules by state](INTERNAL LINK PLACEHOLDER)
- [DIY nuclear fallout basics](INTERNAL LINK PLACEHOLDER)
- [Small-space bunker furniture hacks](INTERNAL LINK PLACEHOLDER)
External authority sources:
- Ready.gov: Household emergency preparedness
- FEMA P-361: Guidance for safe rooms
- CDC: Water, sanitation, and hygiene
- OSHA: Trenching and excavation
Conclusion
Whether you’re carving out a compact crawlspace refuge or pouring a multi-room safe haven, these 10 Underground Bunker Plans give you a path from idea to execution. Start with site safety and drainage, choose a structure that matches soil and budget, then layer in ventilation, water, power, and waste with redundancy. Focus on stealth and daily livability—the quiet details that turn a shelter into a sustainable refuge. Build small, build well, then expand. When you’re ready to stock smart and train deliberately, resources like The Lost SuperFoods, URBAN Survival Code, and Home Doctor can round out your plan.
FAQ
What’s the safest beginner plan among the 10 Underground Bunker Plans?
A small cast-in-place concrete room (Plan 5) or a precast tank pair (Plan 7) offers predictable strength and known burial performance. Always verify soil conditions and follow drainage and waterproofing best practices.Can I bury a shipping container without reinforcement?
No. Containers are not designed for lateral soil pressure. If you choose Plan 4, include structural reinforcement and encapsulation or select a purpose-built alternative like Plans 5 or 7.How deep should the bunker be?
Depth depends on local frost lines, water table, and desired cover. Many designs target enough soil cover for temperature stability and protection while keeping vents and egress practical. Avoid digging into the water table.How do I ventilate without attracting attention?
Use low-profile vents disguised as landscape features, oversize ducting to reduce fan noise, and a passive cross-vent geometry with backdraft dampers. Keep an emergency manual fan. Place intakes and exhausts apart to prevent recirculation.What’s the best water strategy for an underground shelter?
Combine stored potable water, a method to collect or produce additional water, and reliable purification. Diversify sources with solutions like Water Freedom System, Survival Water Box, or SmartWaterBox, and follow CDC treatment guidance.How do I manage waste in a bunker?
Use a dry or composting toilet with a dedicated vent and carbon filter, store brown cover materials, and plan a sealed container for temporary storage. Separate greywater and route it to a dry well or lift it via a sump if needed.Are earthbag bunkers reliable?
When built to engineered principles with proper moisture control and drainage, earthbag domes and bunkers (Plan 6) can be robust. Prioritize site selection, exterior plaster, and a protective roof or berm.Do I really need a second exit?
Yes. A secondary egress is critical for fire, blockage, or collapse at the main door. Integrate a vertical hatch or an offset tunnel early in your design to avoid costly retrofits later.