
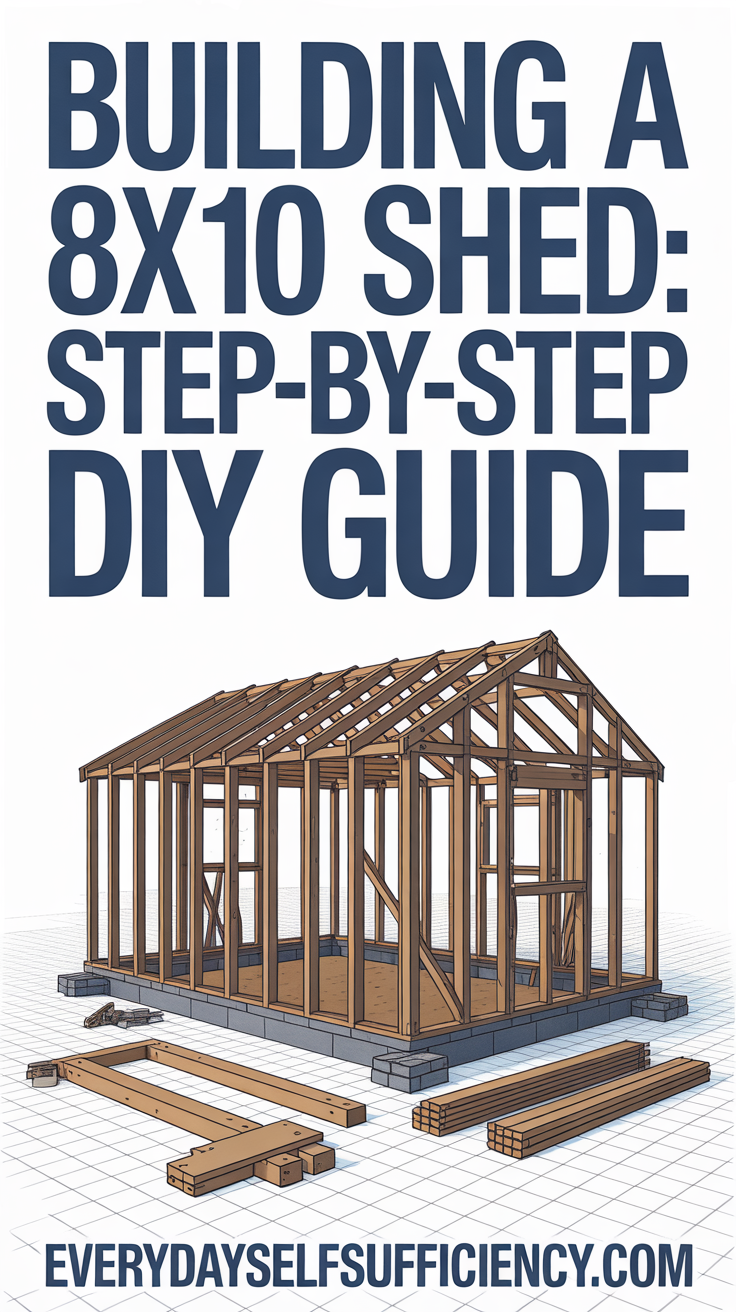
A well-built shed multiplies the usable space on your property for tools, bikes, lawn gear, or a compact workshop. This guide walks you through building a 8×10 shed from planning to paint, using homeowner-friendly methods, materials, and safety tips. Whether you’re adding simple storage or a micro maker space, you’ll find the steps, tools, and pro-level tricks to get it done right the first time. If you plan to capture roof runoff for garden use, a compact system like SmartWaterBox can pair nicely with your new structure.
Planning for building a 8×10 shed
Building success starts long before the first board is cut. Solid planning helps you avoid red tags, rework, and wasted cash.
Define the purpose
- Pure storage, hobby space, potting bench, or a bike/garden hub? Purpose influences door size, windows, interior layout, ventilation, and security.
- If you need electricity (lights, outlets), plan routing and code compliance before walls go up.
Check local rules
- Zoning and HOA: Many areas allow small accessory structures without a full permit if below a size threshold (commonly 120–200 sq. ft.), but rules vary. Call your local building department and review HOA covenants.
- Setbacks: Confirm how far the shed must be from property lines, easements, or utilities.
- Height: Some jurisdictions cap peak heights for sheds.
Choose the site
- Pick well-drained, relatively flat ground. Avoid low spots where water collects. Consider access from driveway and lawn.
- Sun and wind: South/east light helps keep interiors dry. Position doors away from prevailing winds.
- Utilities: Call utility locate services before digging or pounding anchors.
Pick an appropriate foundation
- For many yards, a compacted gravel pad with skids or concrete deck blocks/piers is DIY-friendly and durable.
- In frost zones, ensure support extends below frost depth or that you use an approach tolerant of movement (e.g., floating gravel pad plus flexible anchors).
Size and layout
- An 8×10 footprint equals 80 sq. ft.—a sweet spot for storage while staying under many permit limits. Sketch interior zones: long-handled tools, mower, shelves, ceiling hooks, and clear floor paths.
- Door opening: Double doors (5–6 ft wide) ease mower or bike access.
Budget and schedule
- Price materials with a buffer for hardware and weatherproofing. Plan a weekend for the base and floor, a weekend for walls and roof framing, and another for roofing/trim/paint (weather permitting).
Internal resources to help you prep:
- [Shed foundation guide](INTERNAL LINK PLACEHOLDER)
- [Outdoor project permitting checklist](INTERNAL LINK PLACEHOLDER)
External references:
- American Wood Council Span Calculators: https://awc.org/codes-standards/calculators-software/span-calculators/
- APA – The Engineered Wood Association: https://www.apawood.org
Foundation options and site prep
A sturdy, level foundation prevents racking, leaks, and premature structural wear. Here are proven approaches for an 8×10:
Compacted gravel pad with skids (common, cost-effective)
- Excavate sod to 4–6 inches, extending the pad about 12 inches beyond the shed footprint on all sides.
- Install landscape fabric to reduce weed growth.
- Fill with 3/4-inch crushed stone, compact in 2–3 lifts with a plate compactor.
- Level carefully; crown slightly in the middle for drainage.
- Lay two or three pressure-treated 4×4 or 4×6 skids the 10-foot direction, spaced evenly, and square them up.
Concrete deck blocks or pier footings (good for sloped yards)
- Place deck blocks on compacted gravel, shimming height differences to achieve level. For frost-prone regions, concrete piers to frost depth with post bases provide more stability.
- Align centers to support rim joists and interior joists per span requirements (use span calculators or local guidance).
Full slab (most permanent)
- More costly and may require formal permitting and expansion joints. Best for heavy workshop use or equipment loads.
Drainage, anchors, and access:
- Drainage: Maintain slope away from the shed on all sides. Consider shallow perimeter swales or French drains if yard saturation is a problem.
- Anchors: Ground anchors with straps or brackets resist uplift in high winds. Helical or auger anchors are simple DIY options.
- Access: Plan a ramp location that aligns with your door swing and mower path. A gravel landing in front of doors keeps shoes clean and interiors drier.
Leveling and squaring tips:
- Use a builder’s level or laser to set elevation targets on corner stakes.
- Measure diagonals across the pad; equal diagonals indicate square.
- Use batter boards with taut string lines to maintain layout accuracy during soil and gravel work.
Related internal resource:
- [How to grade and drain around sheds](INTERNAL LINK PLACEHOLDER)
External references:
- EPA Soak Up the Rain (runoff basics): https://www.epa.gov/soakuptherain
Materials, fasteners, and tools
A clear shopping list reduces trips and keeps your build on pace. Select materials rated for exterior use, and use treated lumber where ground contact or splash-back occurs.
Core materials (typical for an 8×10 shed; adjust to your plan):
- Foundation
- 3/4-in crushed stone
- Landscape fabric
- Pressure-treated skids (4×4 or 4×6)
- Anchors and straps (as needed)
- Floor framing and deck
- Pressure-treated rim joists and joists
- Exterior-grade plywood or OSB subfloor
- Construction adhesive and appropriate fasteners
- Wall framing
- Standard framing lumber for plates, studs, headers
- Sheathing: OSB, plywood, or structural siding (e.g., T1-11 or engineered panels)
- Housewrap and flashing tape
- Roof framing and cover
- Rafters and ridge board or trusses
- Roof sheathing
- Underlayment, drip edge, and shingles or metal roofing
- Ridge and/or gable vents
- Doors, trim, finishes
- Hinges, latches/lockset, door pull
- Trim boards, caulk, primer, and exterior paint or stain
- Screws, nails (galvanized or exterior-coated), joist hangers where required
Hardware and fasteners:
- Exterior-coated screws for framing and sheathing give strong holds and easy removal if needed.
- Galvanized nails for siding and roofing.
- Structural screws or lag screws where plans specify.
Tools:
- Tape, chalk line, framing square, speed square, level/laser
- Circular saw (with spare blades), drill/driver set
- Impact driver, hammer, pry bar
- Stapler for housewrap
- Sawhorses, clamps
- Safety: eye/ear protection, gloves, dust mask/respirator, proper footwear
Pro tips:
- Buy 10–15% extra fasteners and a spare blade to avoid downtime.
- Keep treated lumber separate from untreated to prevent mix-ups.
- Prime trim on sawhorses before install for complete coverage.
External reference:
- APA wood resources: https://www.apawood.org
Building the floor system
A stiff, square floor makes everything above it easier.
Layout
- Position and level skids on the compacted gravel pad. Recheck diagonals and adjust until square.
- Place rim joists on skids and mark joist layout (commonly 16 inches on center; confirm your spans using local guidance or calculators).
- If using deck blocks/piers, install beams in post bases and ensure they are dead level before framing the floor.
Frame assembly
- Assemble the 8×10 floor frame on the skids: two rim joists the 10-foot length, end joists across the 8-foot width, and interior joists per your layout marks.
- Fasten with exterior-rated screws or nails plus construction adhesive at key joints.
- Check for square by measuring diagonals; they should match. Adjust with a clamp or temporary brace if needed.
Blocking and fastening
- Add solid blocking mid-span if required by your joist size/span to stiffen the floor and minimize bounce.
- Install joist hangers when beams and joists intersect in a way that requires hardware support (follow manufacturer specs).
Sheathing
- Dry-fit subfloor sheets so seams fall on joists; stagger seams between rows.
- Apply construction adhesive to joist tops, then lay sheets and fasten per exterior sheathing nailing schedules.
- Leave small expansion gaps between sheets per manufacturer guidance.
Anchoring
- Secure the floor frame to the skids or beams with framing anchors/straps, then mount ground anchors and attach straps to the frame if in a high-wind area.
Square, level, and flat checklist
- Re-measure diagonals after sheathing; adjust while you still can.
- Check for ridges at seams; sand slightly only if needed and safe for material type.
Internal resource:
- [How to square a building with the 3-4-5 rule](INTERNAL LINK PLACEHOLDER)
External reference:
- American Wood Council Span Calculators: https://awc.org/codes-standards/calculators-software/span-calculators/
Wall framing, openings, and sheathing
With a solid floor in place, walls go quickly with good prep.
Plan your walls
- Draw each wall with stud spacing, doors, windows, and header sizes based on opening widths and local guidance.
- Most sheds use 92-5/8-in studs with single bottom/double top plates to achieve an interior height similar to a standard room; adjust to your needs.
Assembly
- Build the back and side walls first on the floor deck. Lay out plates and studs, add king/jack studs around openings, and assemble with exterior-rated fasteners.
- Build the front wall with your door opening sized to hardware requirements. For double doors, ensure the rough opening is square and plumb.
Raising walls
- Tilt the back wall up first and brace it plumb. Add a few temporary braces screwed to the floor.
- Raise side walls, check plumb, and tie corners together. Finally, raise the front wall and complete the double top plate laps across corners.
- Recheck the structure for square by measuring diagonals along the top plates.
Sheathing and weather barrier
- Install wall sheathing (OSB/plywood) with edges breaking on studs. Nail per manufacturer and local requirements.
- If using structural siding panels (e.g., T1-11), they can serve as both sheathing and siding—fasten accordingly.
- Apply flashing tape at window/door rough sills and install housewrap with shingle-style overlaps to shed water.
- Leave planned openings covered until roof is on if rain is expected; cut them out later.
Details that pay off
- Add blocking where shelves or heavy fixtures will hang in the future.
- Frame a small gable vent opening if you want passive ventilation.
External reference:
- APA – The Engineered Wood Association: https://www.apawood.org
Roofing and weatherproofing for building a 8×10 shed
Roofs are where sheds win or lose against weather. A durable, well-detailed roof keeps the whole structure dry.
Choose a roof style
- Gable roof: Classic, straightforward to frame, and sheds water well.
- Lean-to (shed) roof: Simple framing; useful if placing the shed against a fence line or another building.
- Gambrel: Maximizes loft storage; more complex cuts.
Framing a basic gable
- Determine slope (e.g., 4/12 to 8/12) based on climate and roof covering. Steeper sheds water/snow better.
- Cut rafters with seat and plumb cuts; test-fit a pair before cutting the rest.
- Install a ridge board and set rafters at standard spacing (e.g., 16–24 inches on center), adding collar ties or rafter ties to resist thrust if required by your plan.
- Add outlookers if you want eave/overhang for better wall protection.
Sheathing and underlayment
- Install roof sheathing staggered with proper edge support. Observe manufacturer nailing schedules.
- Lay drip edge at eaves, then self-adhered eave protection if applicable, followed by synthetic or felt underlayment, and drip edge at rakes.
Roof coverings
- Asphalt shingles are cost-effective and DIY-friendly; follow layout lines and manufacturer instructions.
- Metal panels offer longevity and quick install; ensure correct flashing details at ridge and edges.
Ventilation and gutters
- Provide a path for air: gable or ridge vents plus soffit vents if you have overhangs.
- Install gutters to direct water away. If you intend to capture rainwater for garden use, pair gutters with a compact storage system such as Water Freedom System to create a tidy, gravity-fed watering solution alongside your shed.
Safety
- Secure ladders on stable ground and maintain three points of contact.
- Use fall protection as conditions require; avoid working in high winds or wet surfaces.
External reference:
- OSHA Ladder Safety: https://www.osha.gov/ladder-safety
Internal resource:
- [Shed roof styles and pros/cons](INTERNAL LINK PLACEHOLDER)
Doors, trim, paint, and organization
This stage brings weather protection, curb appeal, and functionality together.
Doors
- Prehung or DIY: Prehung exterior doors are fast and secure, but double doors you build yourself provide a wide opening for bulky items.
- DIY panel doors
- Build two framed panels with a diagonal brace (Z-brace) for racking resistance.
- Skin with exterior-grade panels or boards; seal edges.
- Use heavy-duty strap hinges and a locking latch. Ensure a slight gap to prevent binding as wood swells.
Trim and detailing
- Install corner and fascia trim to seal panel edges and elevate the look.
- Flash above door and window heads with properly lapped metal or tape to shed water.
- Caulk all vertical and horizontal trim joints.
Paint or stain
- Prime bare wood, especially end grain and trim.
- Apply two finish coats rated for exterior exposure. Light colors reflect heat and can extend material life.
Ramp and access
- Build a sturdy ramp with treated lumber and non-slip treads.
- Keep slope gentle to ease rolling equipment in and out.
Organization and upgrades
- Install shelves, pegboards, and hooks to maximize vertical space.
- Consider a simple workbench at one end.
- Add a moisture-activated vent or solar fan to reduce humidity.
- If you’re planning for garden watering from the shed roof, a compact setup like SmartWaterBox integrates neatly with gutter downspouts and keeps the footprint small.
Maintenance checklist
- Inspect caulk and paint annually.
- Keep the perimeter clear of mulch or soil buildup against siding.
- Clean gutters and check anchors after storms.
Electrical, security, and long-term protection
While many sheds remain “cold” (no utilities), small upgrades boost safety and usefulness.
Lighting and power
- Solar shed lights are the simplest: no wiring, quick install, adequate for task lighting.
- If you plan hardwired electrical, route conduit before siding is complete, use outdoor-rated fixtures/receptacles, and consult local code or a licensed electrician.
Security
- Use quality hasp/lock combinations and reinforced door frames.
- Install a motion light; even solar models deter intruders and help you navigate at night.
- Frosted window film lets in light while obscuring contents.
Moisture control
- Ventilate: Pair passive vents with openable windows or a small fan for cross-flow.
- Elevate: Keep stored items off the floor on shelves or pallets to prevent moisture damage.
- Seal: Check roof penetrations and trim joints each season.
Pest prevention
- Install metal mesh at ventilation openings.
- Seal gaps at the sill and corners.
- Keep nearby vegetation trimmed; avoid stacking firewood against the shed.
Preparedness and storage ideas
- Dedicate a shelf for emergency gear and seasonal supplies. A compact guide to shelf-stable foods like The Lost SuperFoods can help you stock essentials sensibly without wasting space.
External reference:
- APA resources on moisture and durability: https://www.apawood.org
Quick CTA: plan smarter, build cleaner
If your shed will support garden irrigation or emergency preparedness, plan those systems now while walls are open. Simple rainwater capture and organized storage make a small building do big work. For a low-profile catchment option, see SmartWaterBox. For smart pantry ideas, browse The Lost SuperFoods for compact, long-lasting food planning that fits neatly on your new shelves.
Recommended add-ons and accessories
- SmartWaterBox: A compact, discreet rainwater solution that pairs well with shed gutters for garden use.
- Water Freedom System: Vertical storage design to save ground space beside your shed while collecting roof runoff.
- Survival Water Box: Off-grid water concepts you can adapt for rural sheds and garden plots.
Note: Always follow local codes, manufacturer instructions, and safety guidelines when integrating water systems.
Conclusion
Building a 8×10 shed is one of the most rewarding DIY projects for adding secure storage and workspace without overwhelming your yard or budget. With thoughtful planning, a well-drained foundation, square and sturdy framing, a weather-tight roof, and smart finishing details, your shed will handle seasons of sun, wind, and rain. Integrate organization and optional upgrades—like compact rainwater capture or solar lighting—to extend its usefulness year-round. Revisit this guide as a checklist at each stage, and you’ll turn a simple footprint into a durable, good-looking asset on your property.
FAQ
What’s the best foundation for building a 8×10 shed?
- For most yards, a compacted gravel pad with treated skids is cost-effective, drains well, and is DIY-friendly. In frost zones or sloped sites, consider deck blocks or concrete piers to frost depth for added stability.
Do I need a permit for an 8×10 shed?
- Many areas allow small sheds without a full building permit if under a size threshold, but setbacks, height, and HOA rules still apply. Always contact your local building department before starting.
What lumber should I use for ground contact?
- Use pressure-treated lumber rated for ground contact for skids and any framing exposed to splash-back. Keep untreated siding at least 6 inches above grade.
Should I choose shingles or metal for my shed roof?
- Asphalt shingles are budget-friendly and easy to install; metal roofing offers long life and quick coverage. Choose based on your climate, budget, and comfort with installation details.
How can I keep my shed cool and dry?
- Provide passive ventilation (gable or ridge plus soffit vents), seal and paint exterior surfaces, install gutters, and maintain clear drainage around the shed. Store items off the floor and consider a small fan for airflow.
What door width works best for mowers and bikes?
- A 5–6 foot double-door opening accommodates most mowers and bike handlebars. Ensure the ramp is sturdy with a gentle slope.
Can I add rainwater catchment to a small shed?
- Yes. Add gutters, a downspout filter, and a compact storage system. Vertical or compact units like Water Freedom System or SmartWaterBox fit neatly beside an 8×10 footprint.
What’s the most common mistake when building a 8×10 shed?
- Skipping proper site prep and drainage. A level, well-compacted base with good runoff control prevents racking, leaks, and premature material failure.