
If you want a pantry that stays full, varied, and safe all year, you need more than random jars—you need a canning plan. A thoughtful, seasonal Canning Plan helps you match your family’s tastes to what’s in season, schedule batches efficiently, and follow proven safety steps so your jars seal right and stay shelf-stable.
For inspiration and shelf-stable meal ideas to plug into your plan, explore The Lost SuperFoods, a collection of long-keeping foods and preservation strategies you can adapt for your pantry: The Lost SuperFoods
Building your canning goals and inventory baseline
Every effective Canning Plan starts with clarity. Before you look at jars or recipes, define what success looks like for your home.
- Family goals and preferences: List the foods you eat weekly: tomato sauce, beans, broths, jams, pickles, ready-to-heat soups, meat, or fruit. For each, set target jars per month and multiply by 12 for a yearly goal.
- Meal framework: Sketch 10–15 weeknight dinners you actually make. Identify which parts are can-able: sauces, beans, meat, broth, or complete “meals in a jar” like chili (pressure-canned without thickeners).
- Pantry audit: Note what you already have. Count jars by size (pints/quarts), lids, rings, vinegar, salt, sugar, pectin, spices, stock bones. Check equipment: pressure canner, boiling-water canner or deep stockpot with rack, jar lifter, funnel, headspace tool, bubble remover, clean cloths, labels.
- Space and storage: Measure shelf space, aim for cool, dark, dry storage. Ensure shelves hold weight (a quart jar weighs ~3 lb full). Plan FIFO rotation (first in, first out).
- Budget and sourcing: Plan your produce sources: garden, CSA, farmers market, u-pick, supermarket case sales. Schedule peak-crop buys to align with canning weekends and maximize yield/value.
Translate this into numbers. If your family uses 2 quarts of pasta sauce, 2 quarts of broth, and 3 pints of beans weekly, that’s about 104 quarts of sauce, 104 quarts of broth, and 156 pints of beans per year. You may not hit the full number initially—aim for 30–50% in year one and scale up.
Finally, slot a rhythm. Many canners succeed with:
- Weekly “mini-batch” night for small hauls
- One “big batch” weekend per month during harvest season
- One “winter stock-up” weekend for dry beans, broths, and meats when fresh produce is lean
Tying goals to time is the backbone of a sustainable Canning Plan.
Safety foundations that never bend
Canning is safe when you follow tested processes designed for acidity, heat, and time. Your Canning Plan should hardwire these standards.
- Use only tested recipes from trusted sources. The National Center for Home Food Preservation and the USDA Complete Guide are gold standards. Tested recipes control pH, density, jar size, and processing time.
- Match the method to the food:
- High-acid foods (pH ≤ 4.6) like most fruits, jams, jellies, pickles, and acidified tomatoes are processed in a boiling-water canner.
- Low-acid foods (pH > 4.6) like vegetables, meats, beans, and soups must be pressure-canned to prevent botulism.
- Altitude adjustment: Water boils at lower temperatures as altitude rises. Adjust processing time (water bath) or pressure (PSI) based on your elevation per the tested recipe’s chart.
- Equipment calibration: Verify your pressure canner’s dial annually or use a weighted gauge. Check gasket integrity and vent/weight function every season.
- Jar choices: Use Mason-type canning jars and new two-piece lids. Inspect for chips or cracks. Never reuse lids.
- Process integrity: Maintain recommended headspace, remove air bubbles, wipe rims with vinegar for acidic foods or hot water for others, apply ring fingertip-tight, and process for the exact time, starting the clock only once the canner is at a full rolling boil (water bath) or at target pressure (pressure canner).
Know the risks and signs:
- Botulism risk: Low-acid foods processed improperly can harbor botulism toxin. When in doubt, throw it out; never taste a suspect jar. The CDC warns that even tiny amounts are dangerous. Relearn the basics each season to keep safety second nature.
Authoritative references:
- National Center for Home Food Preservation: https://nchfp.uga.edu
- USDA Complete Guide to Home Canning (free): https://nchfp.uga.edu/publications/publications_usda.html
- CDC on botulism safety: https://www.cdc.gov/botulism/index.html
- Ball/Fresh Preserving tested recipes: https://www.freshpreserving.com
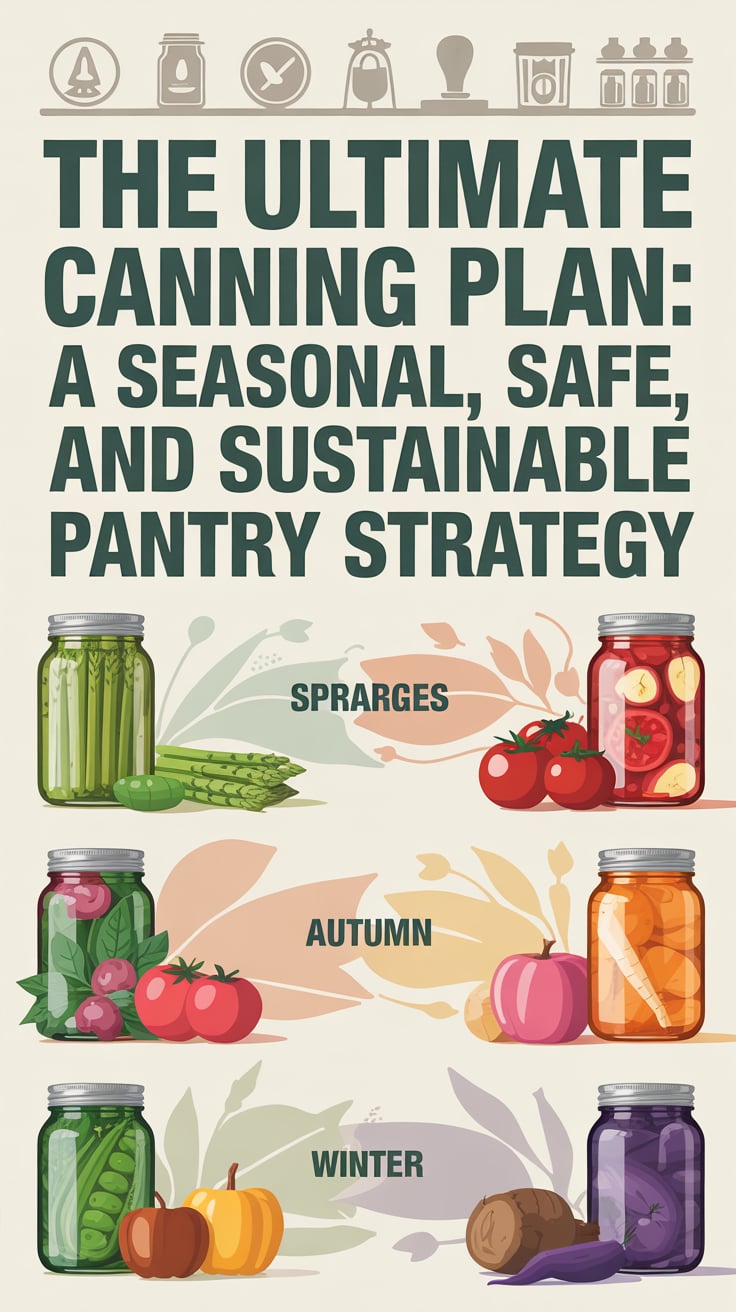
A seasonal roadmap for year-round variety
A smart Canning Plan aligns your calendar with the harvest. This keeps costs low and flavor high. Here’s a common-season flow you can adapt to your area:
- Late winter to early spring:
- Stock bases: Pressure-can chicken, beef, or vegetable broth while kitchens are cool. Can dry beans. Put up citrus marmalades.
- Garden prep: Start seeds for tomatoes, peppers, and cucumbers that will become sauces and pickles later.
- Late spring:
- Strawberries, rhubarb: Jams, compotes, pie filling (if a tested recipe). Small-batch jams to learn your pectin and sugar preferences.
- Early greens: Not ideal for canning alone; consider pickled asparagus with a tested recipe if local.
- Early to mid-summer:
- Cherries, blueberries, peaches: Jams, syrups, pie fillings, and light syrup fruit. Consider low-sugar pectin if you prefer.
- Cucumbers: Pickles—dills, bread-and-butter, relish. Fast-moving pantry winners.
- Peak summer:
- Tomatoes: Whole, crushed, juice, salsa (only tested salsa recipes), pasta sauce. Acidify with bottled lemon juice or citric acid per tested directions.
- Corn and peppers: Pressure-can as mixed relishes or plain kernels (pressure only). Prep large batches on a weekend.
- Late summer to early fall:
- Apples, pears: Applesauce, apple butter, pear butter, spiced slices. Great for a kid-friendly staple.
- Stone fruit rescues: Jam extra peaches and plums before they turn.
- Fall:
- Soups and stews: Pressure-can approved recipes without dairy, flour, or thickeners. Potatoes in soups require specific tested recipes.
- Proteins: Pressure-can meats, chili, taco meat mixes (no thickeners). Build quick meals-in-a-jar for busy nights.
- Winter:
- Pantry maintenance: Rotate, label, and plan next year’s garden around what you used most. Consider pressure-canning more beans and broth.
Plan by batch. For example:
- Pickle weekend: 30 lb of pickling cucumbers → approximately 12–16 quarts of pickles depending on cut and pack style.
- Tomato marathon: 100 lb Roma tomatoes → roughly 20–25 quarts of sauce, depending on reduction and recipe.
Use a simple calendar with target produce, recipes, quantities, and yield estimates. Cross-reference sales, garden peaks, and family events to choose realistic canning windows.
For an urban-friendly preparedness angle, map one “grid-down pantry” weekend each quarter where you replenish ready-to-heat jars and staples. Supplement with your favorite shelf-stable recipes from The Lost SuperFoods: The Lost SuperFoods
Tools, space, and kitchen workflow that save hours
Efficiency makes canning sustainable. Set up a workstation that supports safe, fast repetition.
Equipment checklist:
- Boiling-water canner or tall stockpot with rack (2 inches taller than your tallest jars)
- Pressure canner (weighted or dial gauge) for low-acid foods
- Jar lifter, canning funnel, headspace gauge/bubble remover
- Magnetic lid lifter (optional but handy), clean lint-free towels
- Large cutting boards, chef’s knife, paring knife, ladle, slotted spoon
- Stockpots and roasting pans for broths and sauces
- Cooling racks or folded towels for finished jars
- Labeling system: freezer-safe labels or painter’s tape and a permanent marker
Space layout:
- Prep zone: wash, trim, chop, and pre-measure ingredients.
- Hot zone: stove with canners, saucepots, and a landing pad for hot jars.
- Clean zone: a clear area for wiped rims, lid application, and jar staging.
- Cool zone: draft-free surface for 12–24 hours of undisturbed cooling and sealing.
Workflow tips:
- Preheat jars in the canner or oven-safe pan to avoid thermal shock (always temperature-match jar, food, and water).
- Stage ingredients by recipe to reduce mistakes. Label bowls and measuring cups.
- Run canners back-to-back: as jars are cooling, refill and reheat for the next batch.
- Use timers for each step. Log start time, pressure, and venting notes in a canning notebook.
Kitchen safety matters too. Hot sugar, boiling brine, and heavy pots can cause cuts or burns. Keep a first-aid kit nearby and know basic home care for minor burns, cuts, and strains. If you favor proactive preparedness for health, the practical guidance in Home Doctor can complement your kitchen safety and self-reliance skills: Home Doctor
For sterilization and jar prep fundamentals, see [How to sanitize jars properly](INTERNAL LINK PLACEHOLDER) and keep a quick reference posted near your workspace.
Reliable recipes and yield planning for pantry depth
The best Canning Plan relies on a small set of versatile, tested recipes that you’ll use constantly. Aim for a core “pantry pack” of 8–12 recipes that cover breakfasts, sides, sauces, and bases.
Core staples:
- Tomatoes: crushed, sauce, and approved salsa. Acidify per recipe. Use wide-mouth jars for chunky products; standard-mouth for sauces to reduce siphoning.
- Pickles and relishes: Dill spears, bread-and-butter slices, classic relish. Vinegar strength must be 5% acidity.
- Jams and fruit: Strawberry, blueberry, peach, and apple butter. Experiment with low-sugar pectins but follow the tested formula.
- Broths and stocks: Chicken, beef, vegetable—pressure-can in quarts for soups and pints for quick cooking.
- Beans: Black, pinto, chickpeas—pressure-can from dry (pre-soaked methods per recipe) or from cooked to your preference.
- Meals-in-a-jar: Plain meats (chicken, beef), chili, soup bases. Skip thickeners; add at serving time.
- Acidified vegetables: Pickled jalapeños, carrots, and beets in a tested brine.
Yield guidelines (approximate; actual output varies):
- Tomatoes: 2.5–3.5 lb per quart of crushed/sauce (depends on reduction).
- Applesauce: 21–24 lb per 7 quarts.
- Pickles: 14 lb pickling cukes per 7 quarts of dills.
- Green beans: 14 lb per 7 quarts (pressure canning).
- Broth: One 6–8 lb chicken yields 4–6 quarts of stock after reduction and straining.
Recipe sources and safety notes:
- Always follow tested recipes verbatim for processing times, jar sizes, and headspace. Substitutions can change acidity or density and affect safety.
- For approved variations, consult:
- National Center for Home Food Preservation (recipe library): https://nchfp.uga.edu/how/can_home.html
- Ball/Fresh Preserving (tested recipes): https://www.freshpreserving.com
Batch math example:
- Goal: 24 quarts of pasta sauce for 12 weeks (2 per week) during winter.
- Plan: Three tomato weekends at peak harvest, each producing ~8 quarts.
- Inputs: ~75–85 lb Roma tomatoes across three sessions, plus onions, garlic, lemon juice/citric acid, salt, and dried herbs (added per tested recipe that permits them).
Keep a page in your canning notebook with “Yields at a glance” and actuals from each batch so your plan becomes more accurate yearly.
Pressure canning confidence for proteins and complete meals
Low-acid foods demand pressure canning and deserve extra planning detail in your Canning Plan. The payoff is huge: fast dinners with rich flavor and long shelf life.
Pressure canning principles:
- Use a tested recipe. Avoid thickeners (flour, cornstarch), dairy, and fats beyond what’s specified. Thickened mixtures can be too dense for heat penetration.
- Pack appropriately: For raw pack meats, trim excess fat. For hot pack, pre-brown or par-cook as the recipe requires. Leave the exact headspace stated.
- Liquid choices: Broth, water, or tomato juice based on the tested recipe. Thick sauces reduce heat transfer—avoid home-invented gravies.
- Jar sizes and times: Many meat and meal recipes specify pints and quarts with different times. Choose sizes that match your meal habits.
- Altitude and pressure: Follow the elevation chart for Weighted Gauge (10 or 15 PSI) or Dial Gauge pressures.
Meal ideas within tested parameters:
- Seasoned beef or chicken chunks for tacos, casseroles, and stir-fry.
- Chili without thickeners—finish with masa or cornstarch at serving.
- Soup bases with vegetables and meat, leaving pasta, rice, or dairy for serving day.
- Beans ready for quick refried beans, hummus, or salad add-ins.
Quality tips:
- Pre-soak beans if the tested recipe uses that method to reduce split skins and ensure even hydration.
- For better texture, use wide-mouth jars for meats; easier to remove.
- Store jars without rings once sealed to prevent trapped moisture or false seals.
For power outages or grid-down scenarios, pressure-canned proteins and meals do heavy lifting. Pair your jars with dry staples (rice, pasta) and you’ve got a 15-minute dinner plan even without refrigeration. For tight spaces and city living, a preparedness blueprint like New Survival Offer: URBAN Survival Code can help you integrate canning with urban constraints: New Survival Offer: URBAN Survival Code
If you’re new to pressure canning, start with a short run: 4 pints of chicken and 4 pints of beans in the same day. Record venting time, pressure behavior, and cooling notes. Build from there, or review the [Beginner’s guide to pressure canning](INTERNAL LINK PLACEHOLDER) for step-by-step confidence.
Labeling, rotation, and troubleshooting that keep jars moving
A Canning Plan is only as good as your labeling and rotation. Systematize it so nothing gets lost or wasted.
Labeling essentials:
- Include product, flavor/variation, date (YYYY-MM-DD), batch number, and recipe source. Example: “Tomato Sauce—Basil—2025-08-20—Batch 3—USDA Guide.”
- Place labels on jar sides for visibility and on the lid for redundancy. Remove rings for storage.
Storage and rotation:
- Cool, dark, and dry storage—ideally 50–70°F. Avoid freezing temps that may compromise seals.
- FIFO: Oldest jars in front. Use a shelf label or simple spreadsheet for at-a-glance inventory.
- Target turnover: Aim to consume within one year for best quality, even though properly processed jars can be safe longer.
Quality checks and reprocessing:
- After cooling 12–24 hours, verify seals by removing rings, pressing the center (should not flex), and lifting gently by lid edge (should not release).
- If a jar fails to seal within 24 hours:
- Refrigerate and use within a few days, or
- Reprocess with a new lid within the safe reprocessing window per your recipe. Reboiling jams is often acceptable; meats and low-acid foods are better used promptly.
- Signs of spoilage: Leaking, bulging lids, spurting liquid on opening, off-odors, unusual discoloration, or mold. Discard safely without tasting.
Troubleshooting patterns:
- Siphoning (loss of liquid): Often due to inadequate rest time or rapid pressure changes. Allow a 5–10 minute cool-down in the canner before removing jars.
- Cloudiness: From hard water or starch. Use vinegar in canner water and rinse beans before canning.
- Floating fruit or herbs: Pack firmly and use hot pack methods when recommended.
Build a “fixes” page in your canning notebook so you can correct issues next time. For safety refreshers on handling minor kitchen injuries, keep a practical reference like Home Doctor handy: Home Doctor
See our [Emergency pantry checklist](INTERNAL LINK PLACEHOLDER) to connect your jars with dry goods, spices, and cooking fuels for a resilient kitchen.
A 90-day action sprint to launch your Canning Plan
Turn intention into jars on shelves with a simple, time-boxed sprint that builds momentum.
Weeks 1–2: Plan and prep
- Inventory jars, lids, and tools. Replace any missing essentials.
- Define 8–12 core recipes from trusted sources. Print or bookmark them.
- Set monthly jar targets and pick your canning days on the calendar.
- Source first-month produce (market/garden) and staples (vinegar, salt, sugar, pectin, spices, bones).
Weeks 3–6: First canning cycle
- Run one weekly mini-batch (jams or pickles) to practice workflow.
- Schedule one weekend for a larger project (e.g., 20–30 lb tomatoes for sauce).
- Record yields, timing, and any hiccups.
Weeks 7–10: Pressure canning focus
- Pressure-can beans and broth. Graduate to meats or soup bases using tested recipes.
- Practice altitude adjustments and monitoring pressure calmly over 60–90 minute cycles.
- Fine-tune your kitchen layout and timing.
Weeks 11–12: Scale and stabilize
- Audit what you used quickly and plan a repeat batch of those items.
- Organize shelves with FIFO labels and update inventory sheets.
- Lock in the next season’s harvest calendar and seed orders if gardening.
Urban dwellers and small-space preppers can tailor this sprint with urban-specific tactics for storage, sourcing, and stealth kitchens. If that’s you, consider scanning New Survival Offer: URBAN Survival Code for adaptable, city-aware frameworks: New Survival Offer: URBAN Survival Code
Recommended tools and resources
Trusted authorities for safe canning
- National Center for Home Food Preservation: https://nchfp.uga.edu
- USDA Complete Guide to Home Canning: https://nchfp.uga.edu/publications/publications_usda.html
- CDC Food Safety—Botulism: https://www.cdc.gov/botulism/index.html
- Ball/Fresh Preserving recipes: https://www.freshpreserving.com
Helpful affiliate resources that complement your plan
- The Lost SuperFoods: Pantry concepts and shelf-stable meal ideas to plug into your Canning Plan. The Lost SuperFoods
- Home Doctor: Practical home health guidance that dovetails with kitchen and canning safety. Home Doctor
- New Survival Offer: URBAN Survival Code: Urban-centric preparedness strategies that integrate with small-space canning and storage. New Survival Offer: URBAN Survival Code
Internal resources to deepen your skills
- [Beginner’s guide to pressure canning](INTERNAL LINK PLACEHOLDER)
- [How to sanitize jars properly](INTERNAL LINK PLACEHOLDER)
- [Emergency pantry checklist](INTERNAL LINK PLACEHOLDER)
- [Seasonal produce calendar](INTERNAL LINK PLACEHOLDER)
Conclusion: Put your Canning Plan into motion
A great Canning Plan turns preserving from a once-a-year scramble into an easy rhythm that feeds your home every week. Define what you want to eat, match it to the seasons, schedule realistic batches, and commit to tested, safe methods. In a few months, you’ll trust your shelves the way others trust a store. Use authoritative recipes, refine your workflow, and keep learning. Start small, repeat what works, and scale up—your jars will follow.
For pantry inspiration, check out shelf-stable ideas in The Lost SuperFoods, and keep your home-care know-how current with Home Doctor. If you’re optimizing a small urban space, the URBAN Survival Code can help you integrate canning with city constraints. The point is progress: one safe, well-labeled jar at a time.
FAQ
How do I start a simple Canning Plan if I’m a beginner?
Begin by listing foods you eat weekly (sauce, beans, broths), choosing 6–8 tested recipes, and scheduling one mini-batch per week and one larger batch per month. Gather essential tools, practice with jams or pickles, then add pressure canning for low-acid foods.Do I need a pressure canner, or can I use a boiling-water bath for everything?
You need a pressure canner for low-acid foods such as meats, beans, and most vegetables. Use a boiling-water bath only for high-acid foods (fruits, jams, jellies, pickles, properly acidified tomatoes). This distinction is central to any safe Canning Plan.How long do home-canned foods last on the shelf?
For best quality, aim to consume within one year. Properly processed and stored jars can last longer safely, but flavor and texture gradually decline. Always inspect seals and contents before use.What are the signs a jar is unsafe, and what should I do?
Watch for unsealed lids, bulging, spurting liquid on opening, off-odors, or mold. If you suspect botulism or contamination, do not taste—discard safely. Review CDC guidance on botulism and food safety.How do I adjust processing for altitude?
Follow the tested recipe’s altitude table. Increase processing time for water-bath canning and increase pressure (PSI) for pressure canning as your elevation rises. Consult USDA and NCHFP charts before each session.Can I can dairy, thickened soups, or puréed pumpkin?
No. Dairy and thickened mixtures aren’t recommended for home canning due to density and heat-penetration issues. Puréed pumpkin is also unsafe to can; use cubes only with a tested pressure-canning recipe and purée at serving time.What jar sizes should I prioritize in my Canning Plan?
Pints and quarts cover most needs. Pints are versatile for sauces, beans, and chili portions; quarts suit broths, tomatoes, and family-sized sides. Wide-mouth jars help with chunky foods and meats.What if my jars siphon liquid or don’t seal after processing?
Let jars rest in the canner 5–10 minutes after the cycle before removing to reduce siphoning. If a jar fails to seal within 24 hours, refrigerate and eat soon or reprocess with a new lid per the recipe’s guidance.